It’s simple. Original Altecs are expensive so I decided to make my own.
The story.
After discovering the existence of the A7 and the other VoTT speakers while in college around 2011, I became instantly obsessed. The world of horn-loaded speakers was completely unknown to me at the time and I began to dig deeper into the forums reading about them and all the details surrounding what turned out to be a legendary speaker.
Even though I was a time-impoverished college student with a full class load and a few jobs, I took on this massive project. It’s worth mentioning that school was also the primary enabler in this story. If it weren’t for the huge amount of machinery and awesome woodshops dotted around Ohio State’s campus, none of this would be possible. Not to mention having free access to SolidWorks.
As an aspiring automotive engineer I set out to enhance my CAD skills whenever I could and this project helped me learn the assembly basics. I had modeled pieces and parts before but I need to level up and try out assembly modeling.
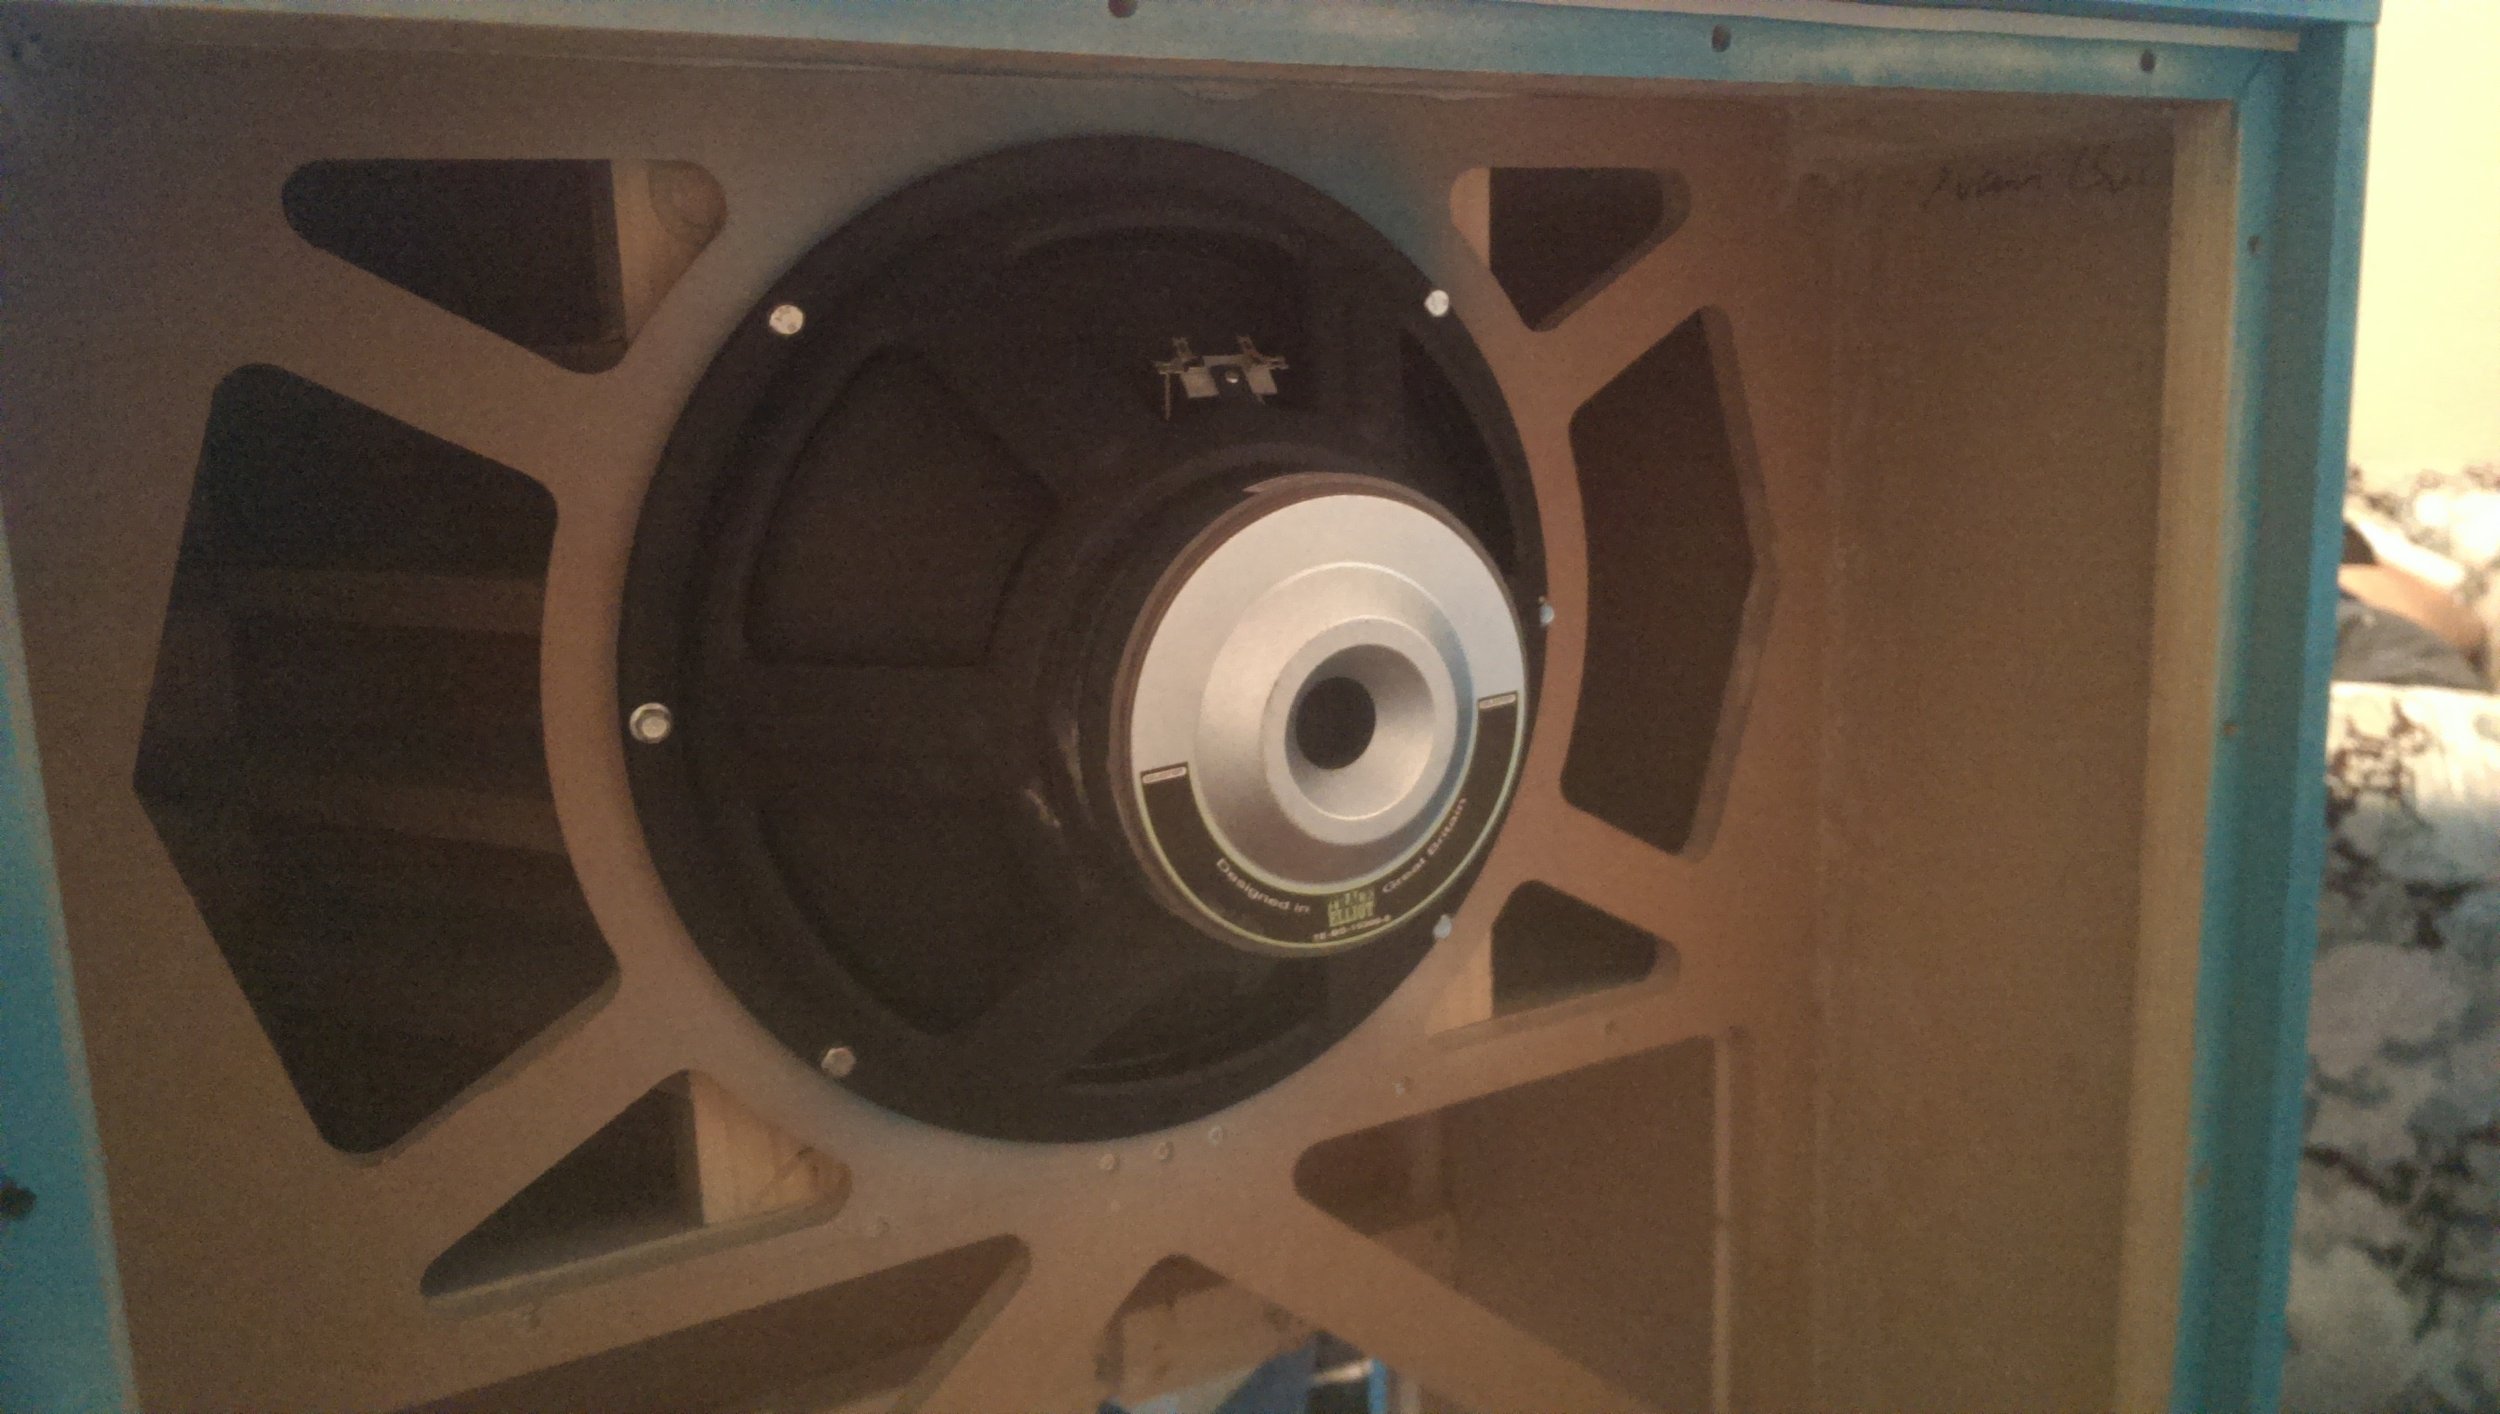
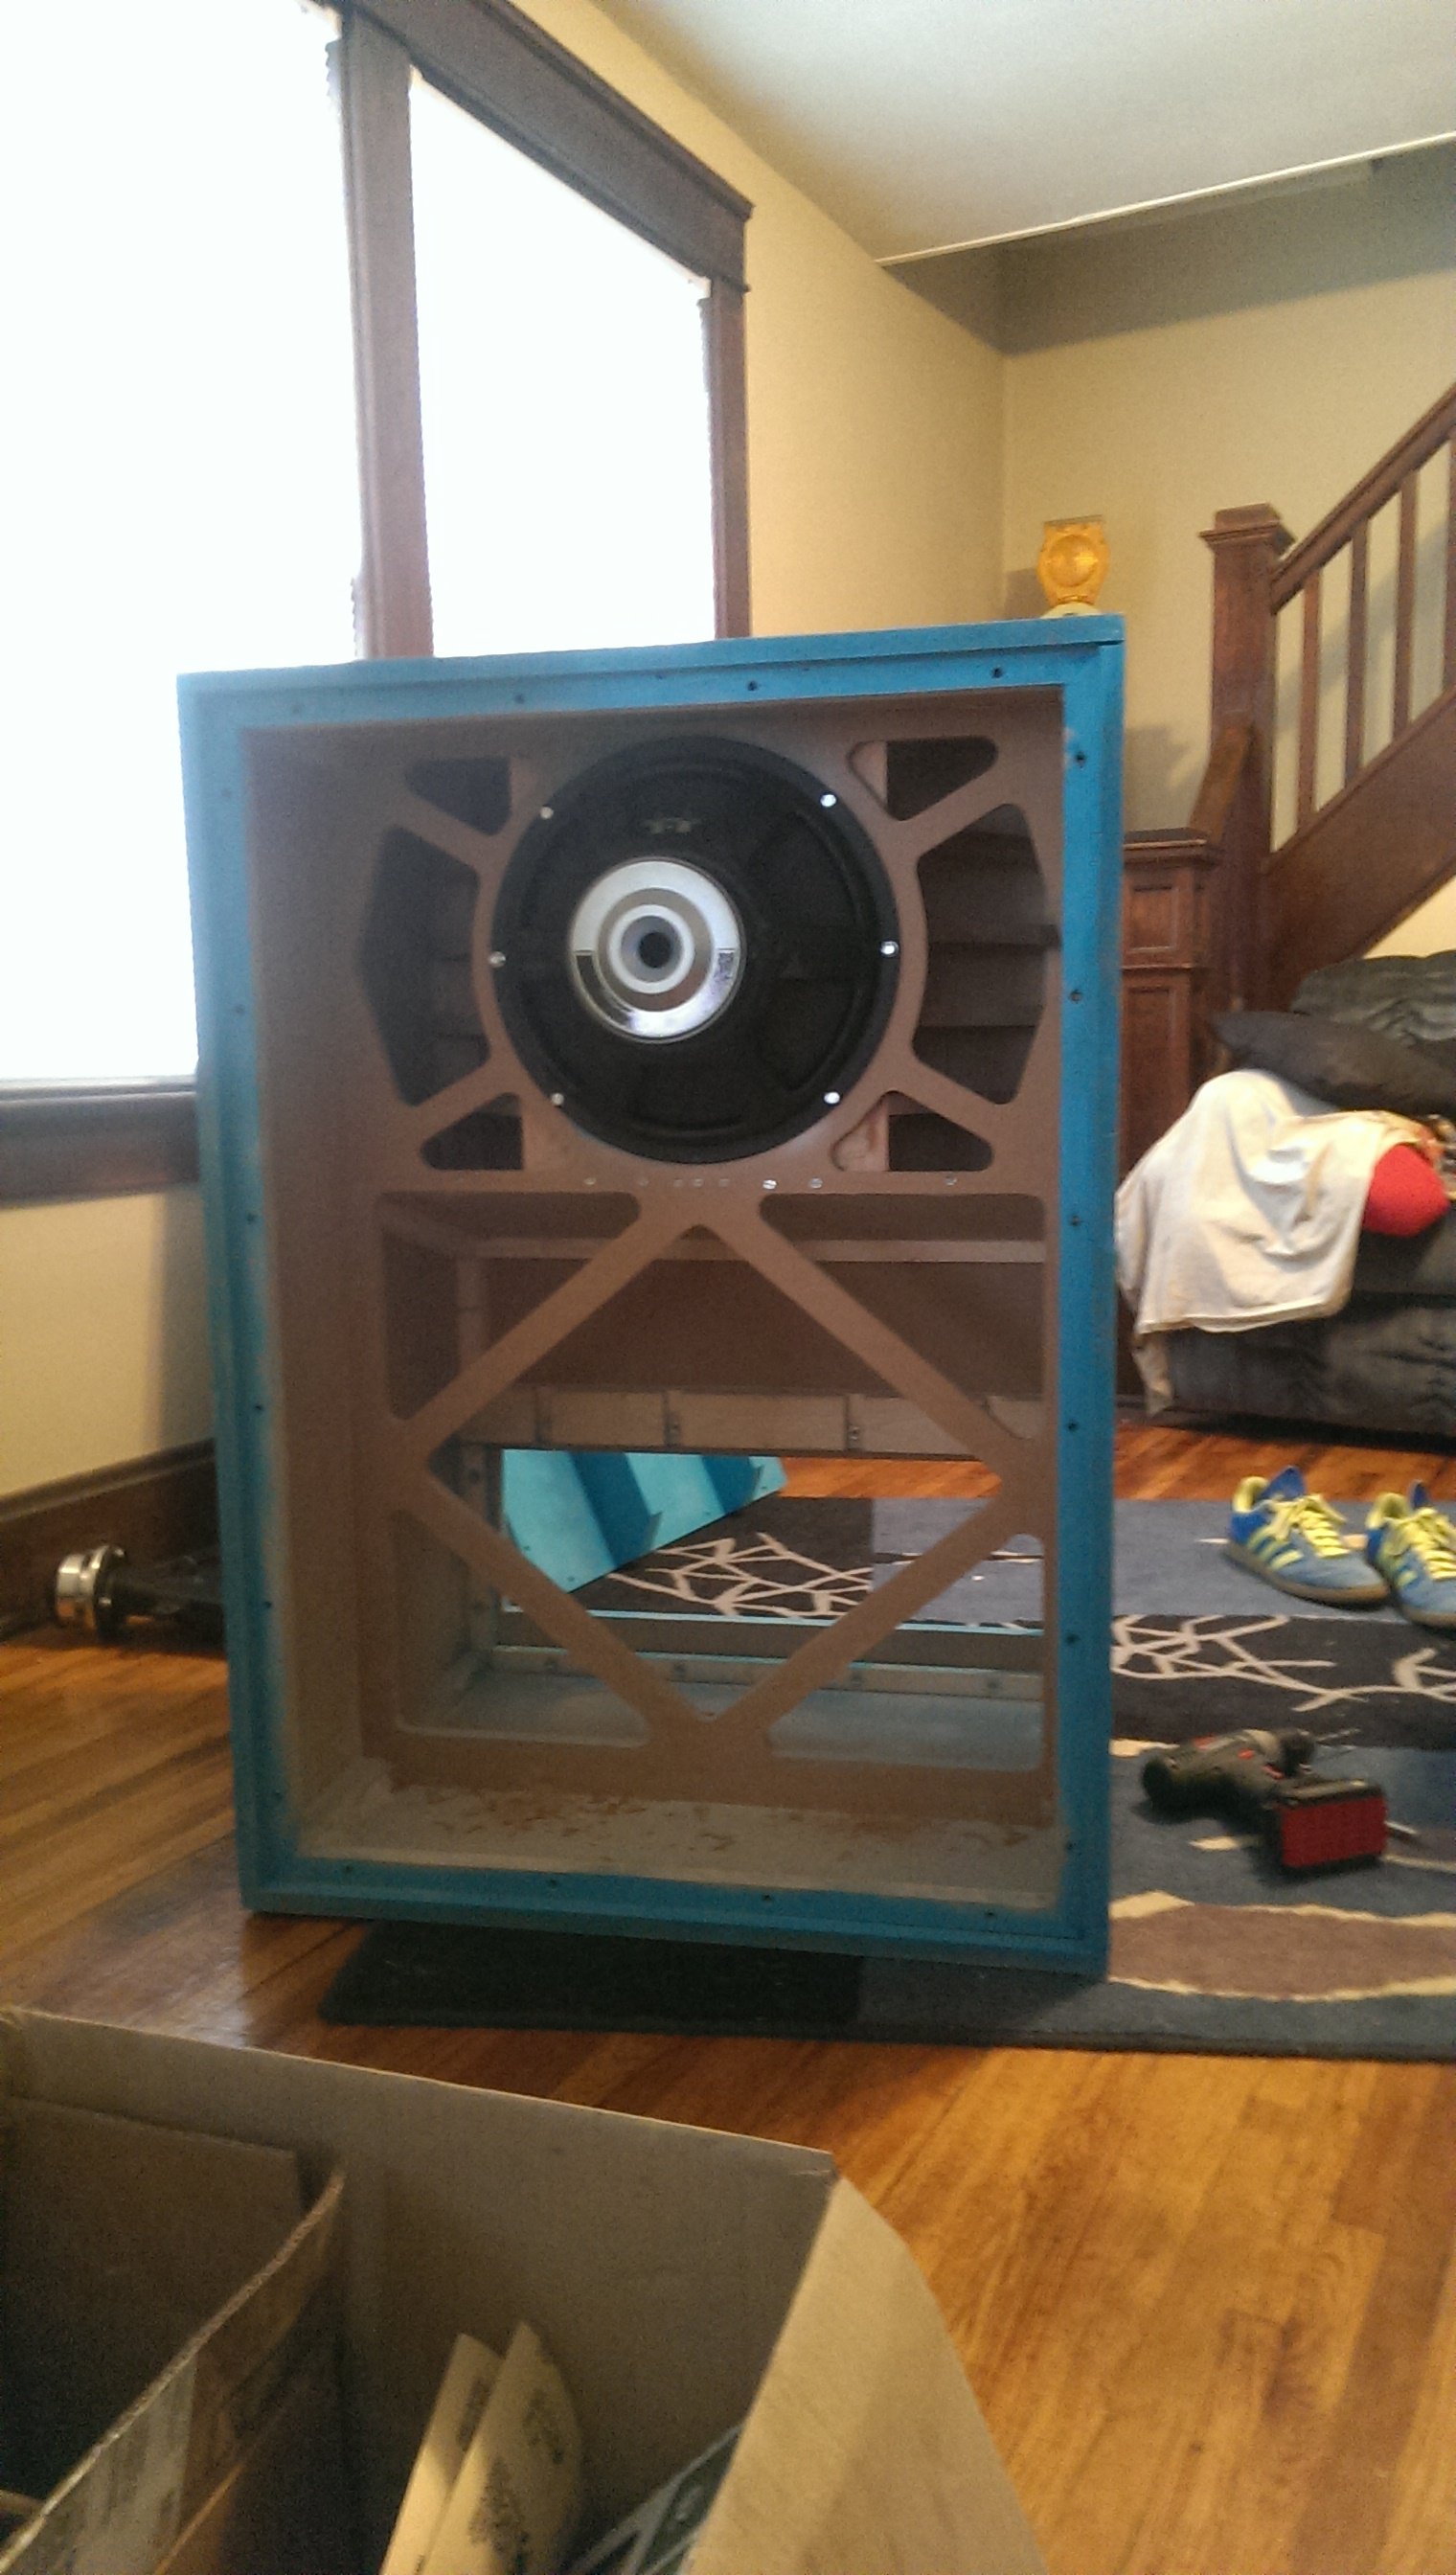
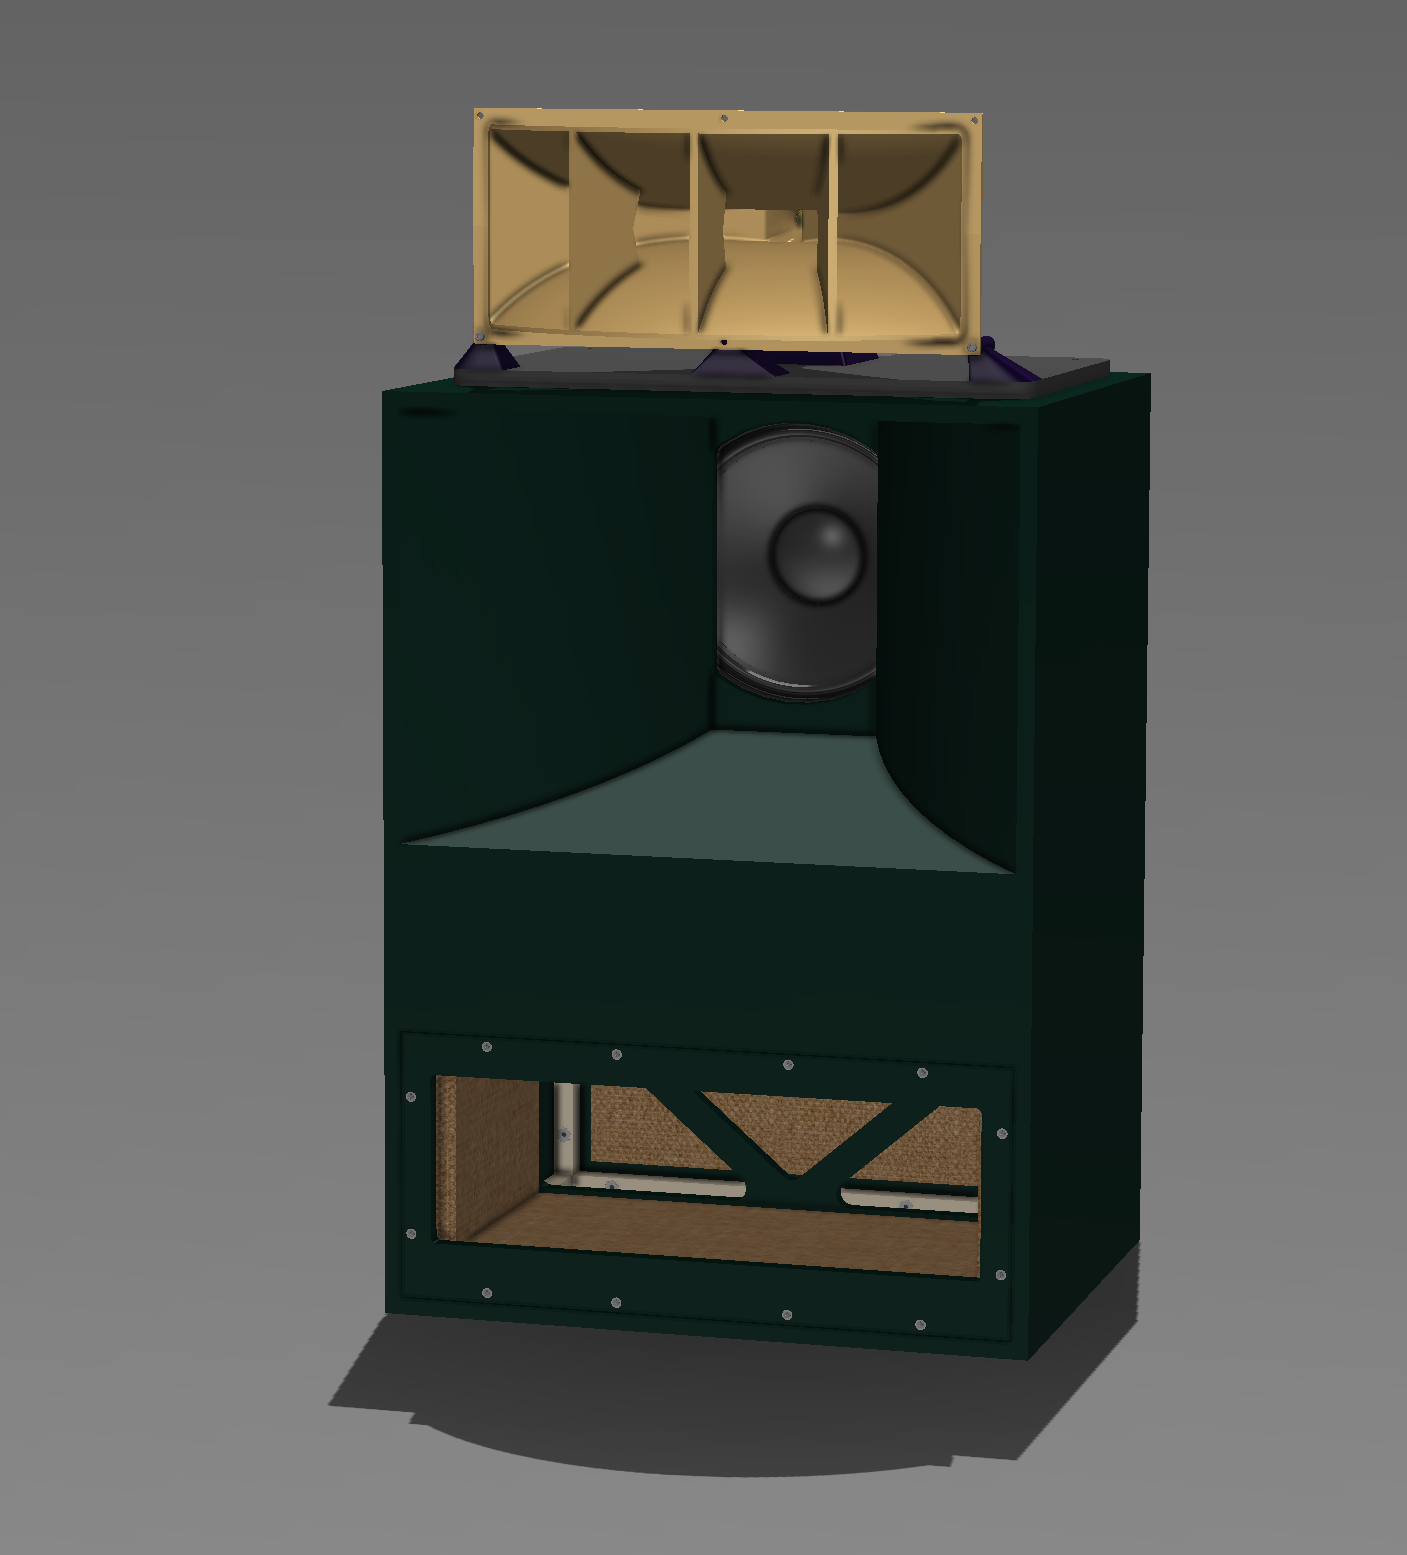
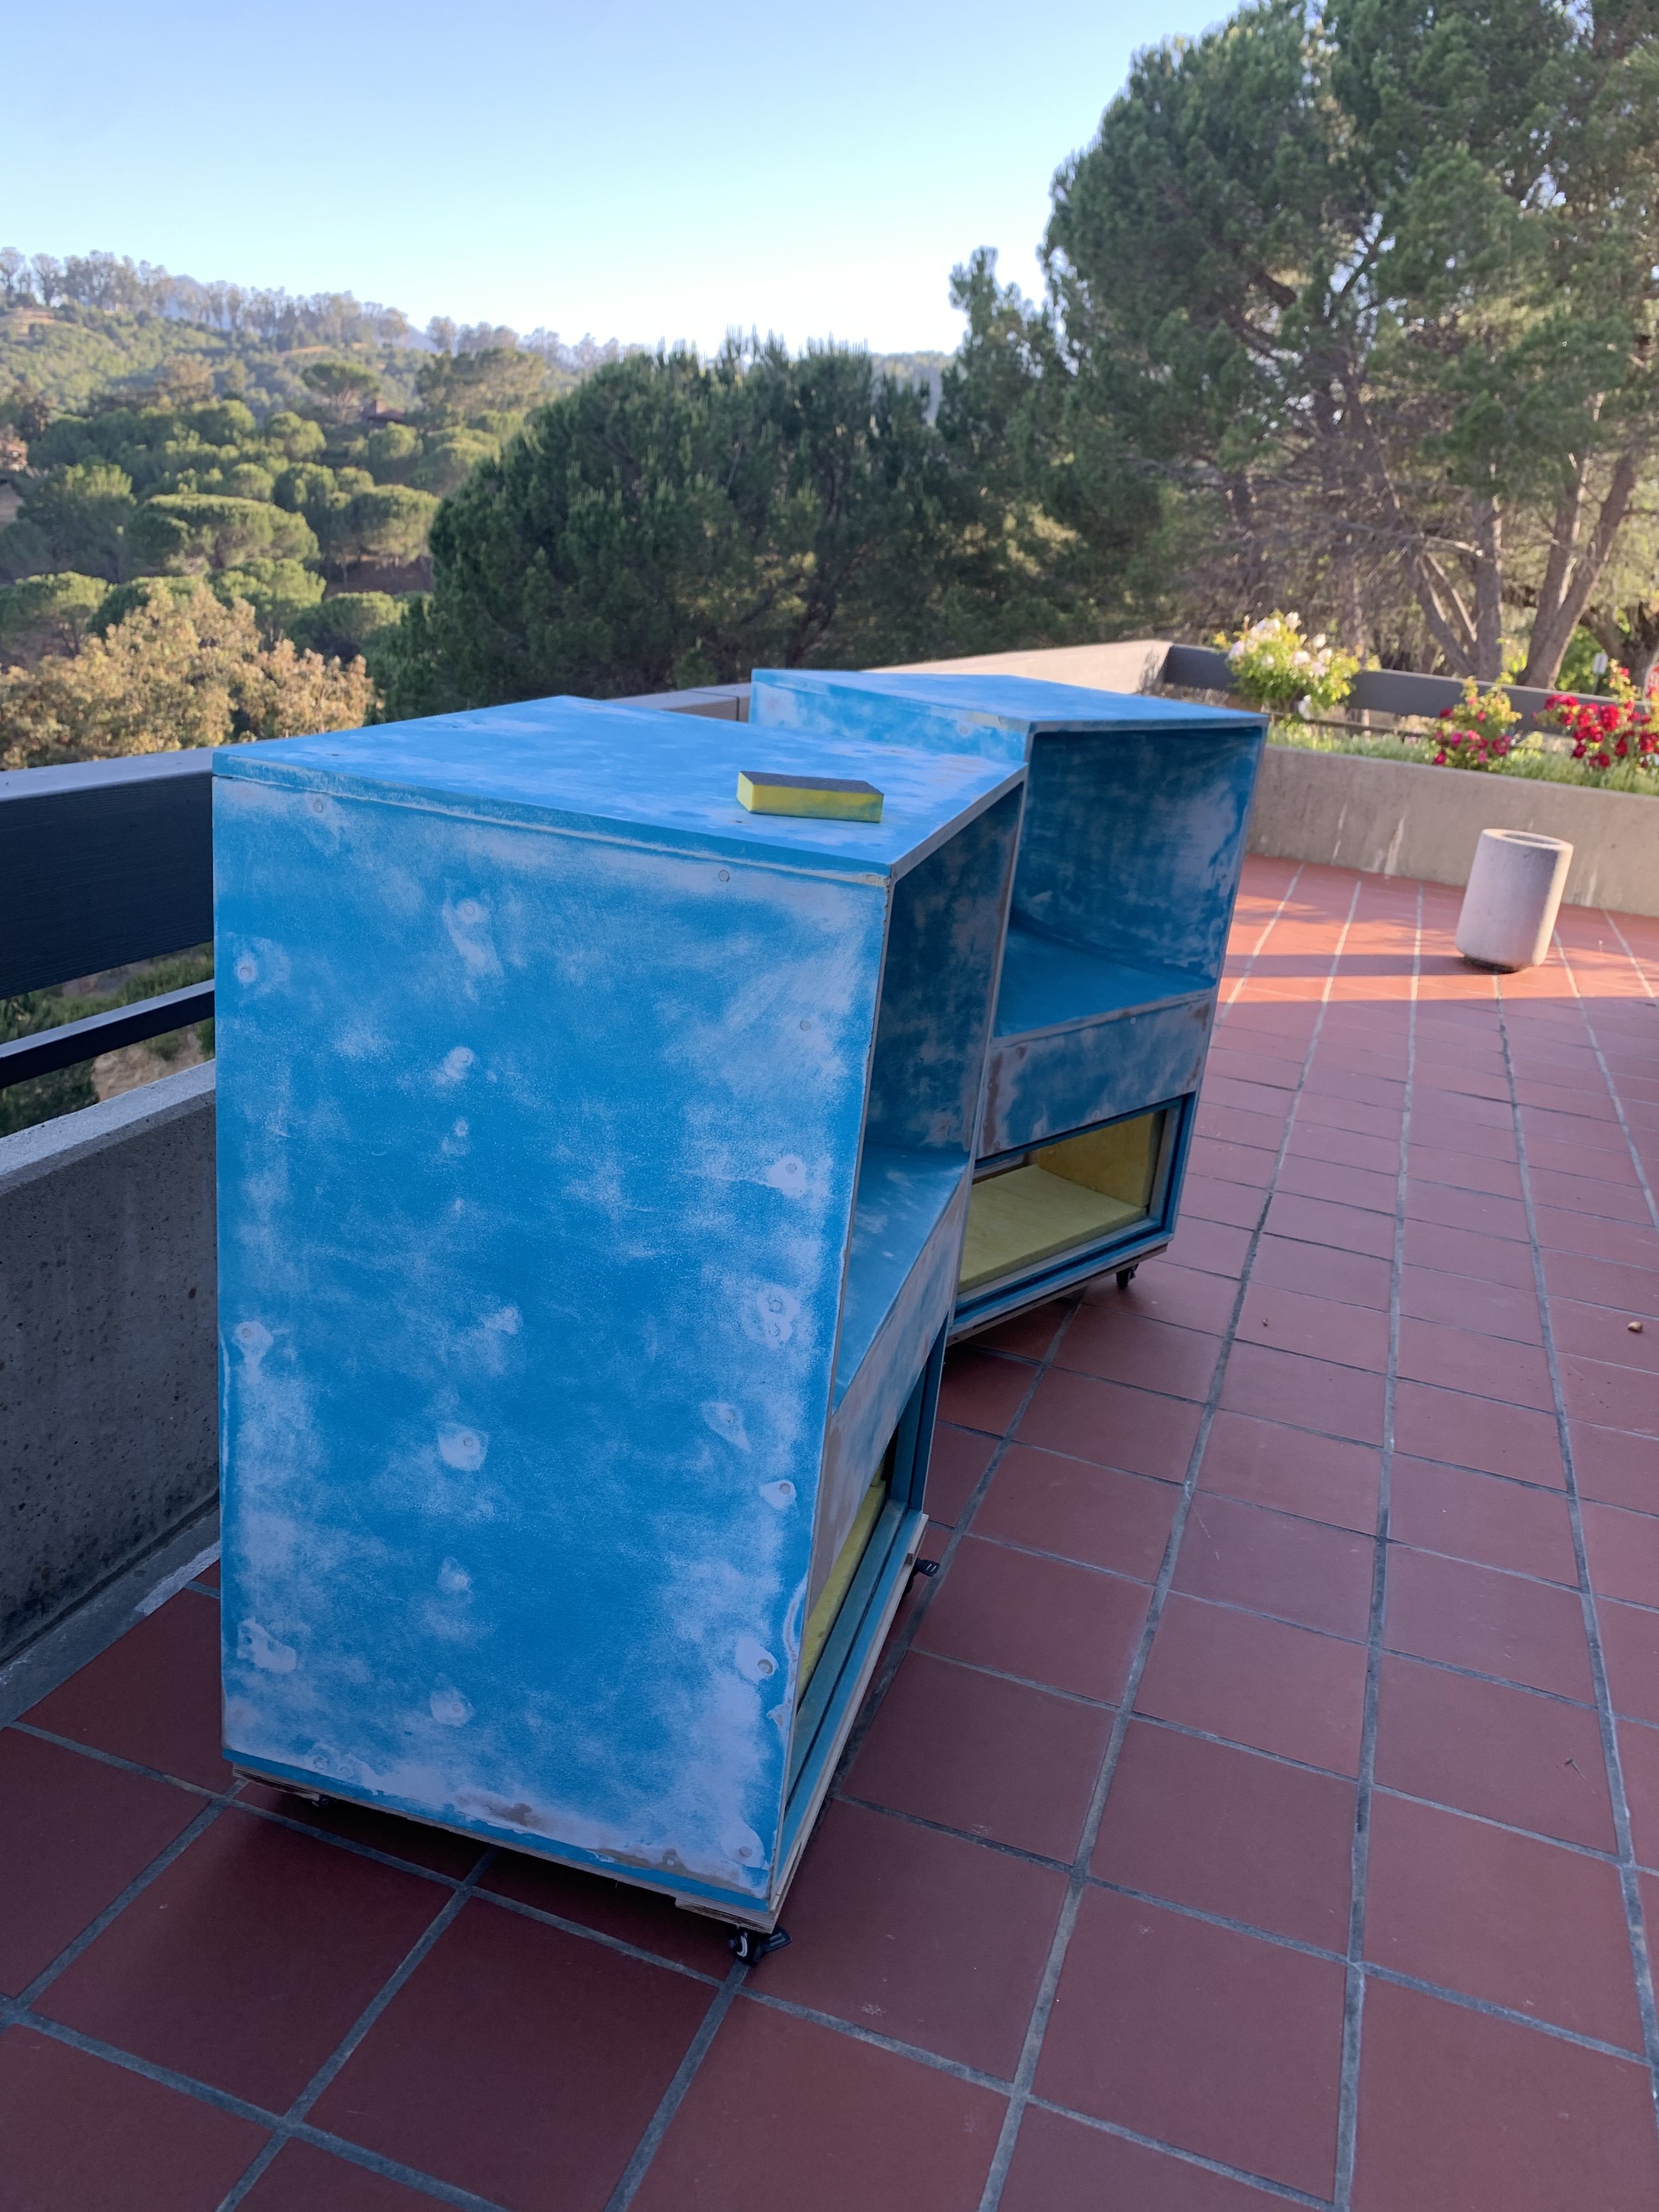
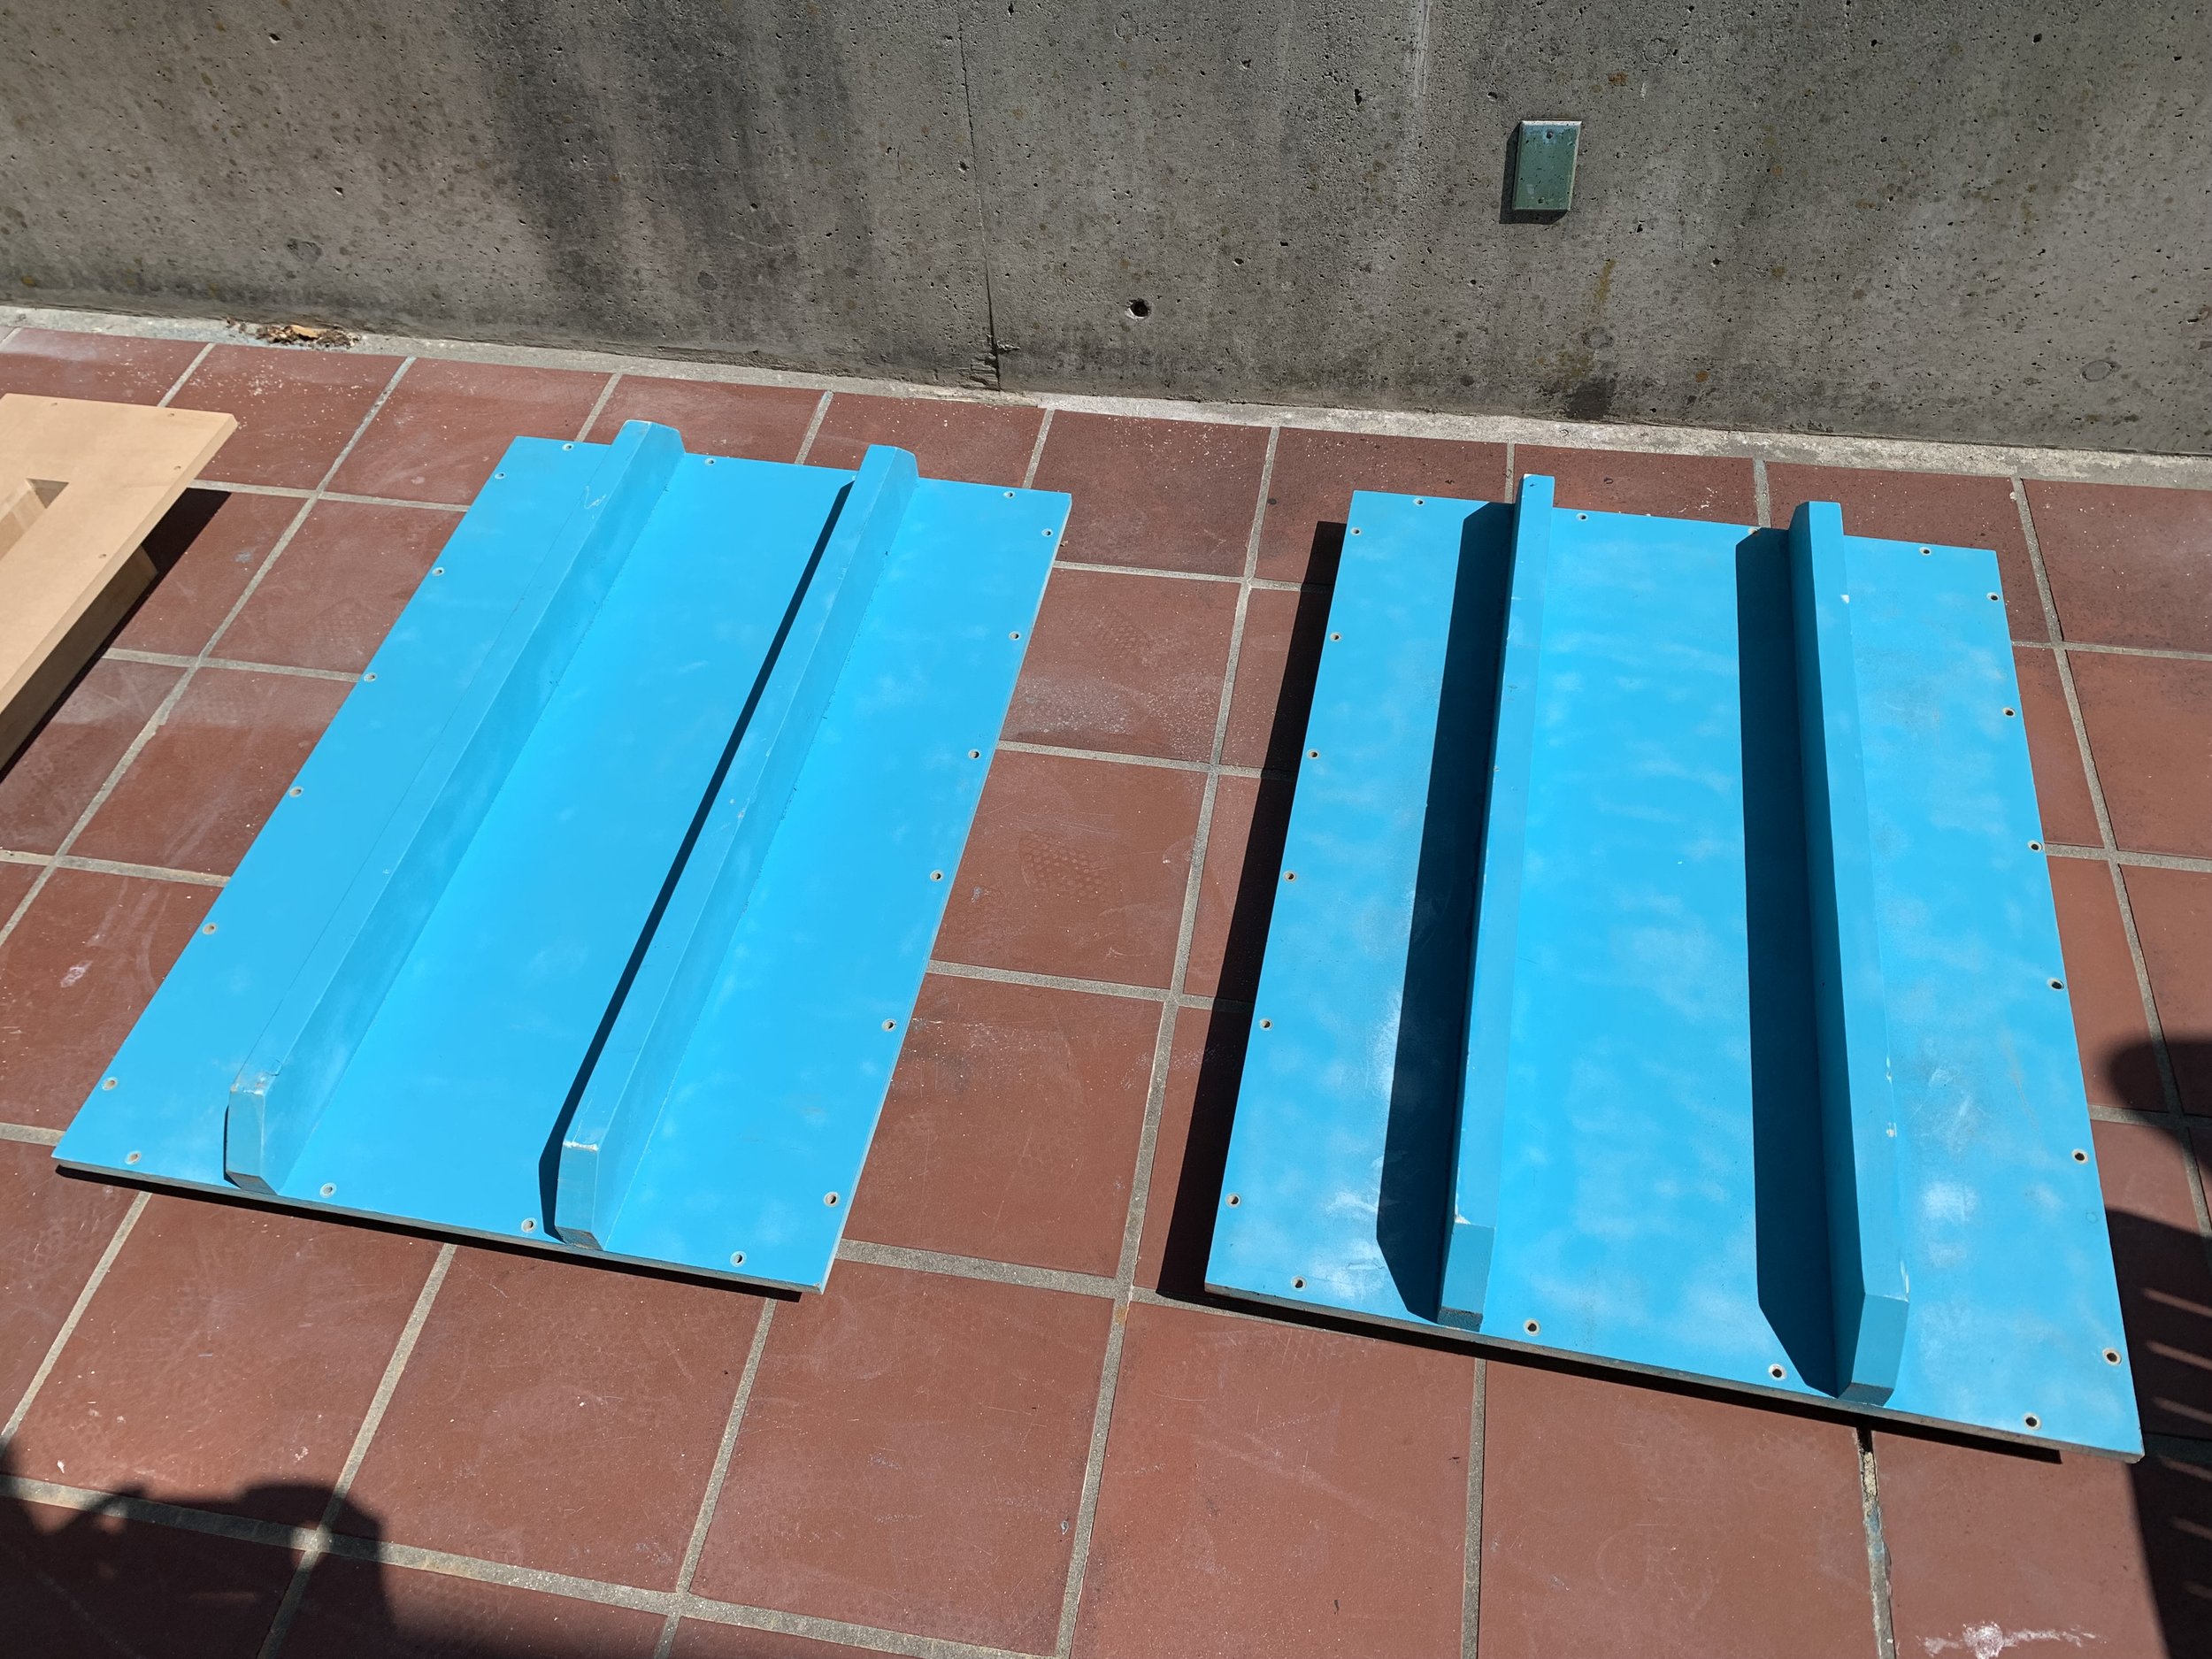
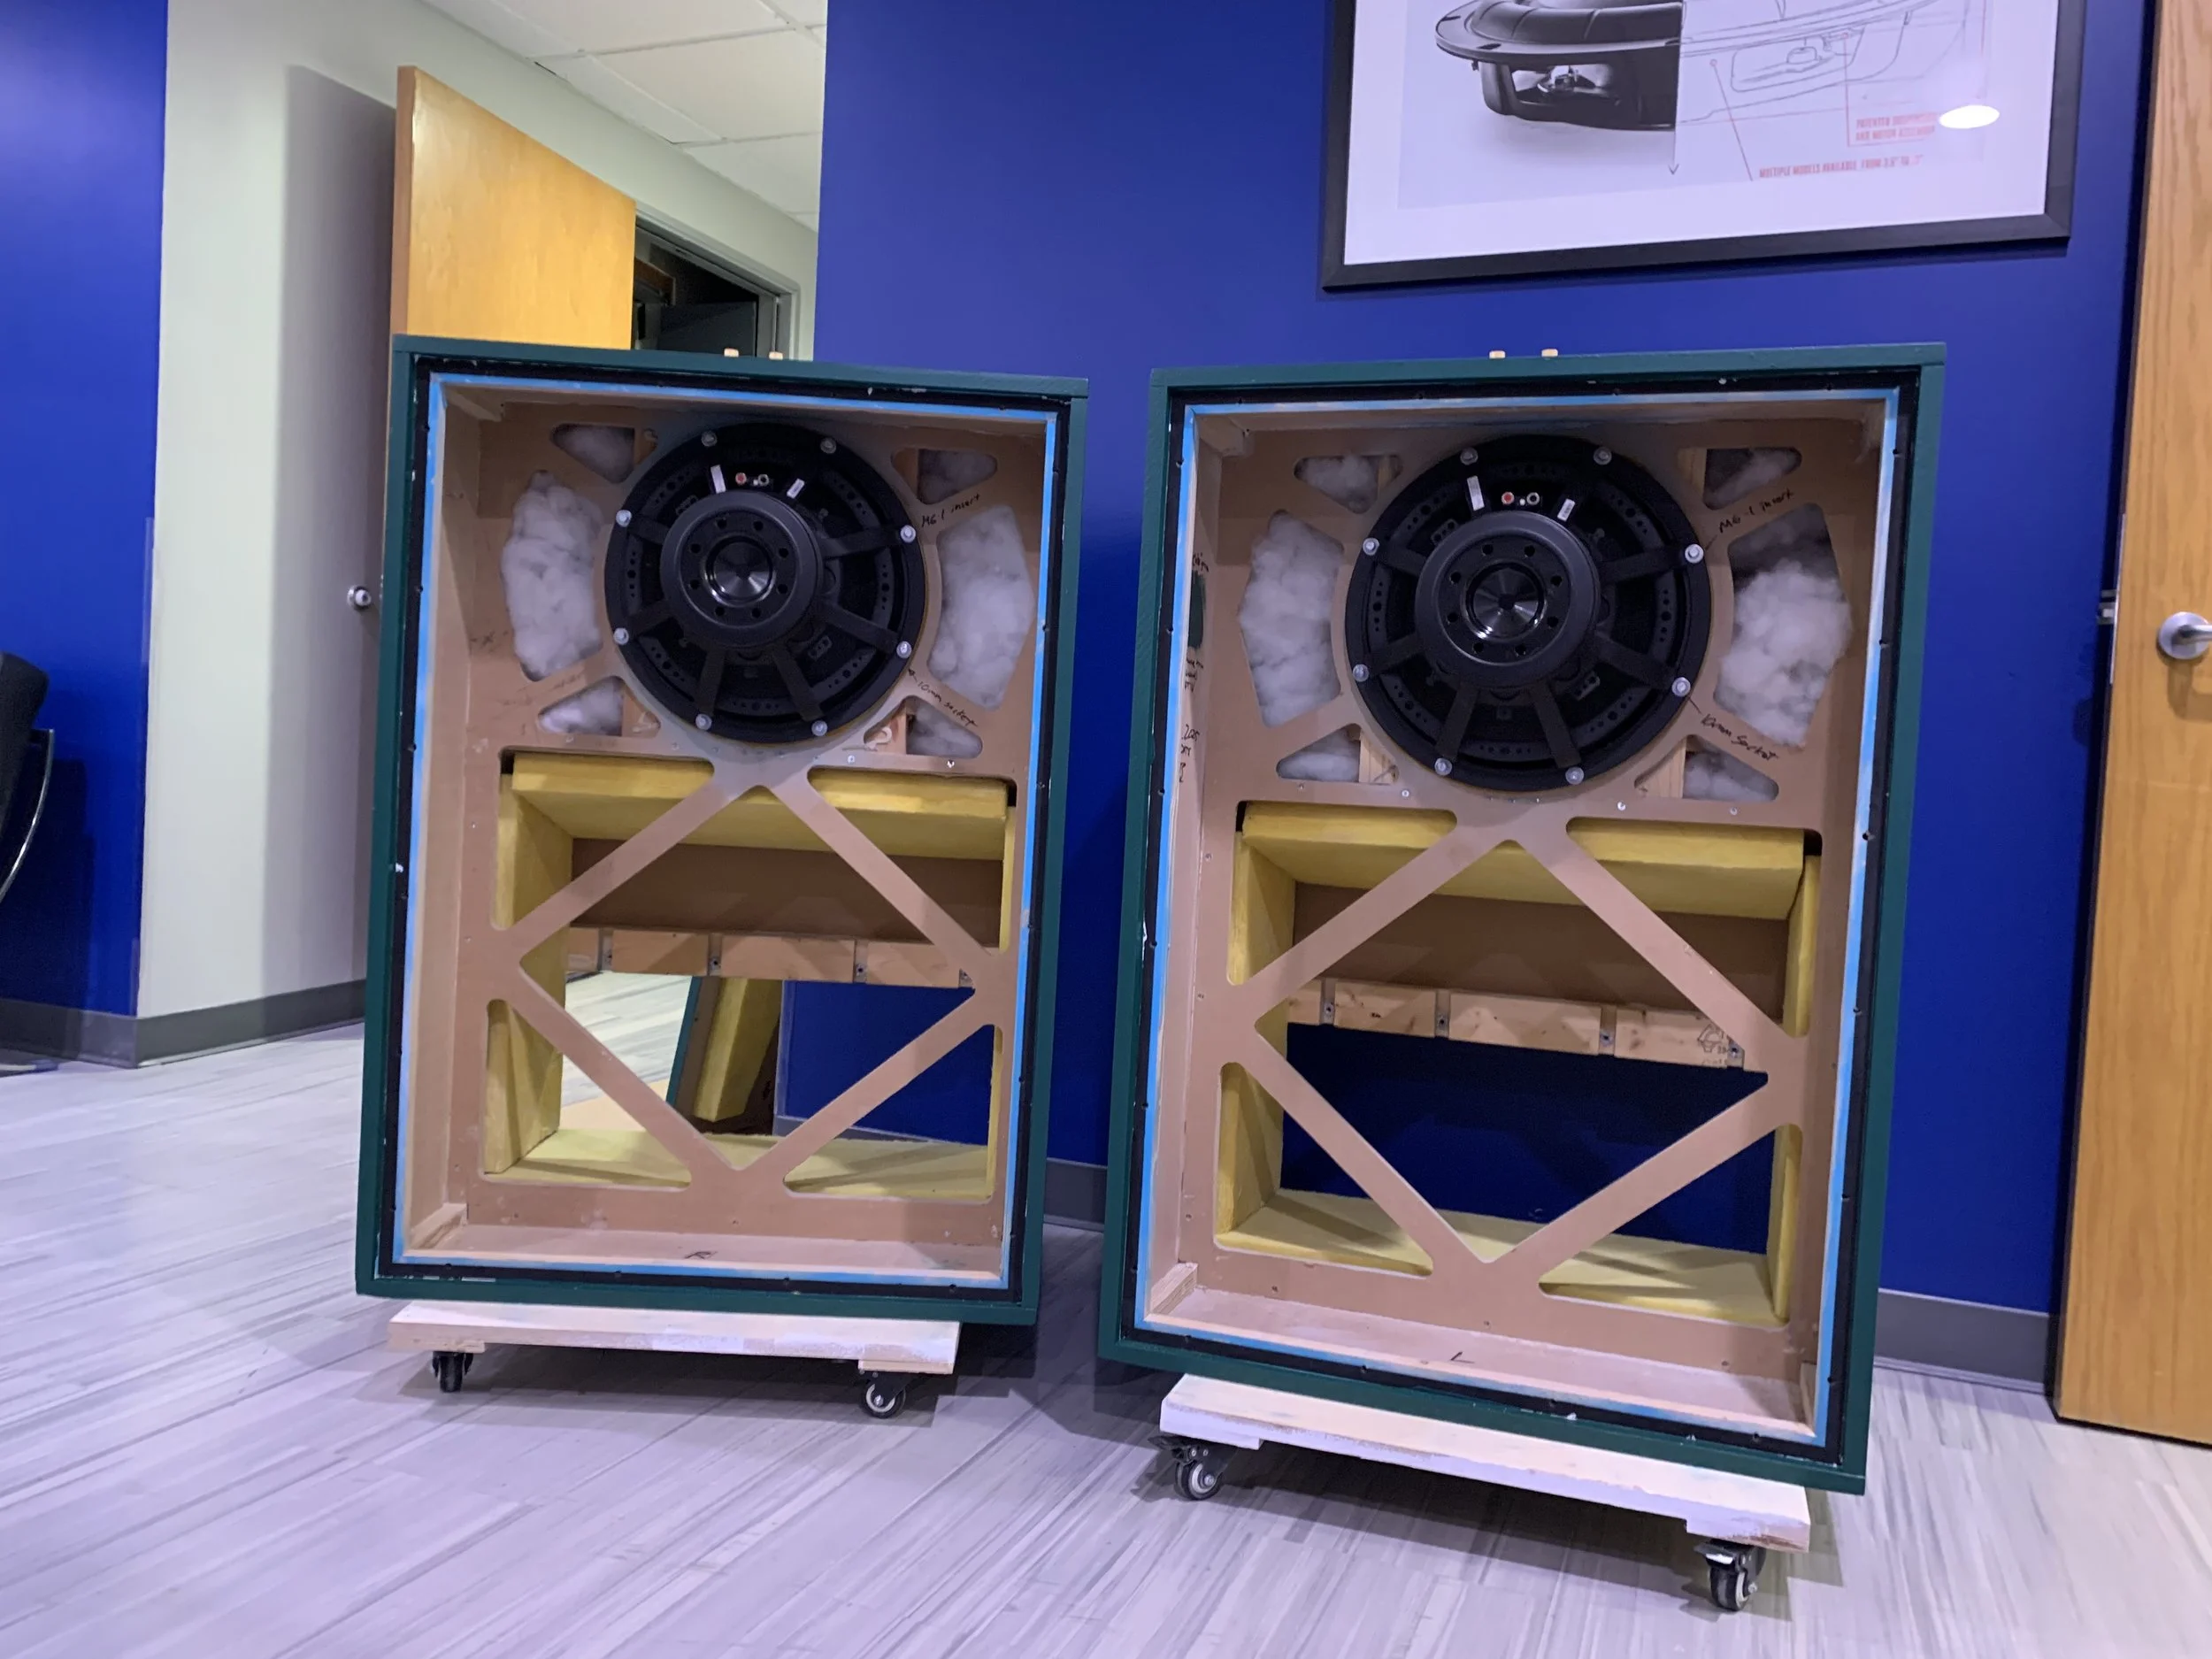
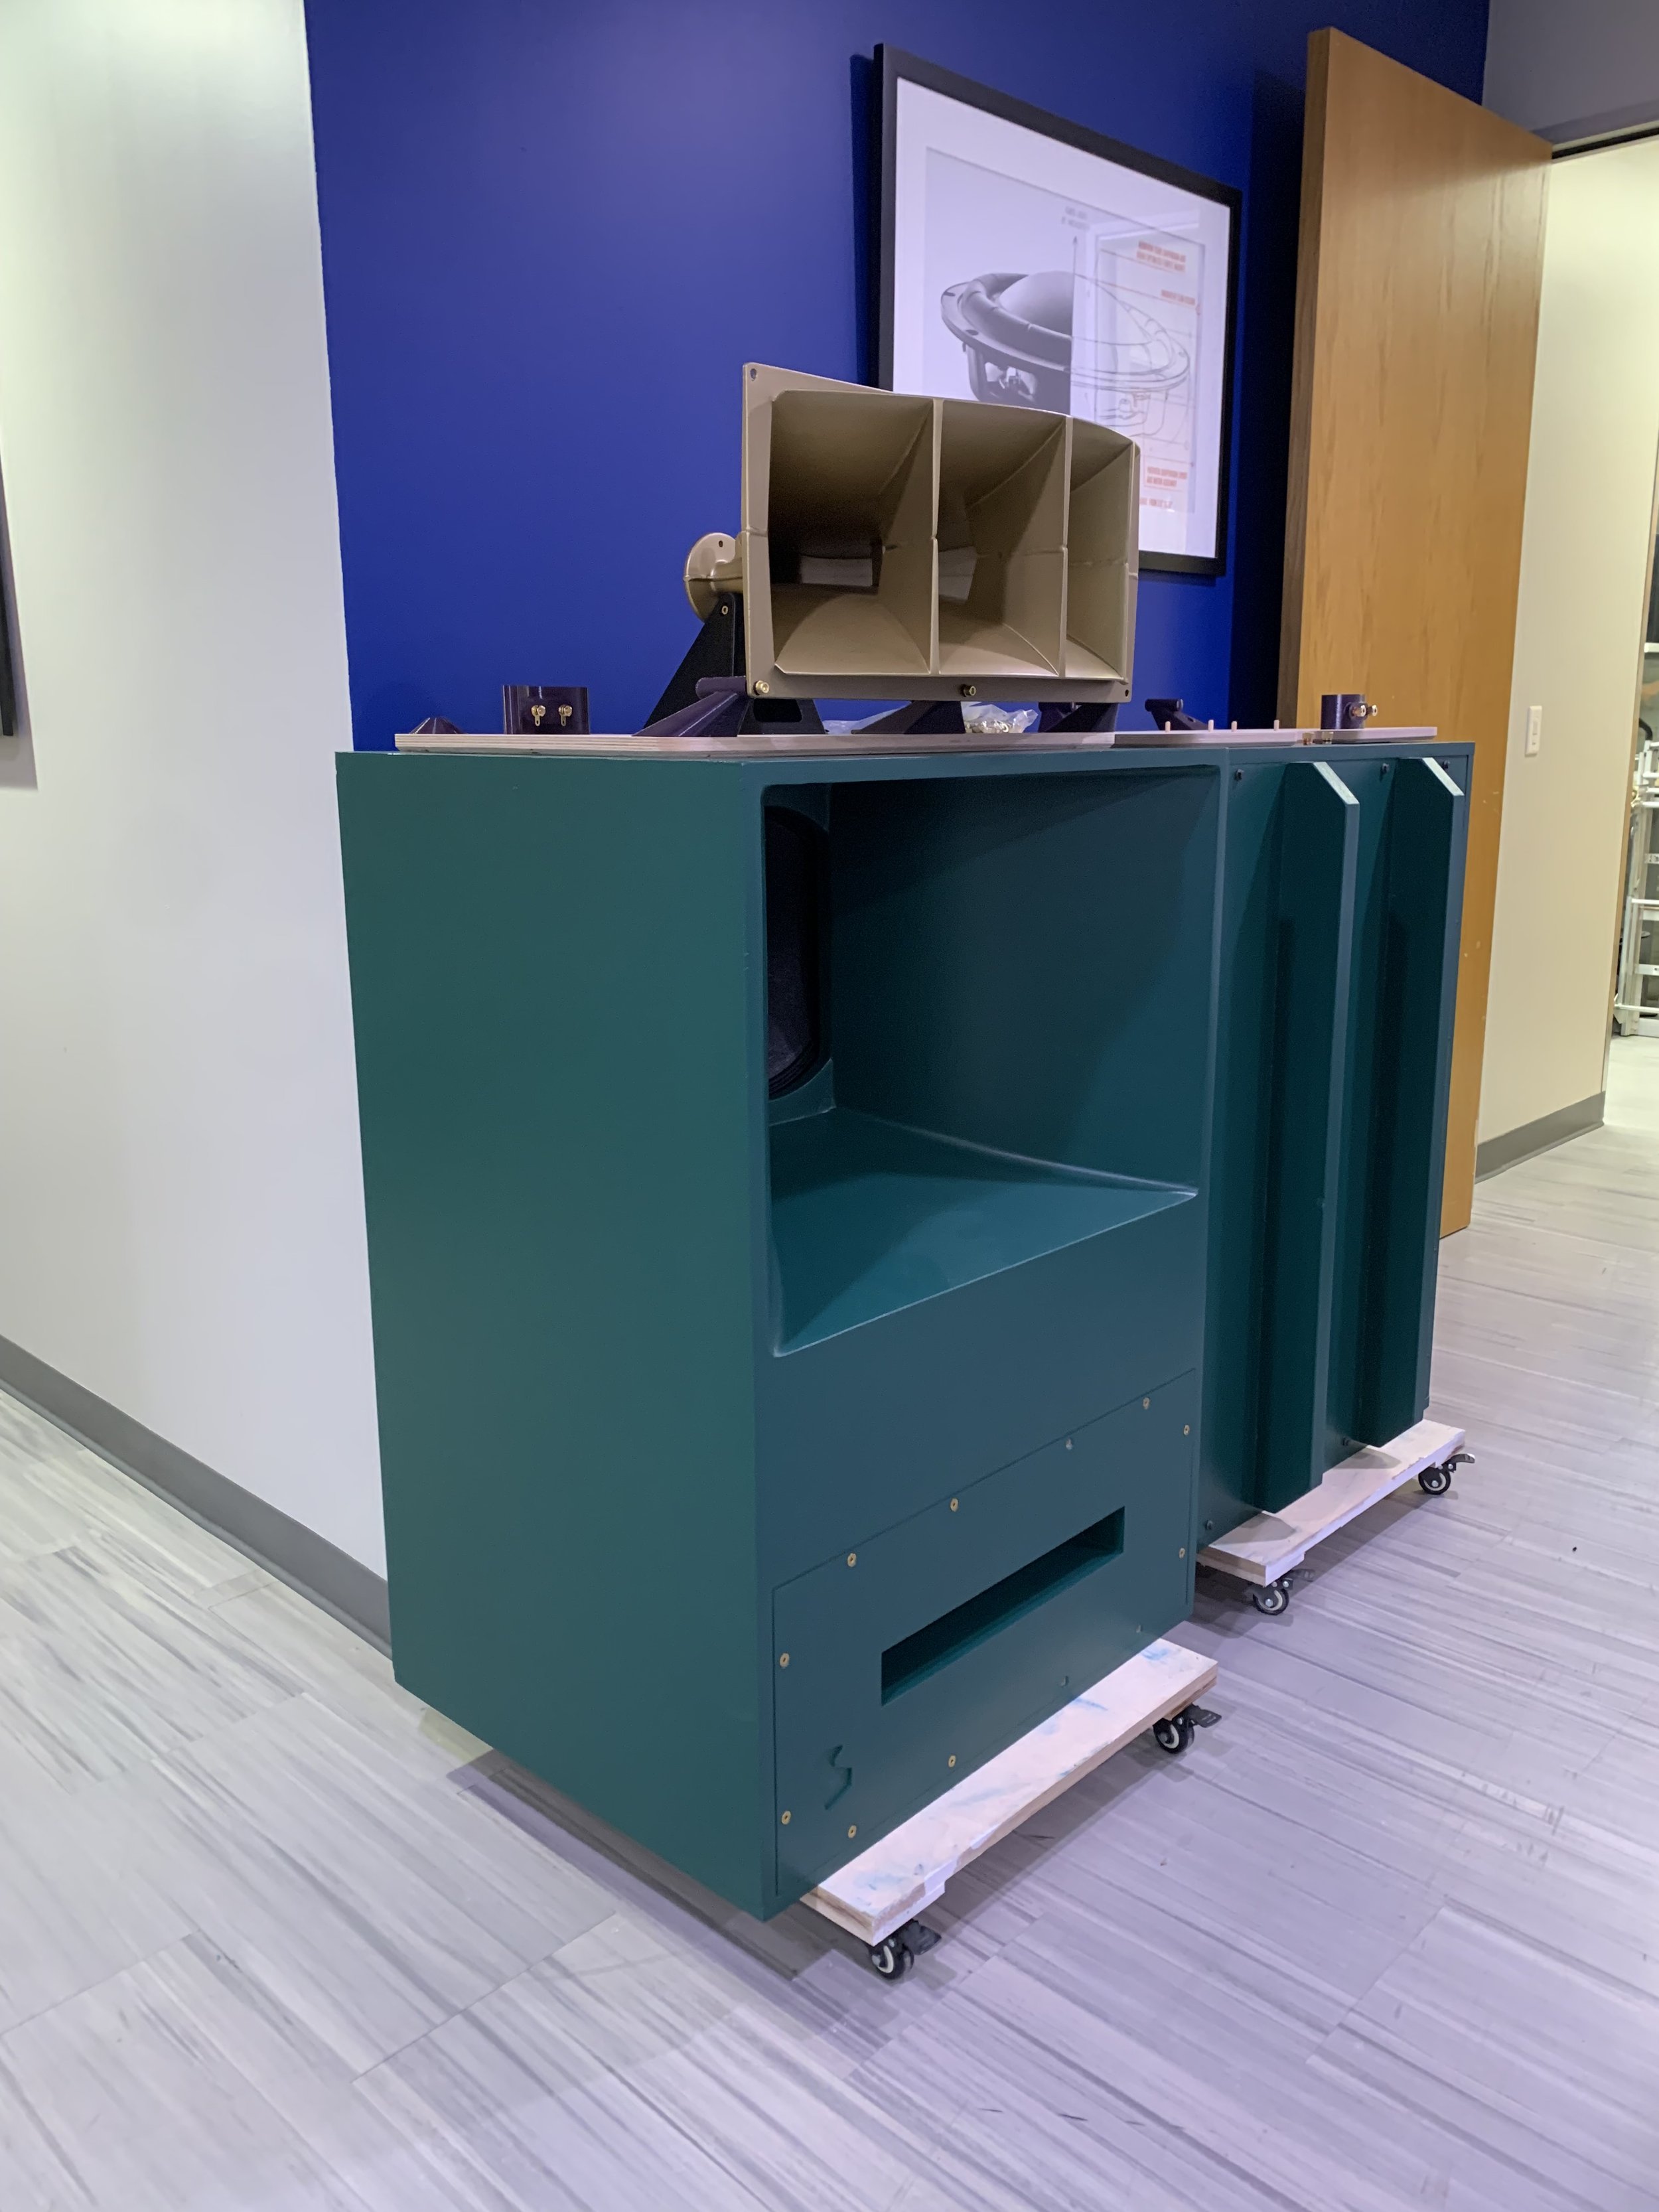
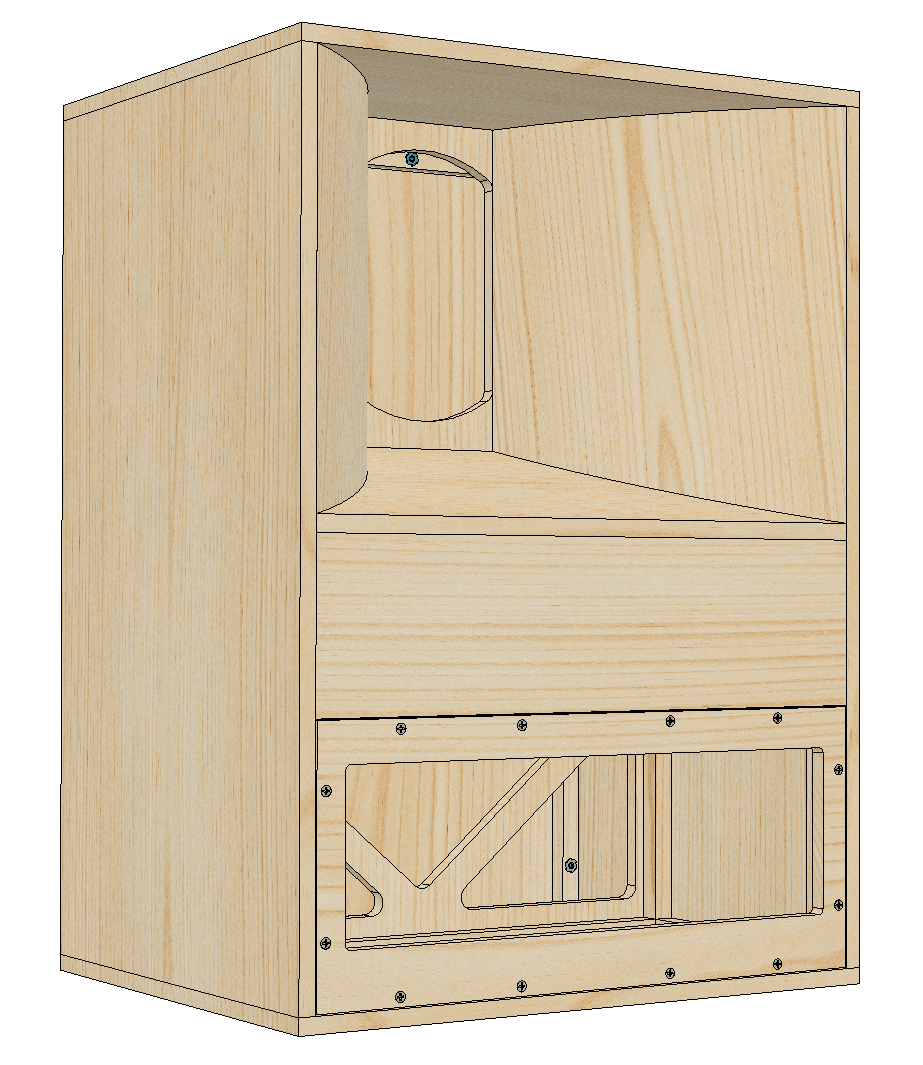
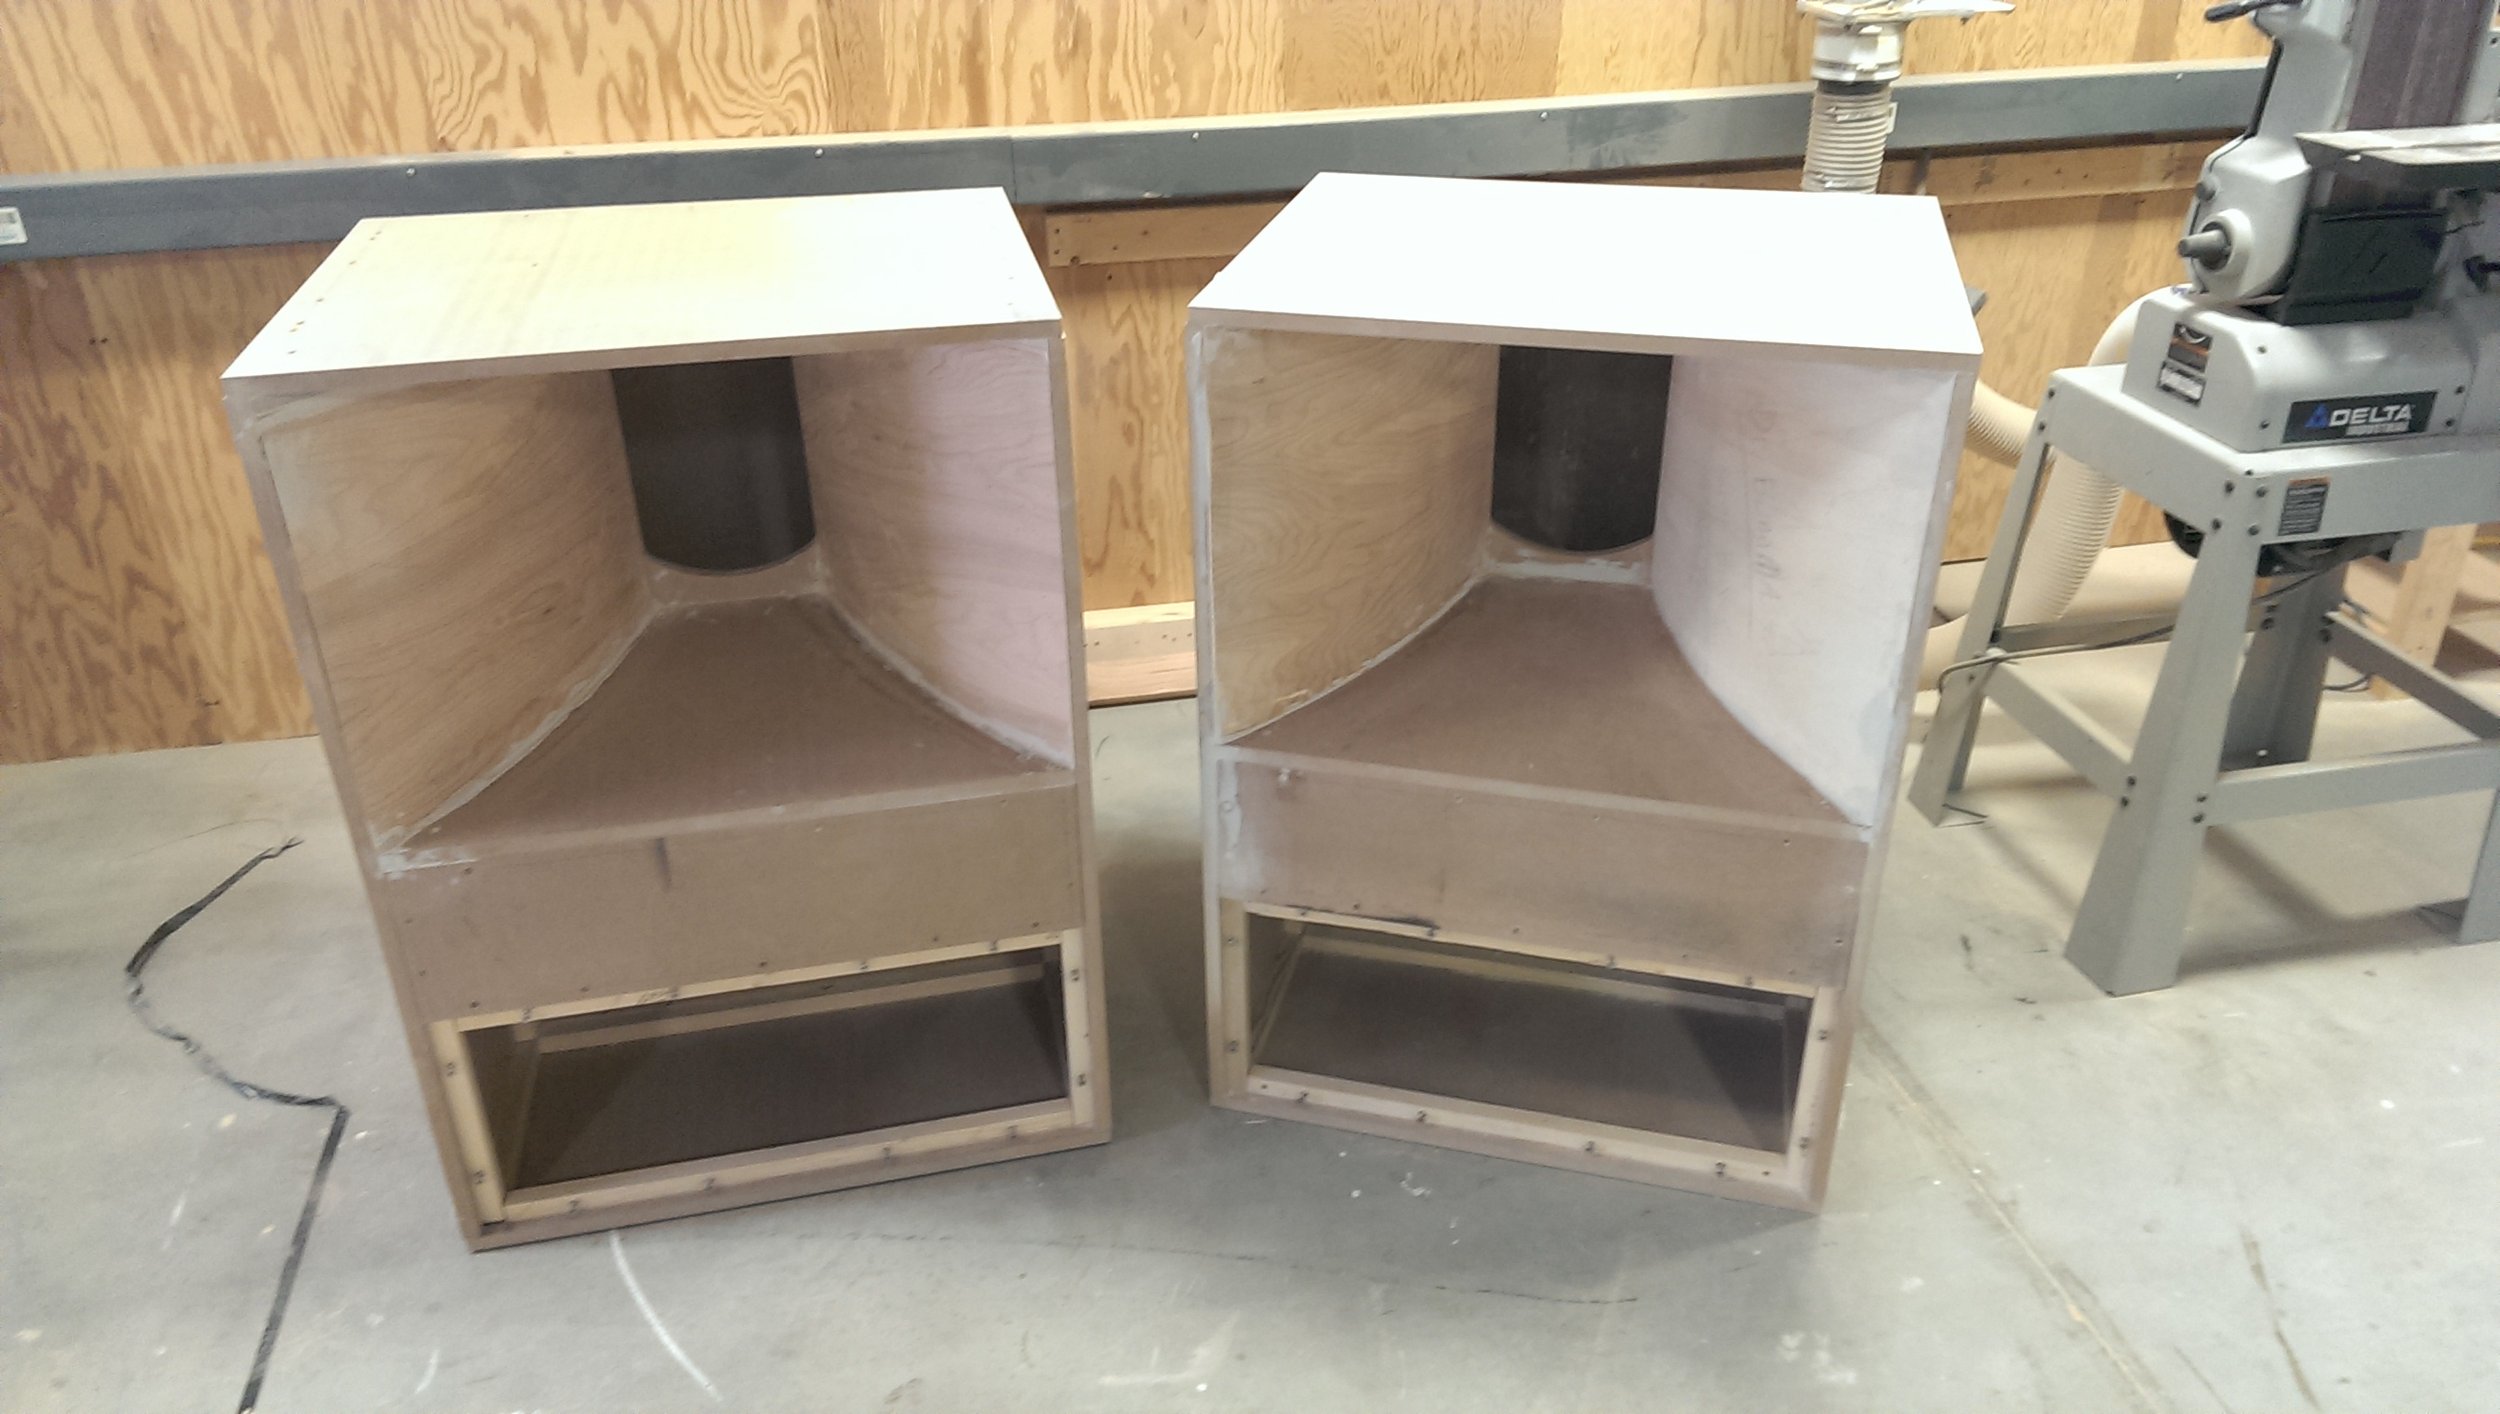
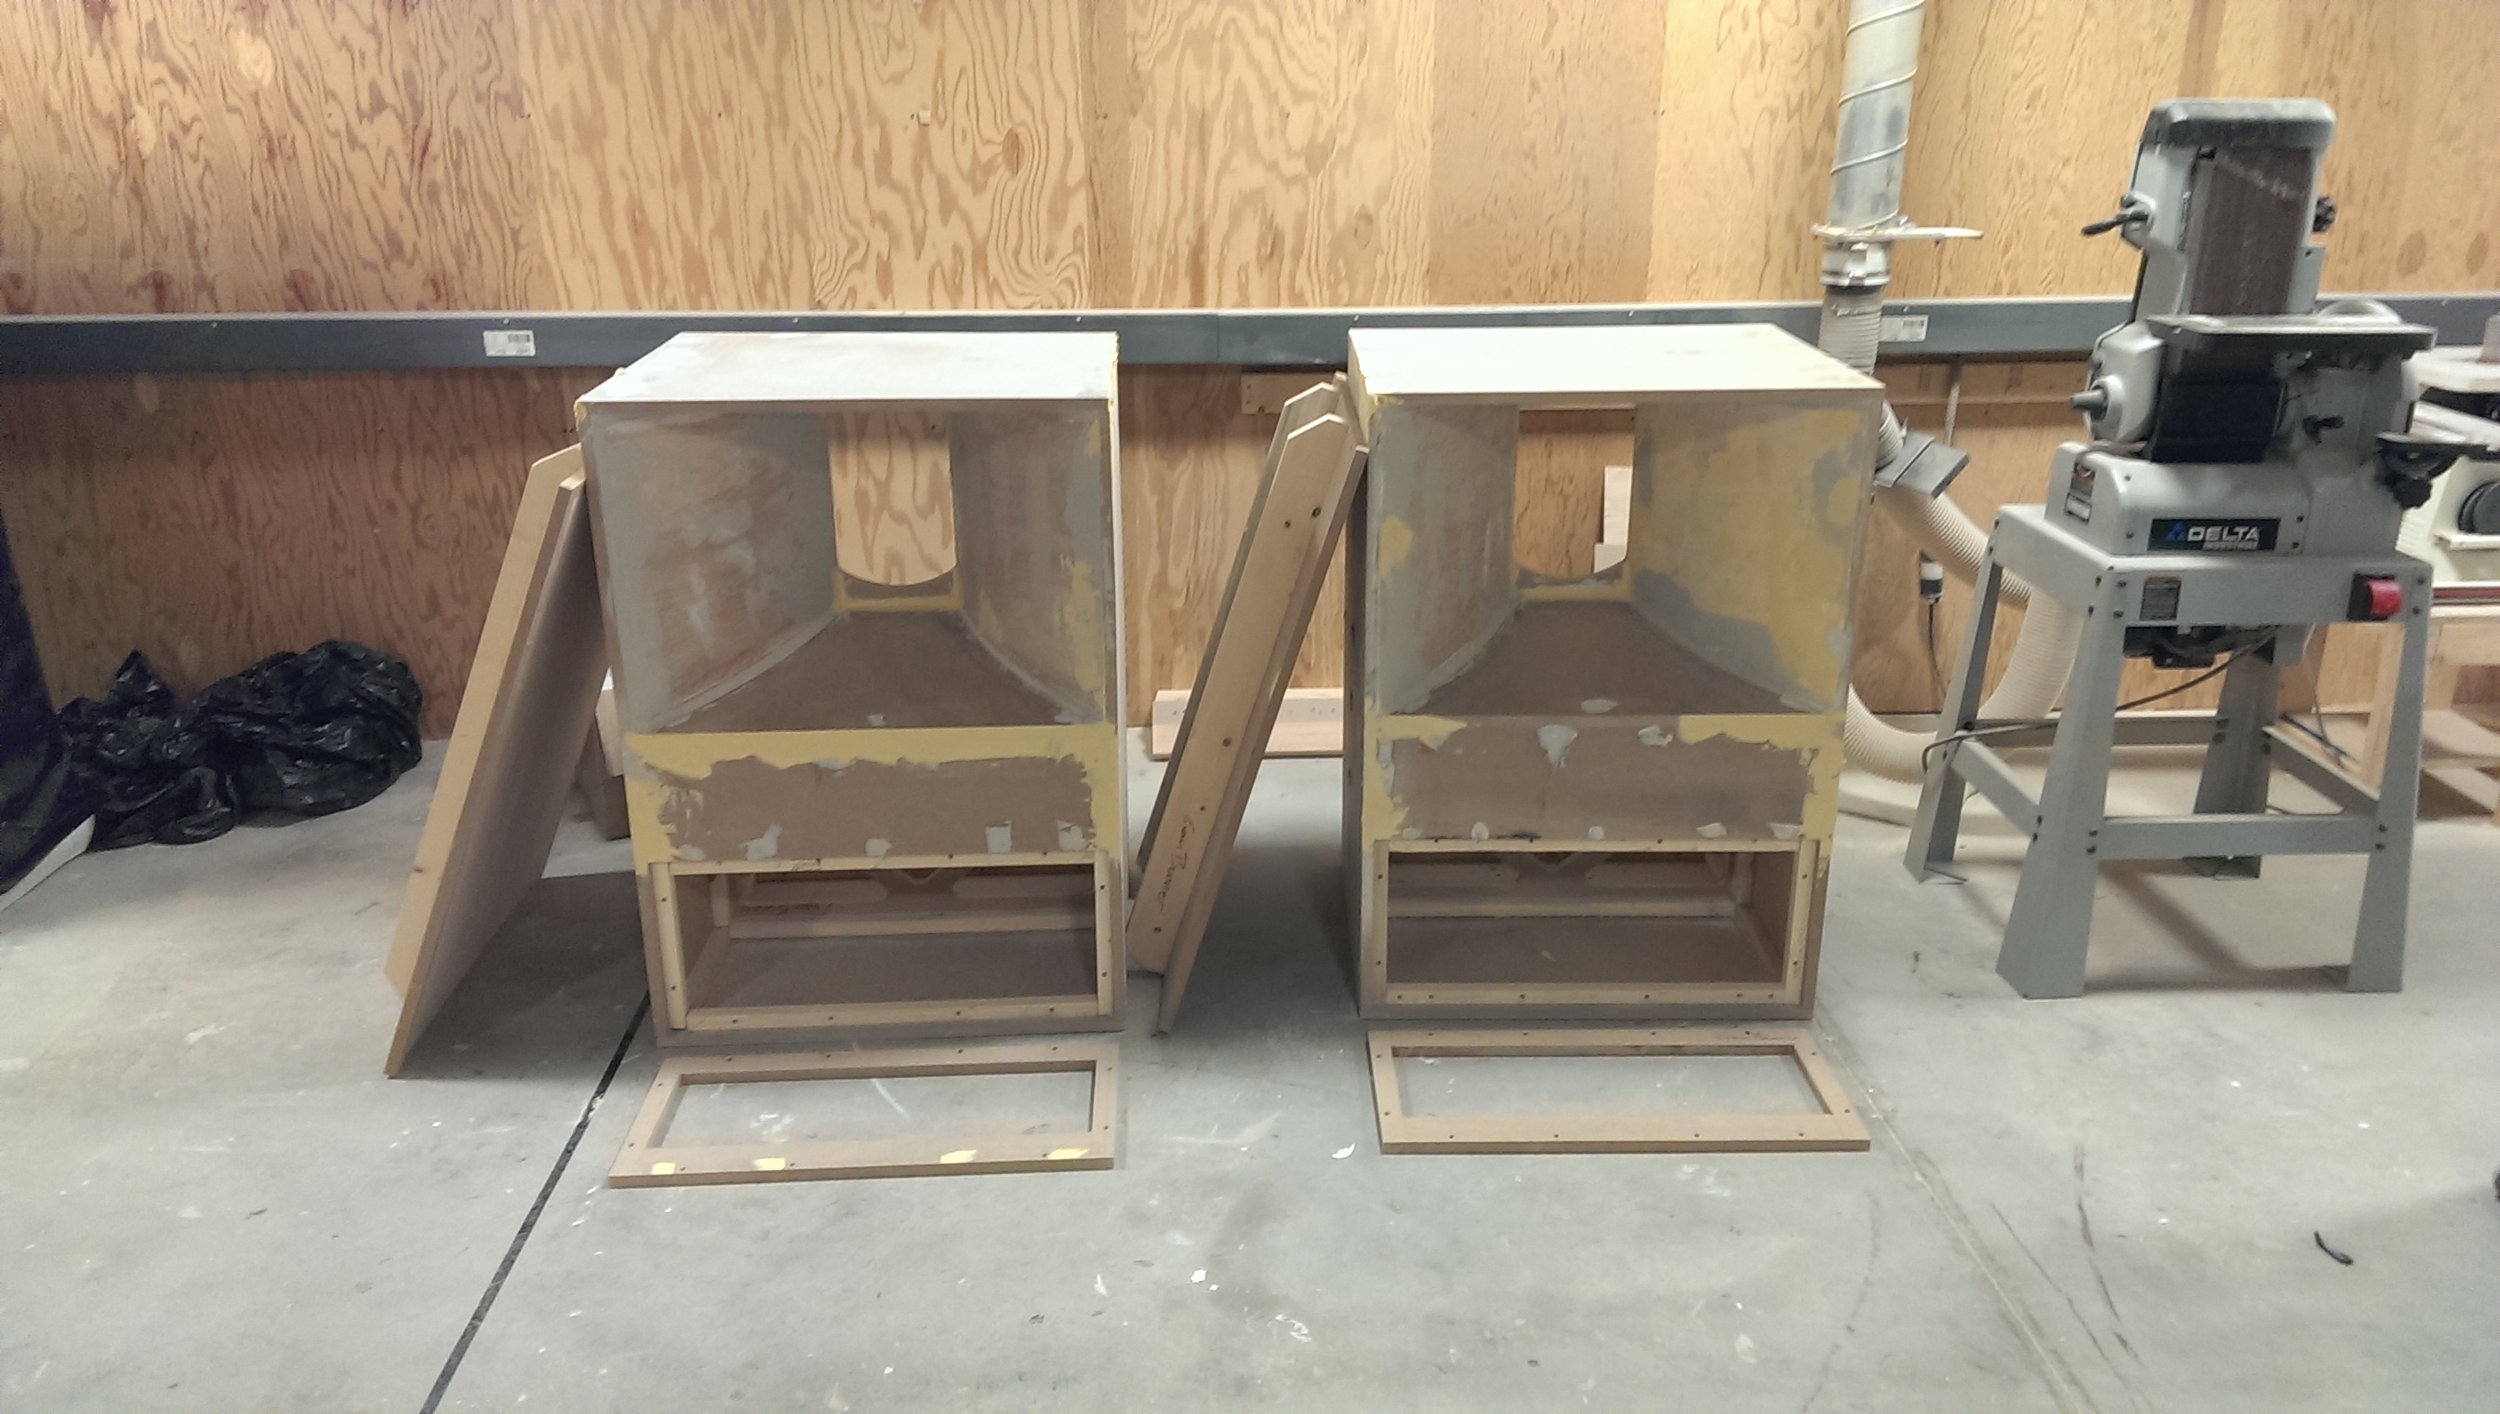
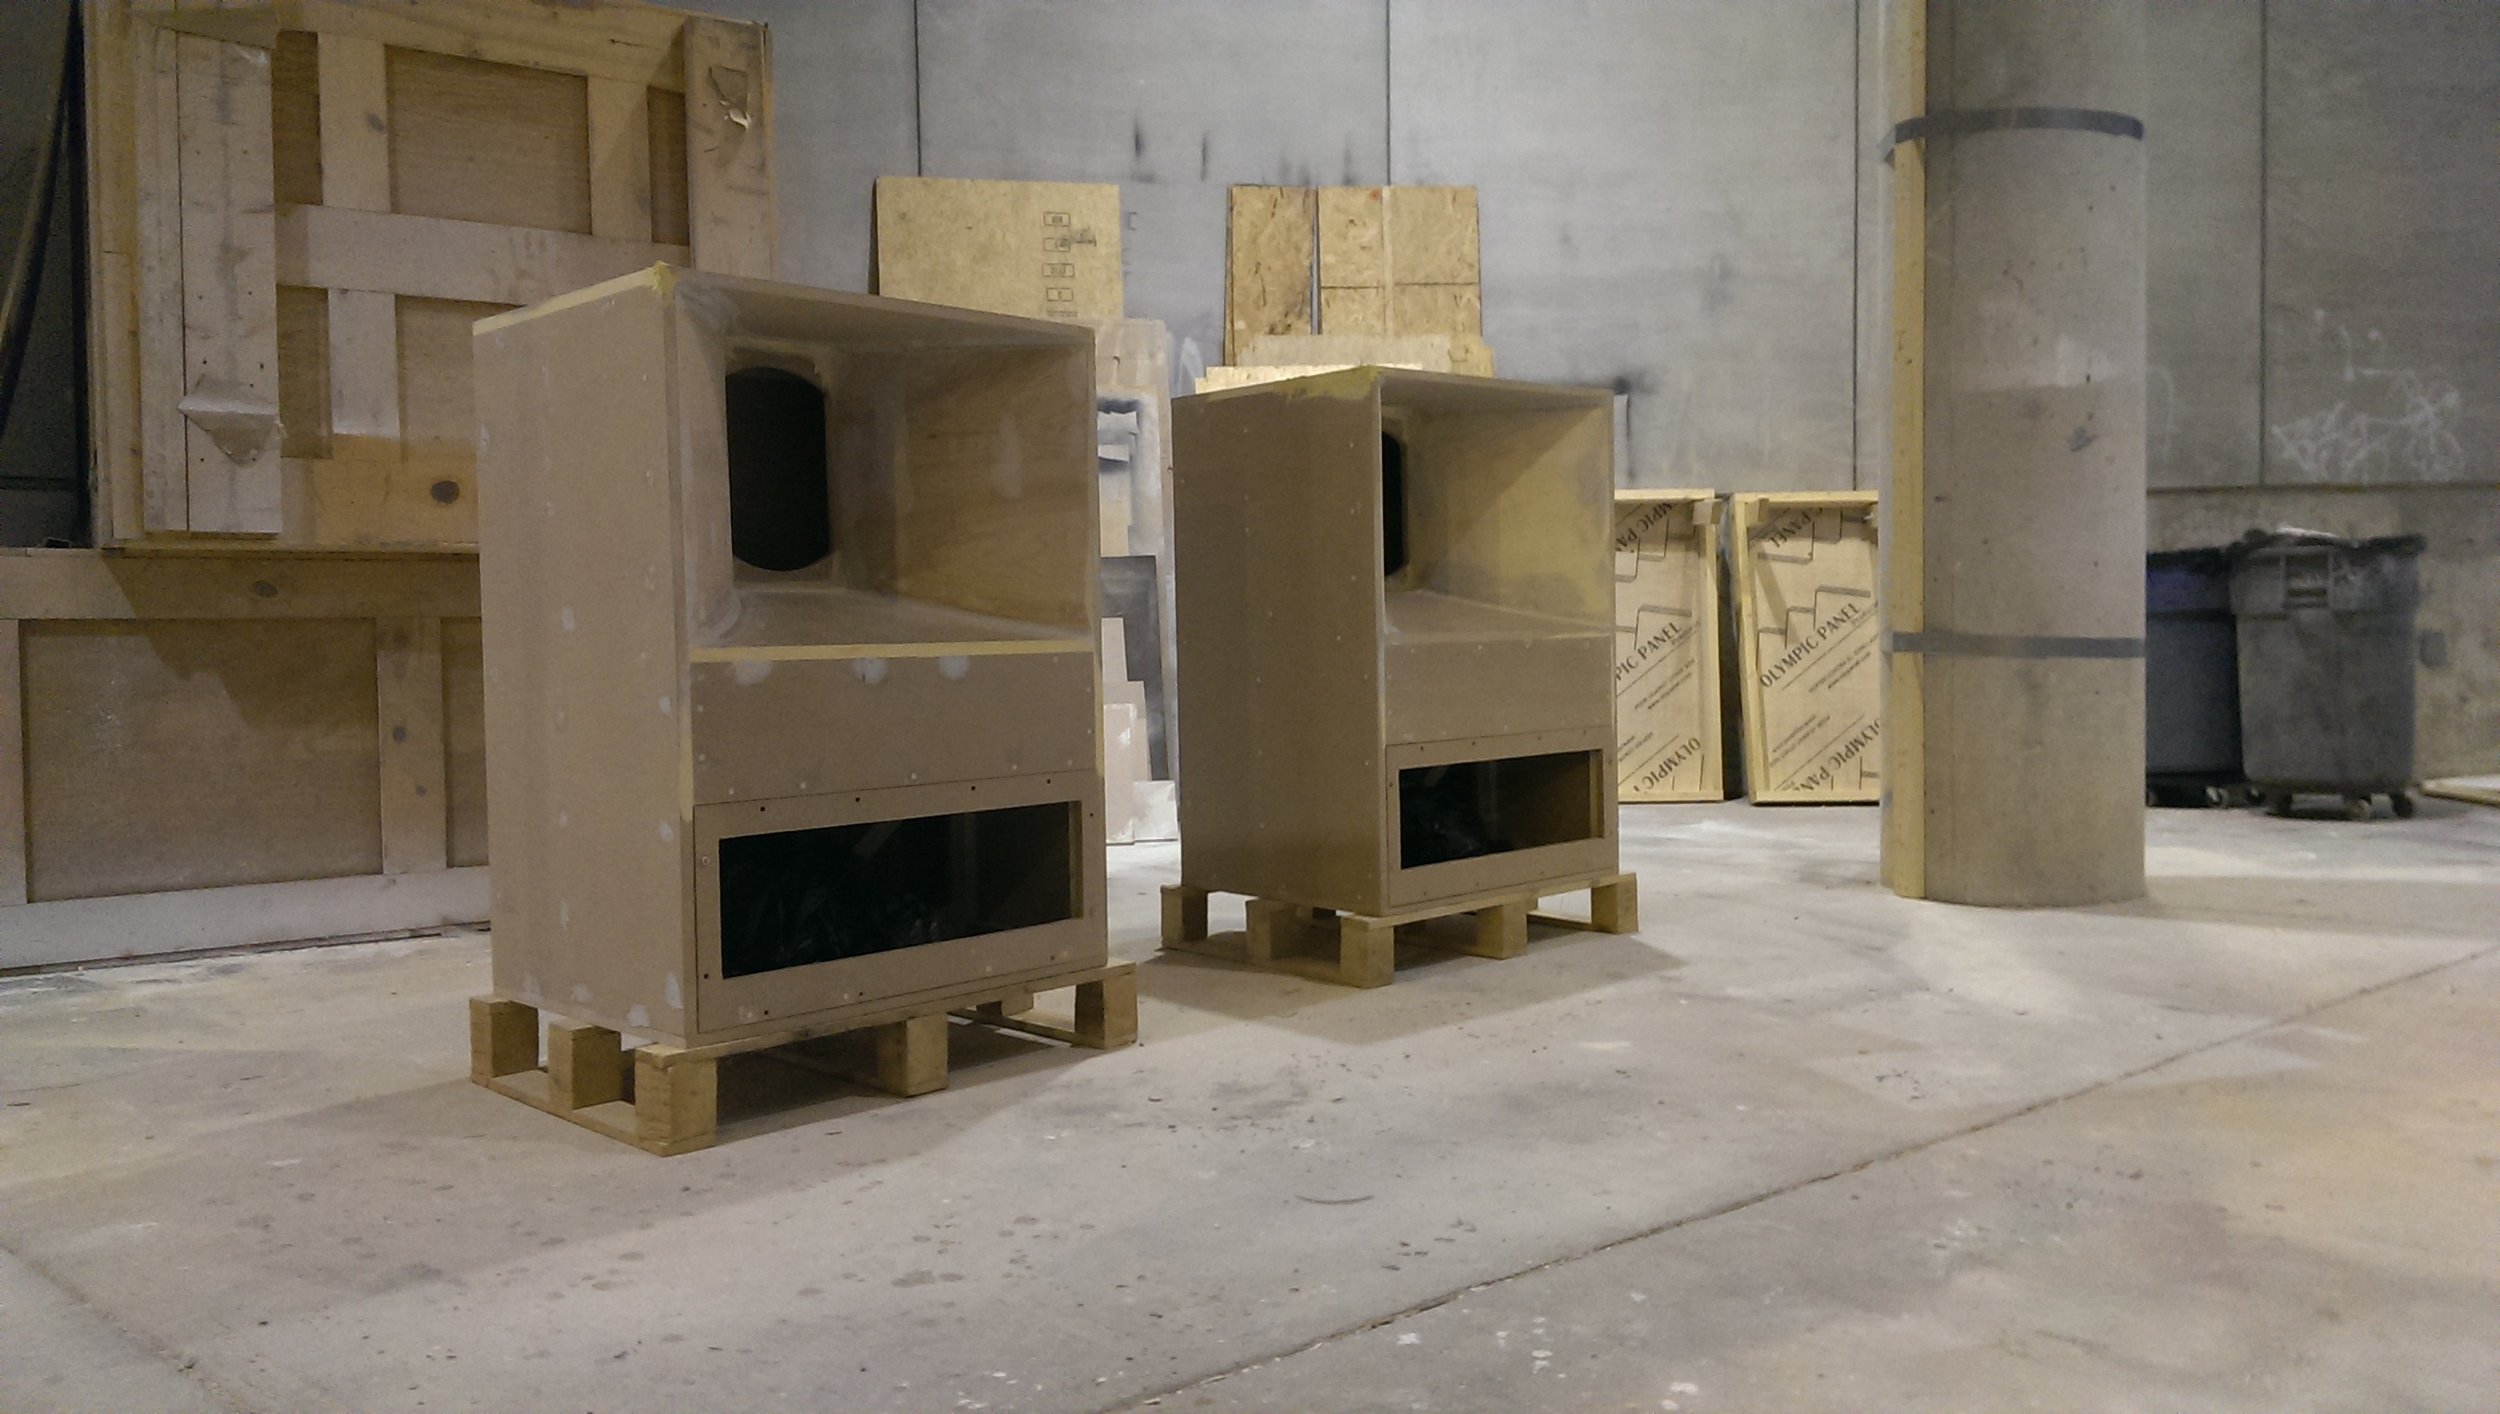
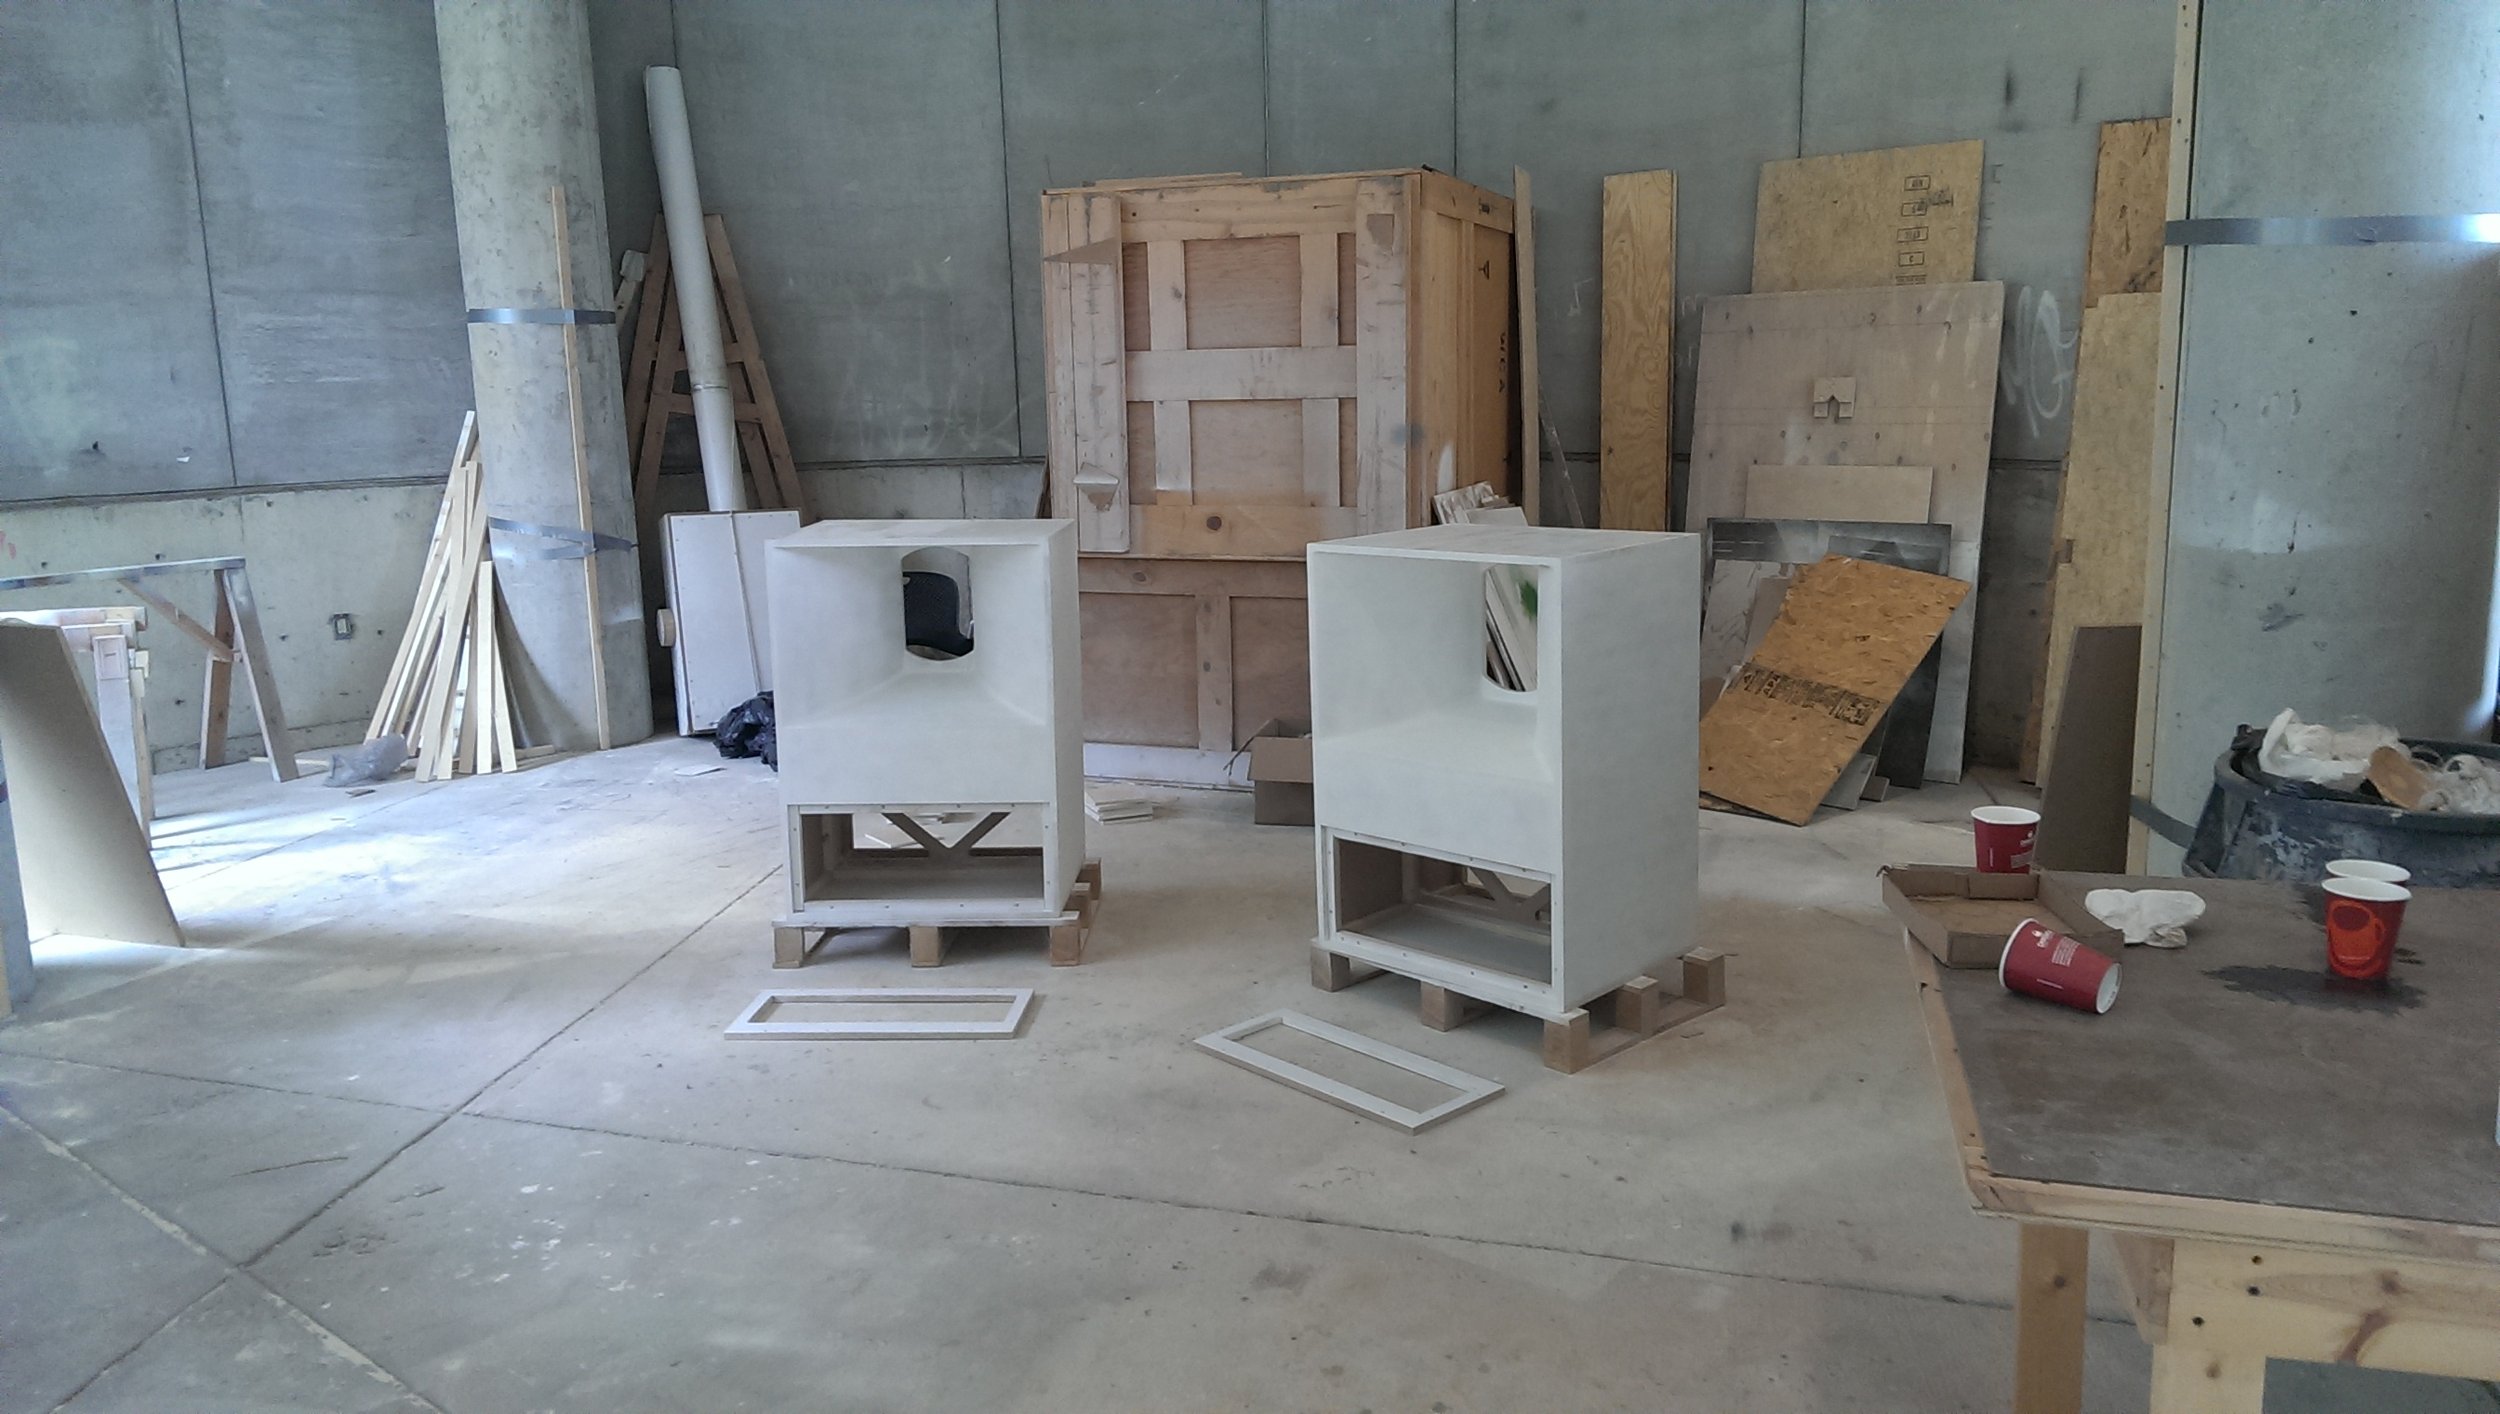
First step was to get the original design into CAD and work to improve from there. I spent a huge amount of time combing the forums gathering all I could about the A7 cabinet’s shortcomings. The modest updates I managed to incorporate centered around the baffle and lack of bracing, both in general and around the horn flare itself. One other major difference between my design and the original is the material choice. I decided early on that I would use ¾” MDF which meant that a clean sheet design was necessary as the original 828 was 5/8” panel thickness.
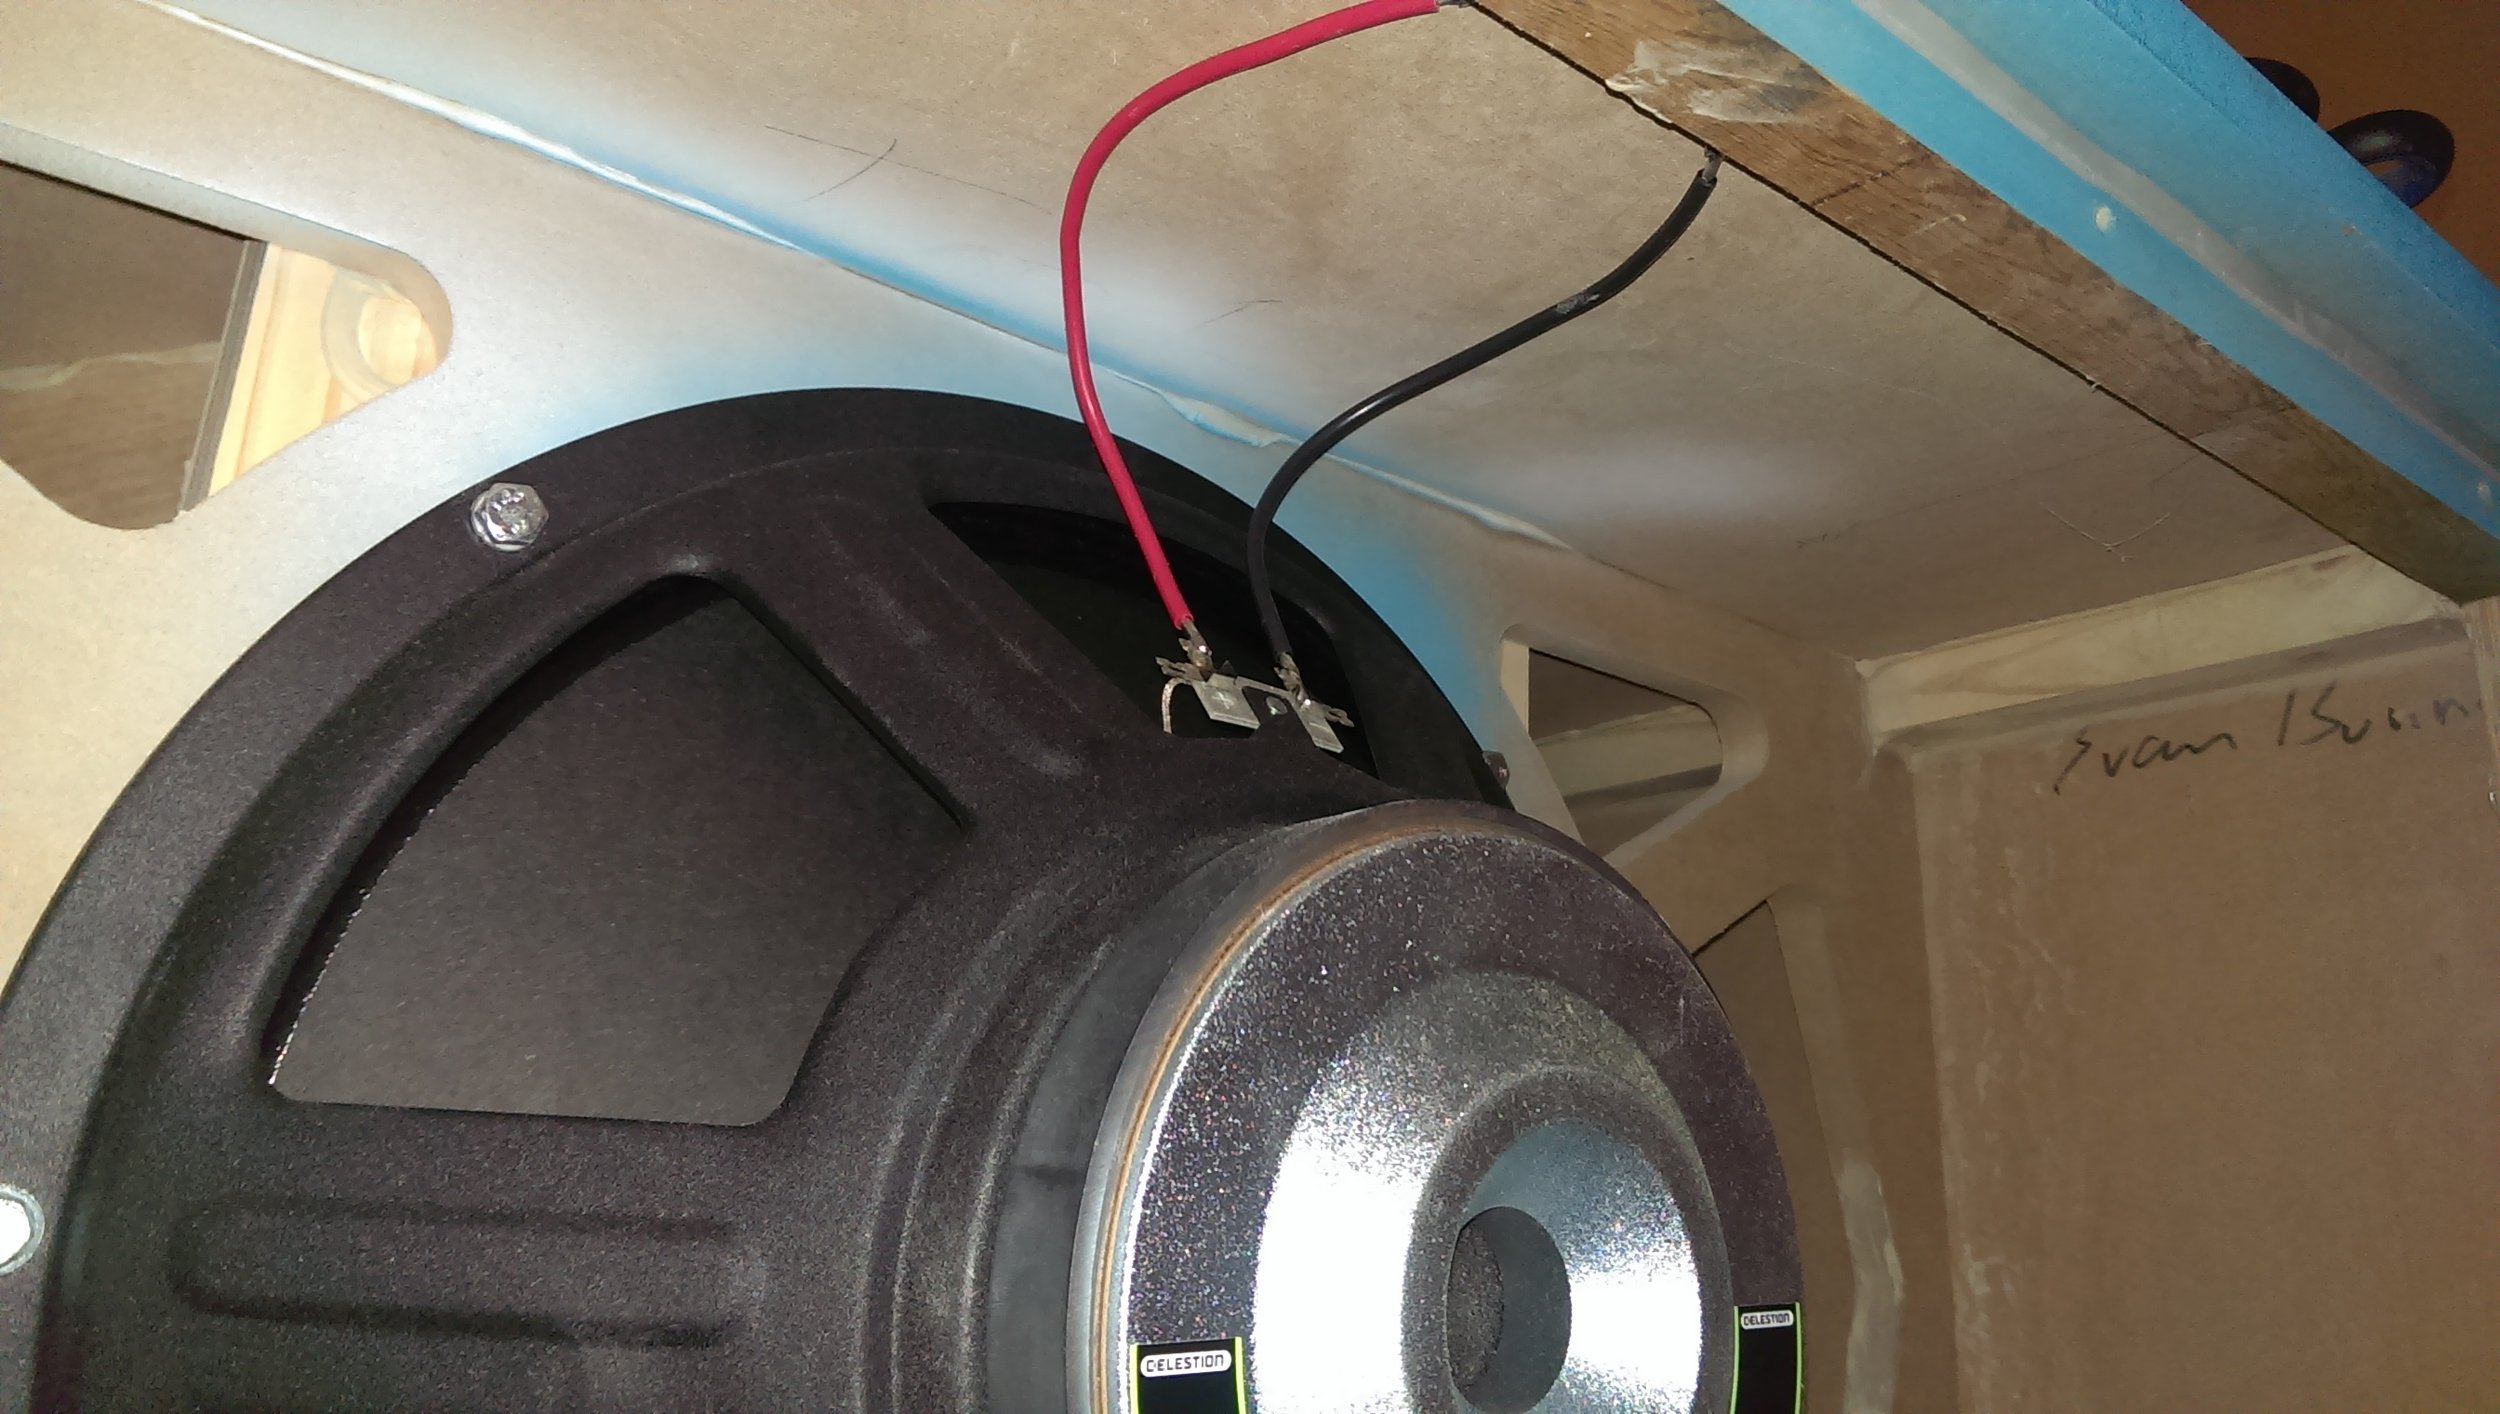
Since I was a broke college student and always on a budget, I went with some pretty affordable transducer hardware. The Celestion woofers were chosen mainly due to the fact that they were cheap and even then, I convinced my parents to get them for me as a Christmas gift. I think at the time they cost a whopping $60 each as they were buy-outs on Parts-Express.
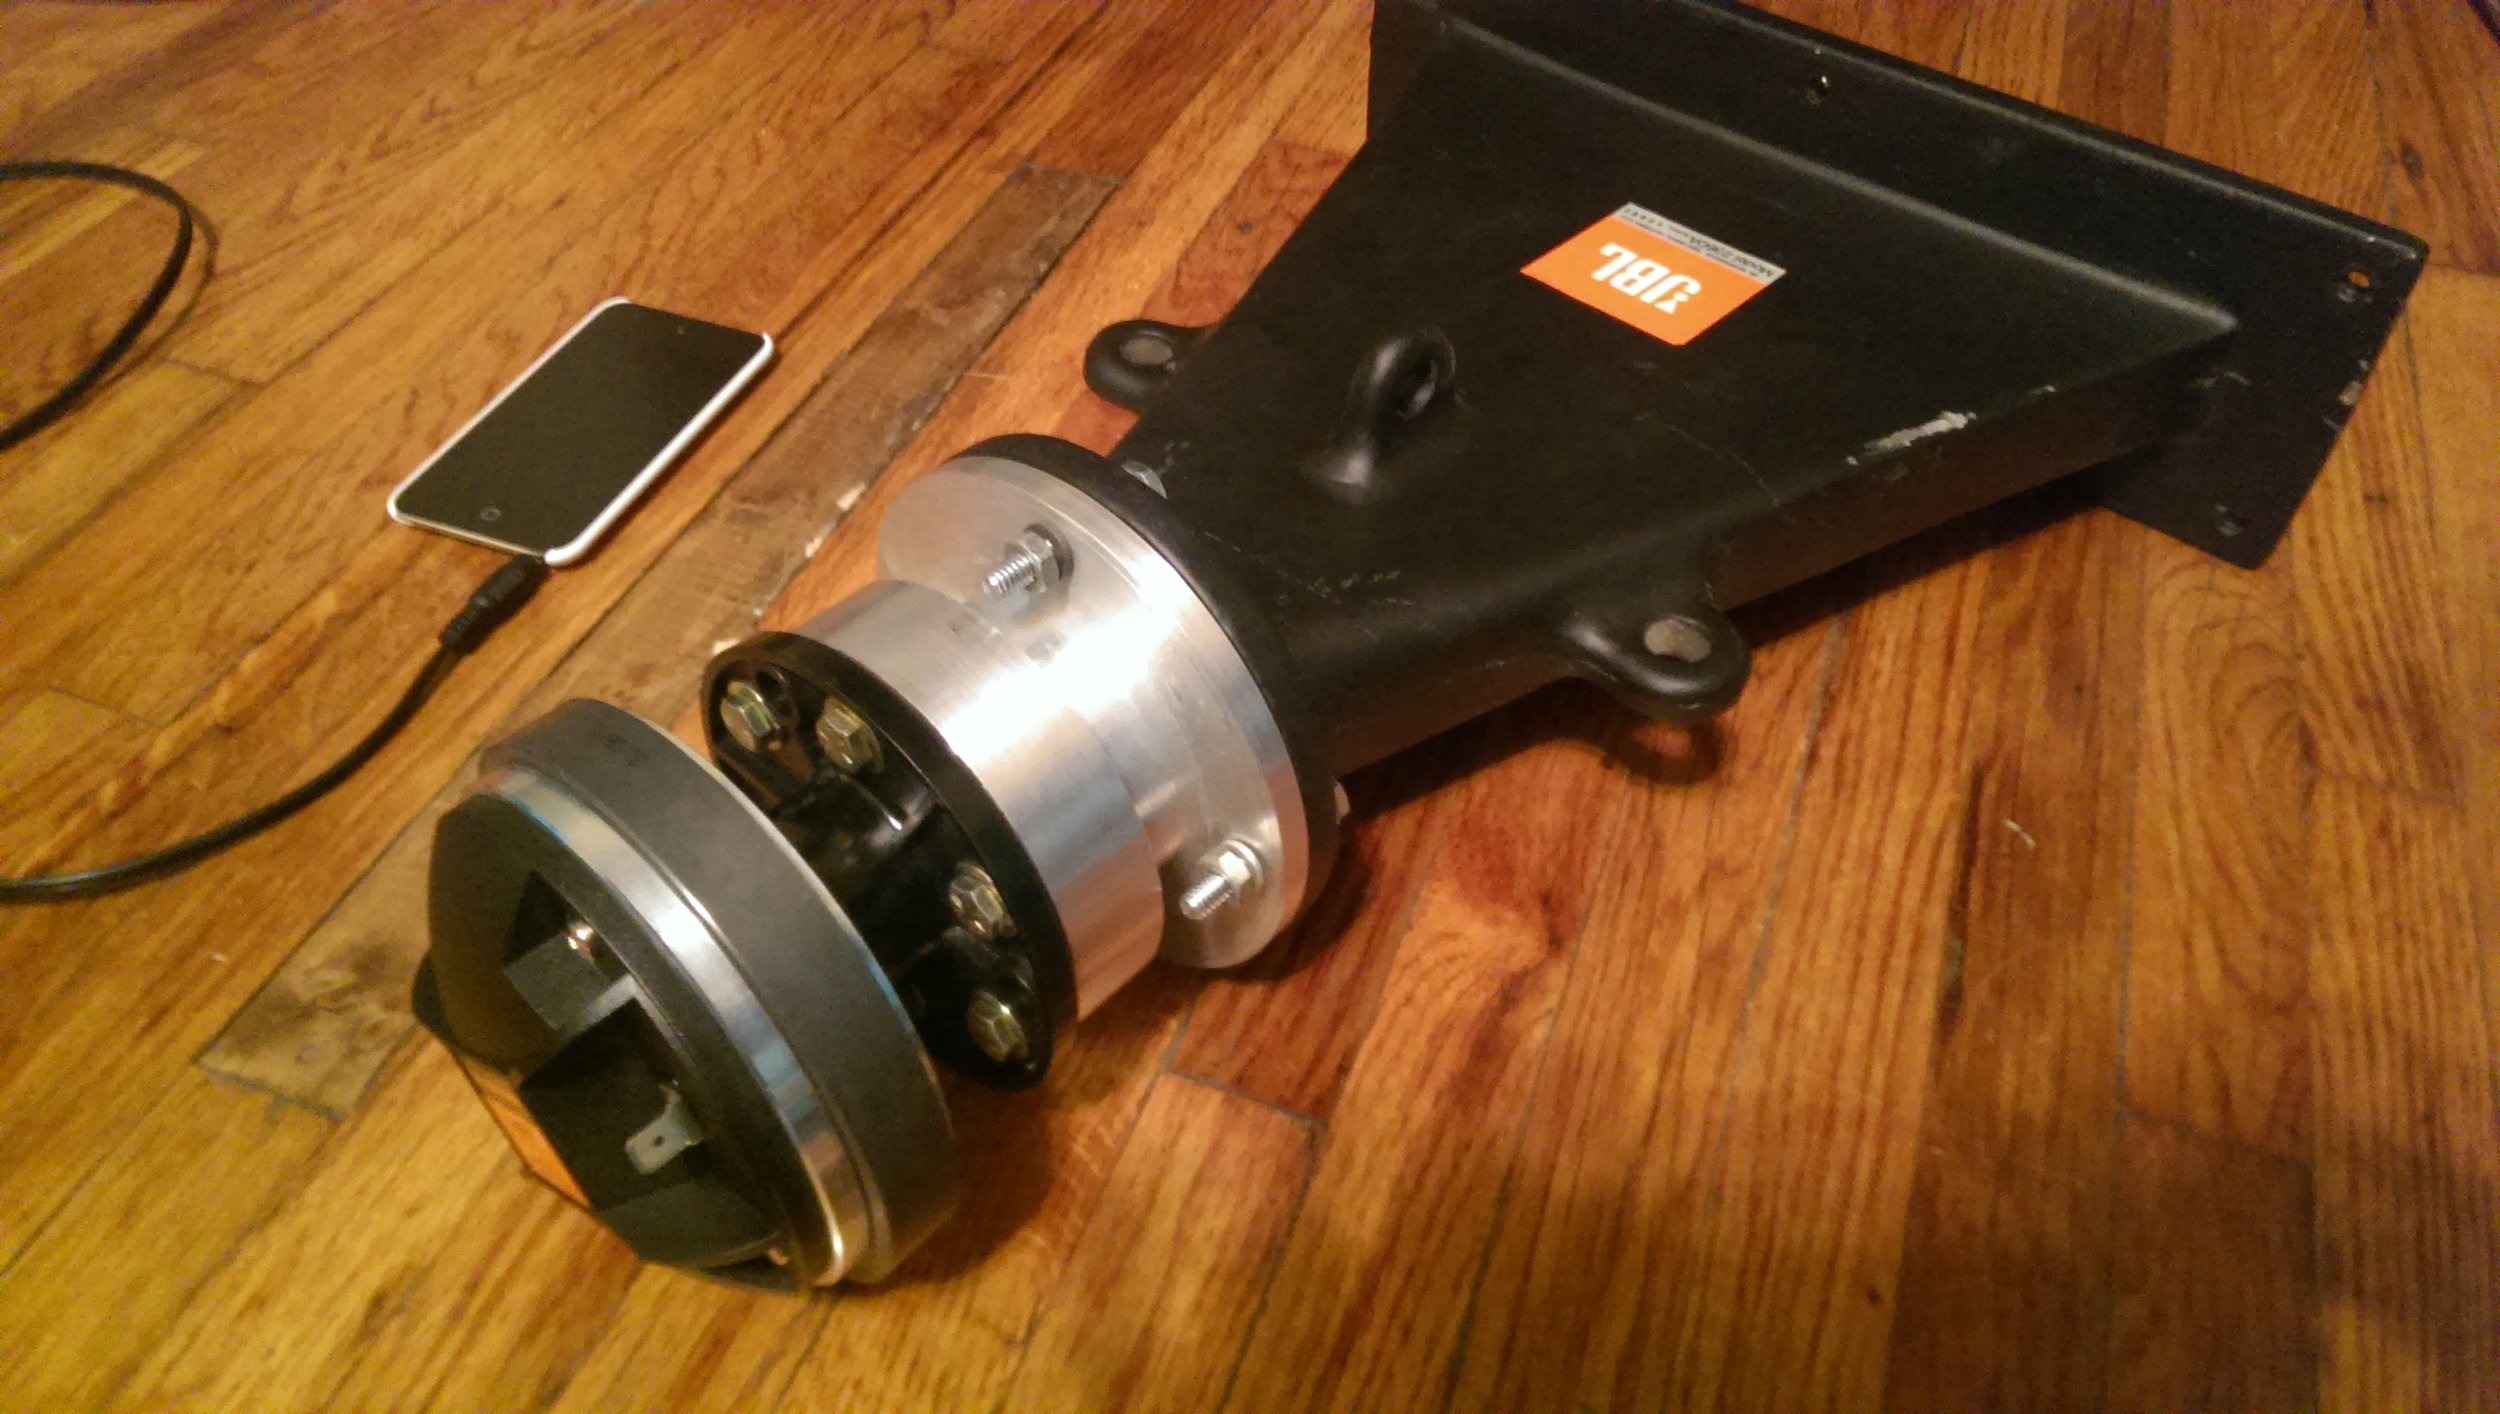
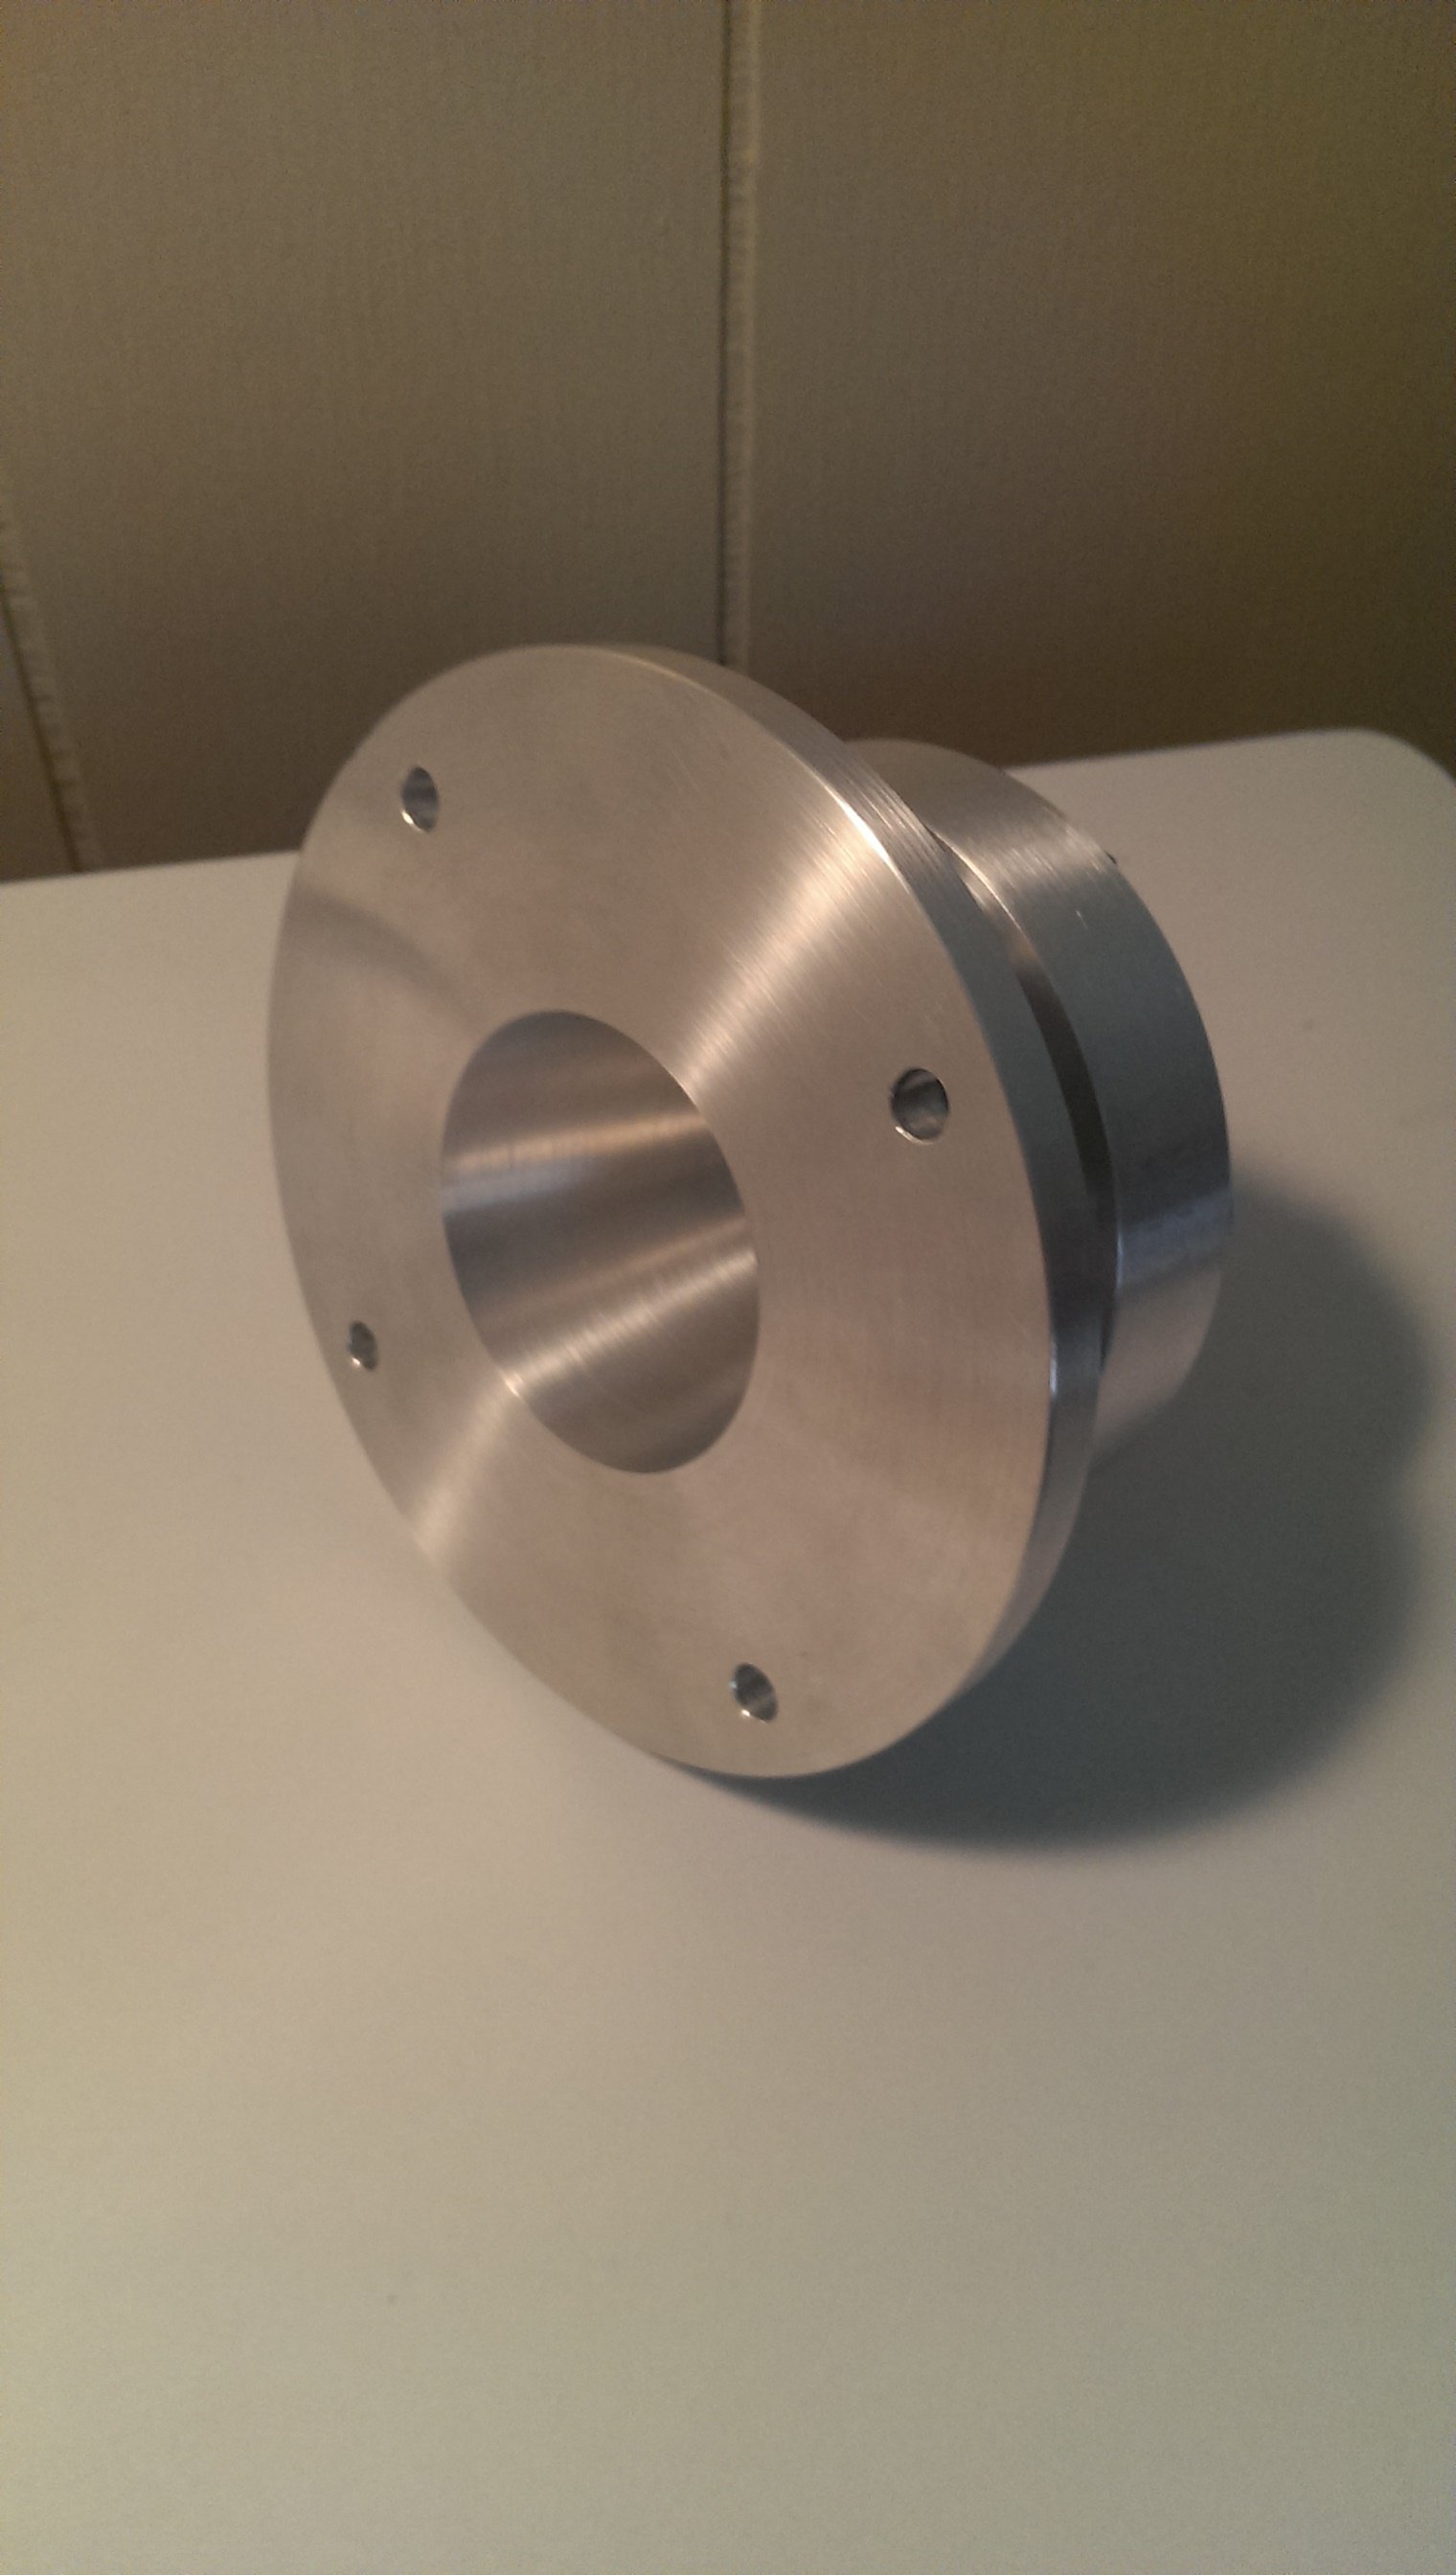
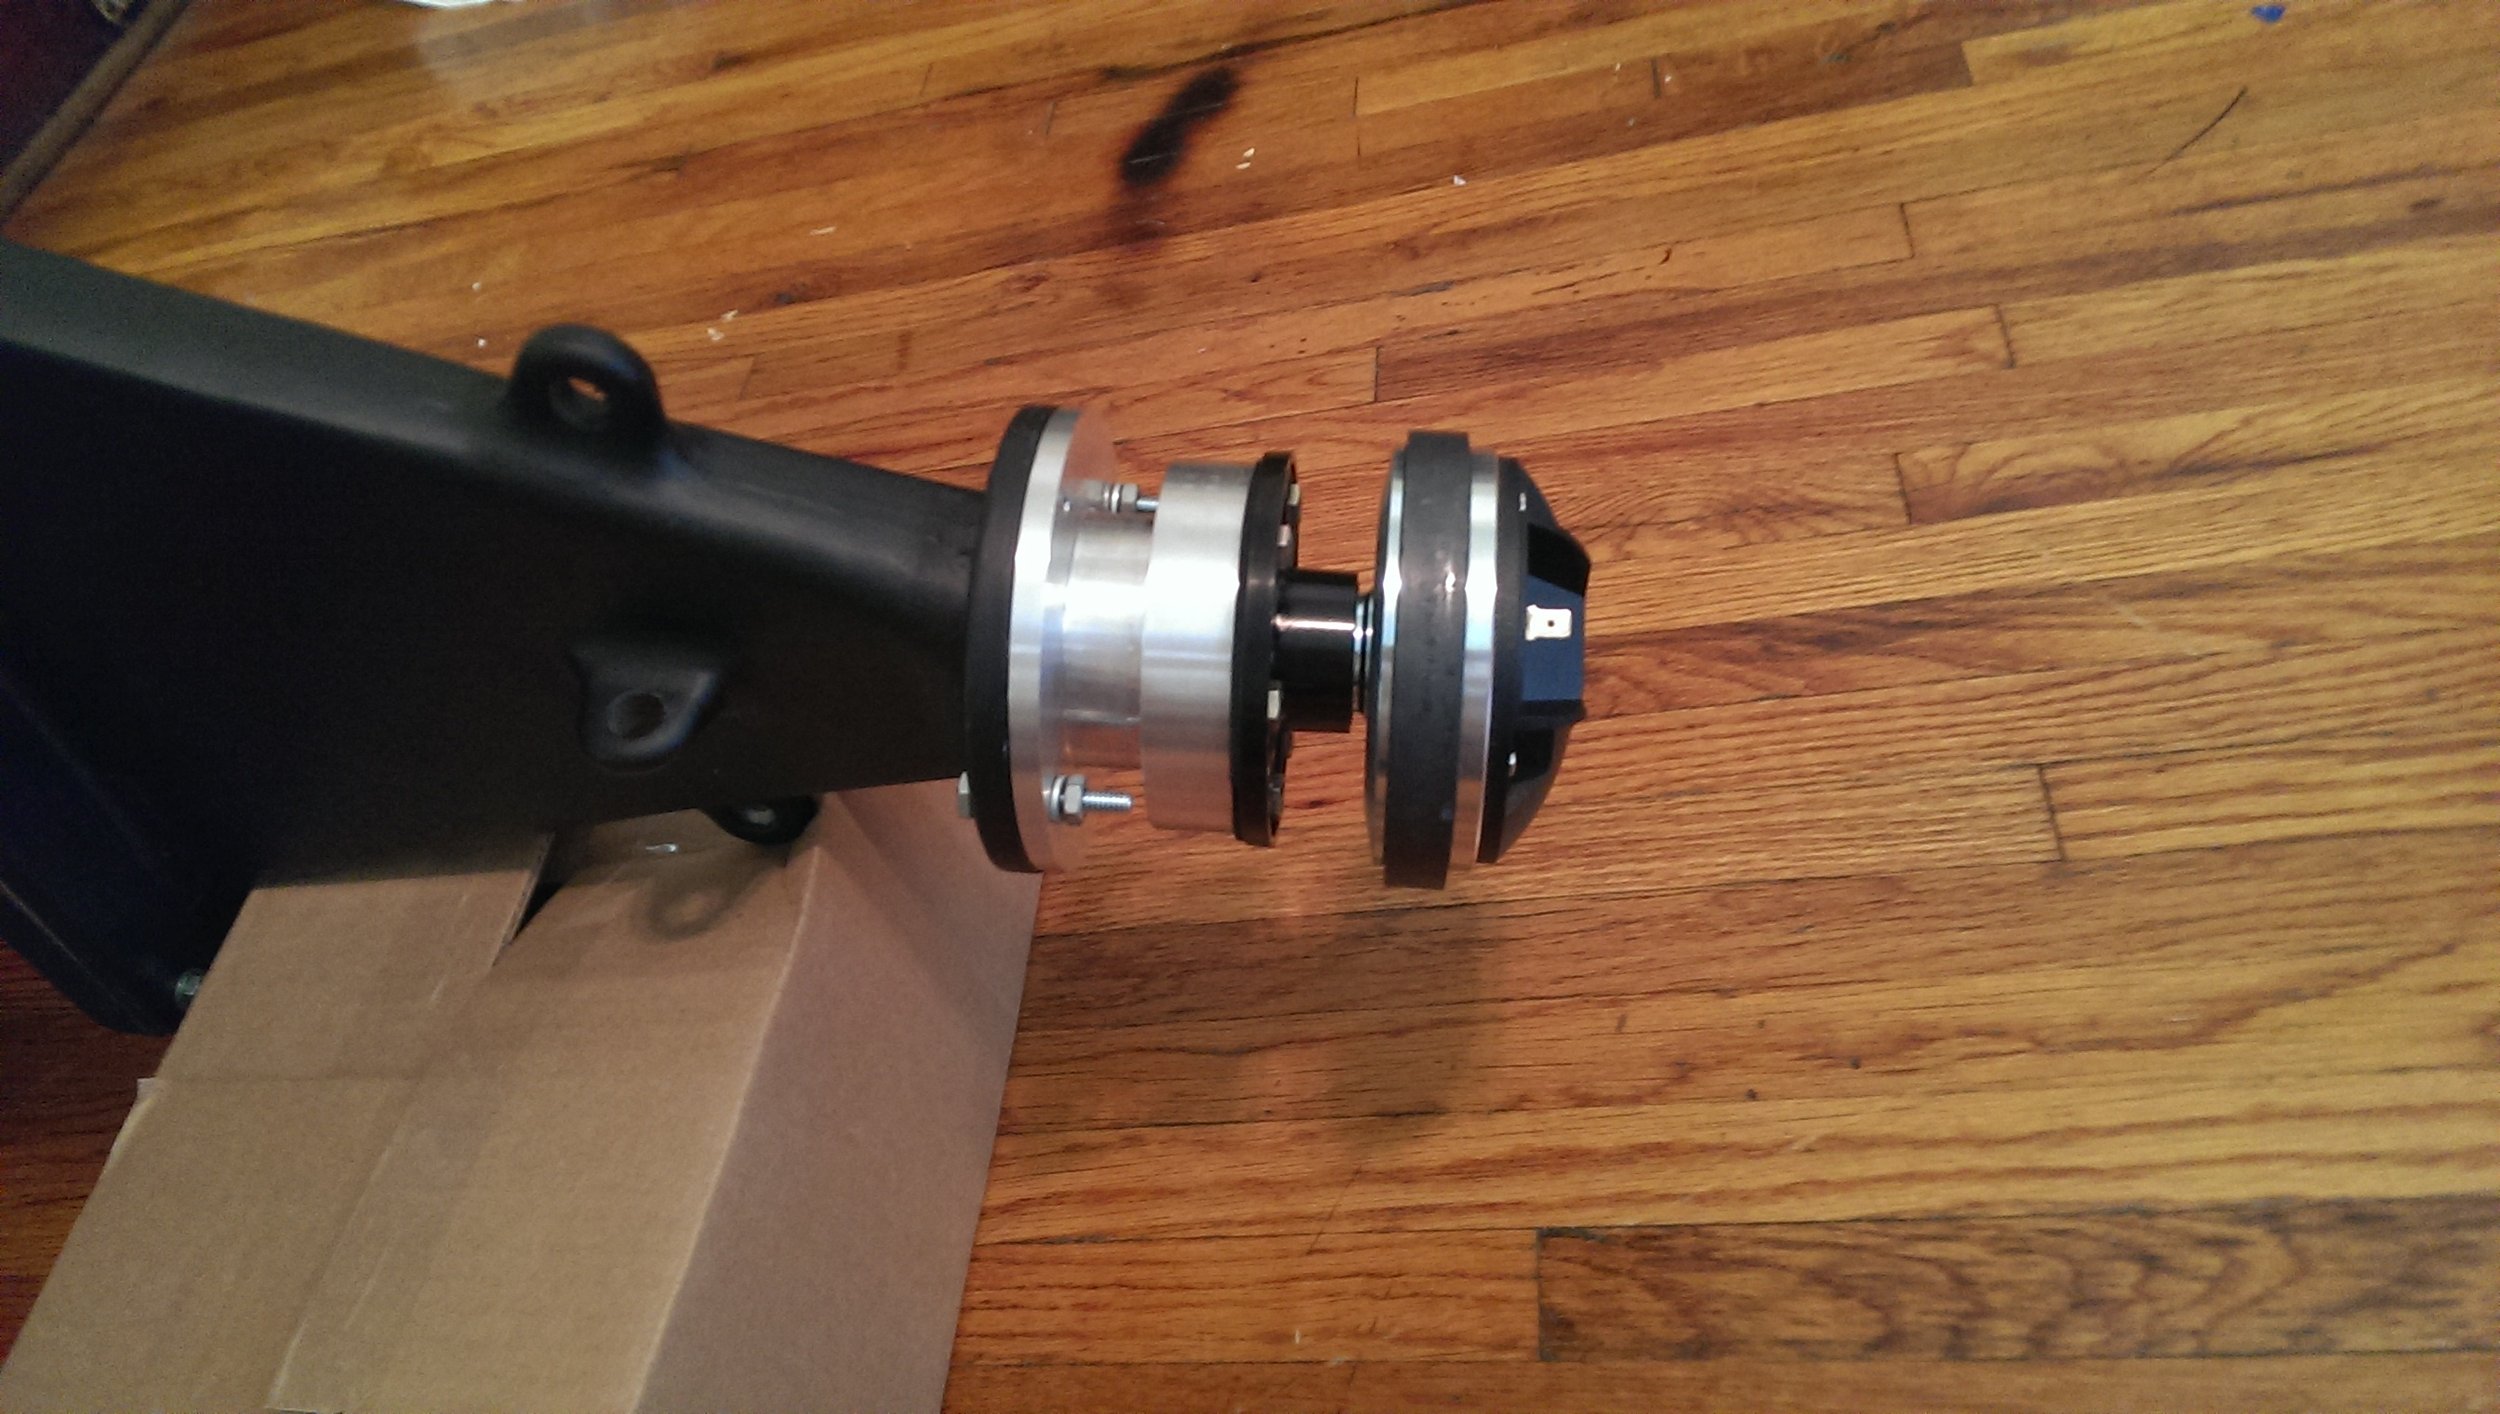
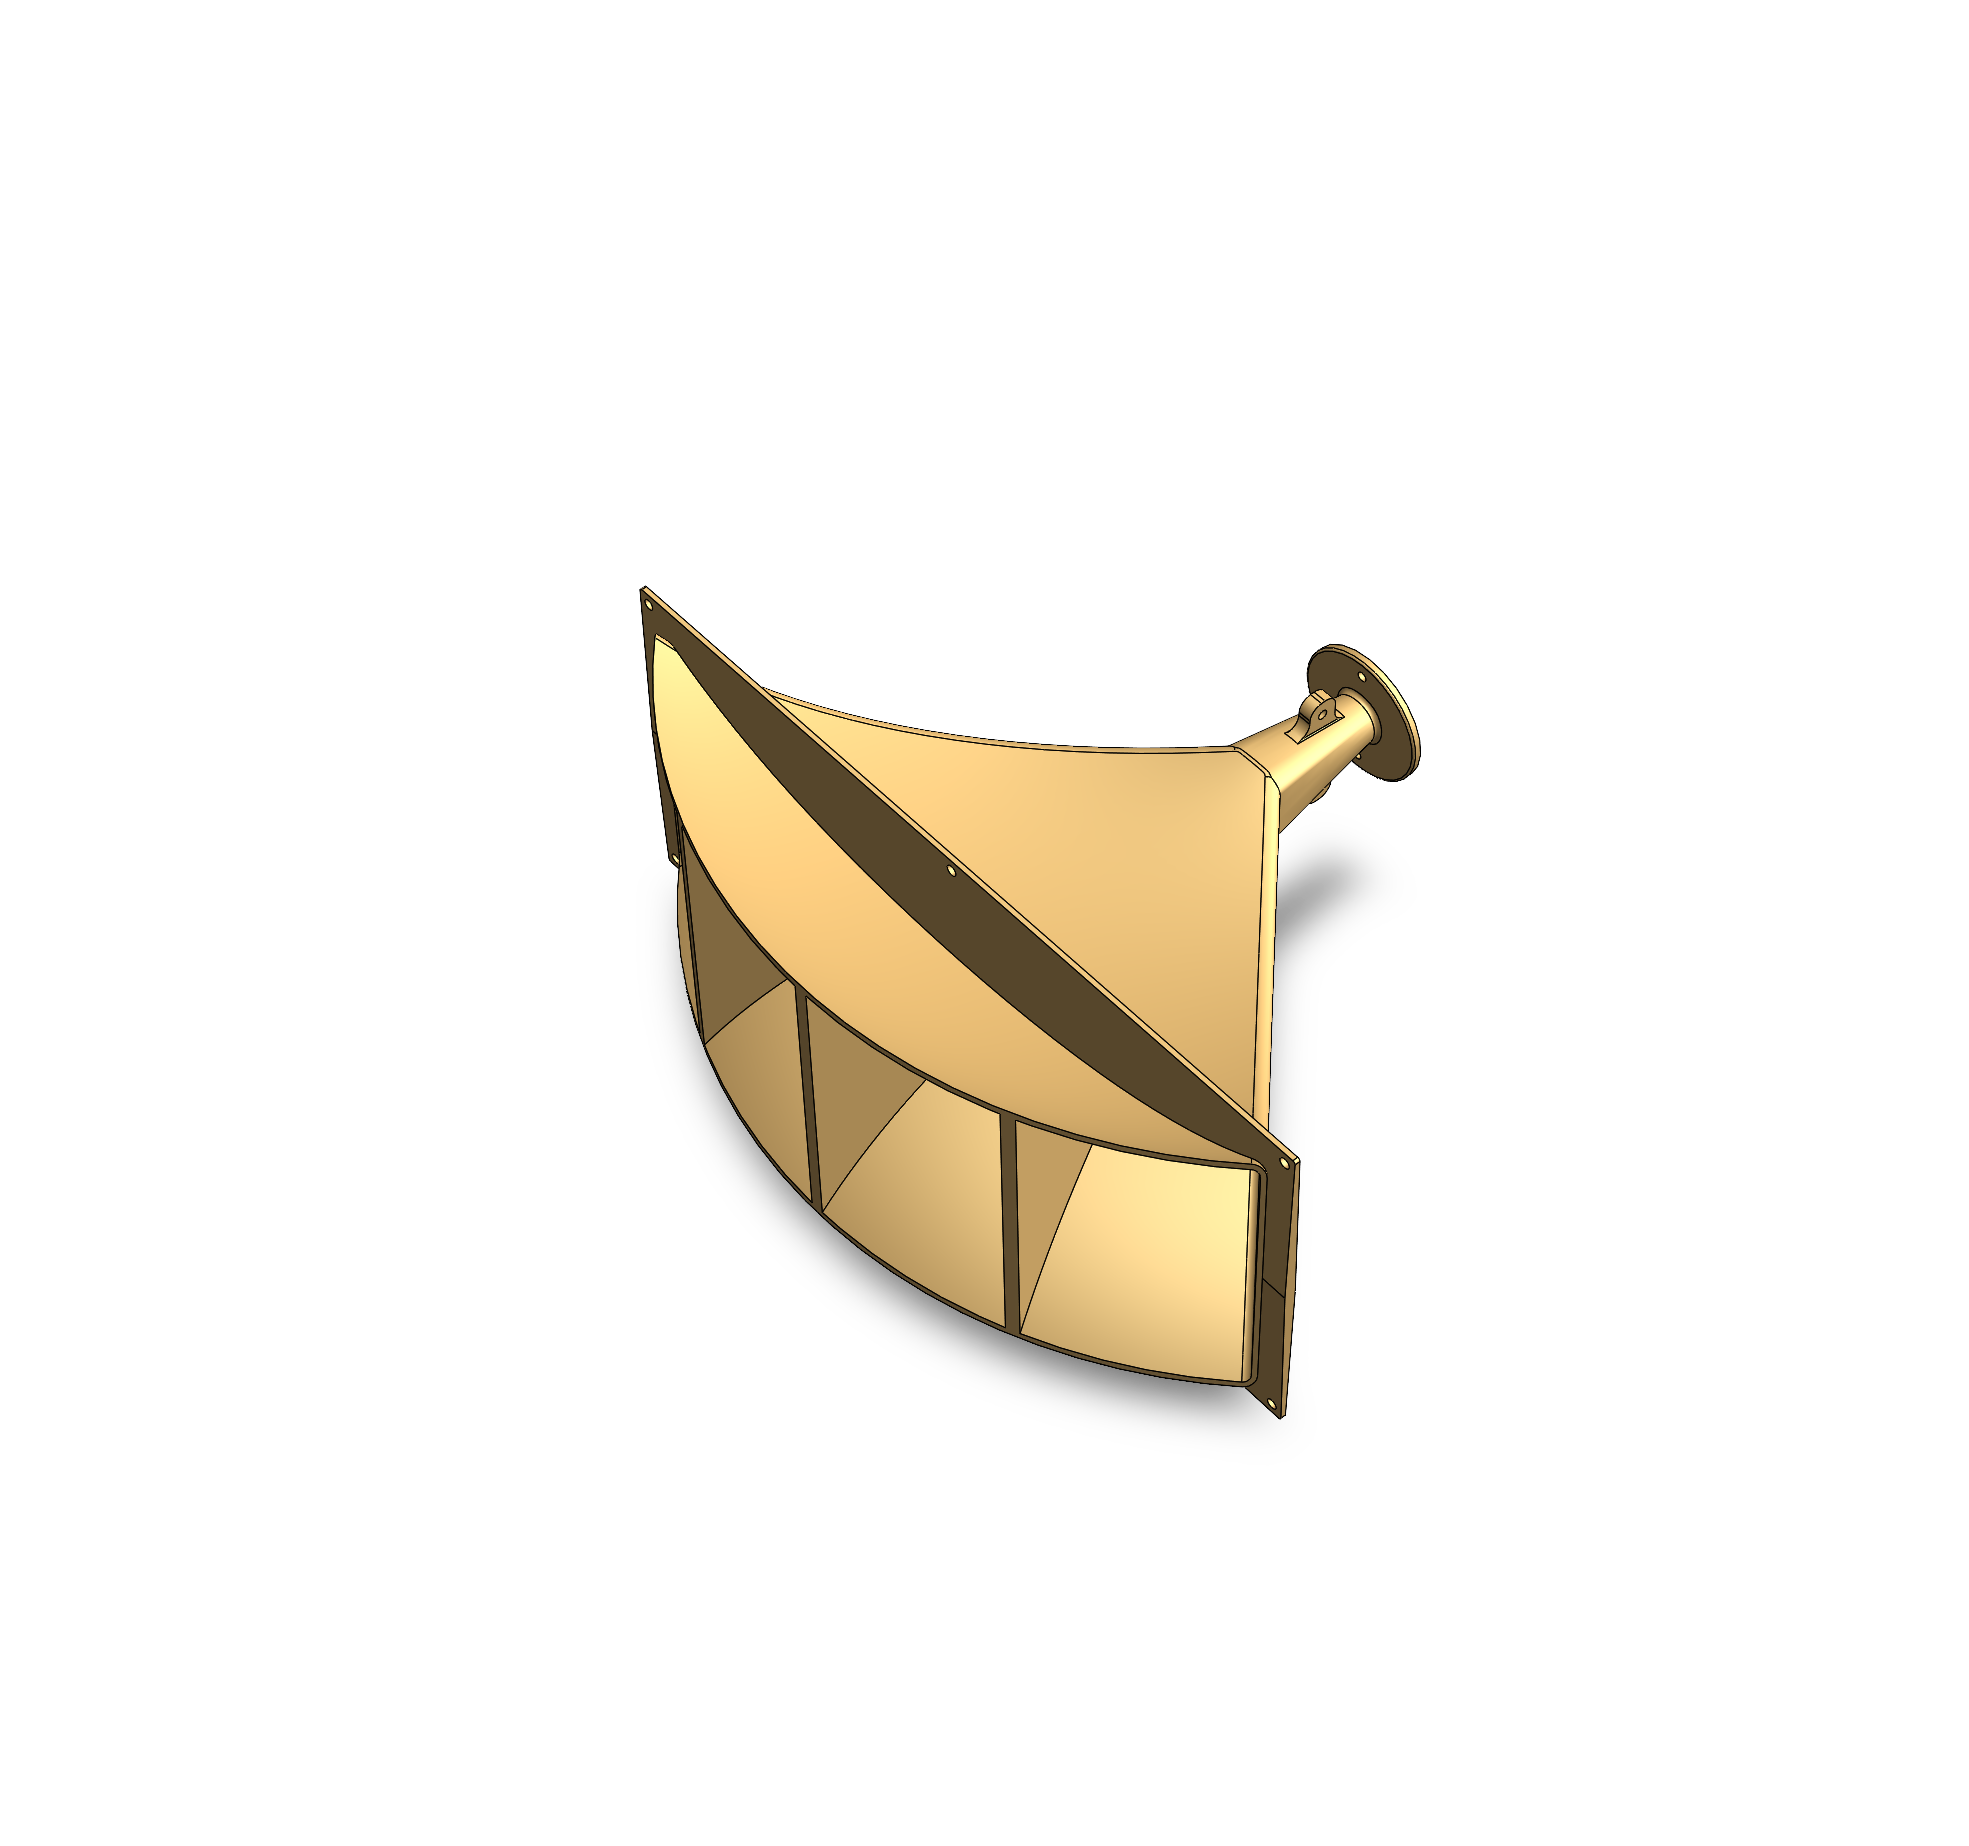
Not having much money to do this project made the HF horn the most difficult hurdle. Original Altec horns 511/811 horns were just too expensive for me and pretty much impossible for me to get my hands on at the time. Period correct compression drivers would be completely out of the question. I contacted many audio repair shops around town, online and over the phone. Eventually I discovered the deal of a lifetime and scored not just two but three original JBL 2360A horns from a craigslist ad in Cincinnati. Believe it or not, those three horns set me back a whopping $110 (without drivers) and cost of gas for my friend’s borrowed Honda Pilot – no way were three of these fitting in my car. Since I had some of the greatest bi-radial horns on planet earth I had to find something that worked with them. It took forever but I ended up pulling an all-nighter to turn some aluminum adapters on the lathe at school but I managed to get a screw-to-flange adapter and aluminum taper adapter to connect some Selenium D-220Ti’s.
To make use of the 2360A’s I had to also build a set of brackets. Luckily the shop at my University had an industrial grade metal shear and brake so I was able to fabricate some aluminum ones with the help of my roommate in about a day.
Driven by an old set of amplifiers (Yamaha P2201 for woofers and Niles SI275 for the compression drivers) I implemented another bargain find - UREI 5235 crossover that I bought from my local guitar center store for an impressive $20. To make it work I etched my own filter cards that were set to make the crossover 1200Hz. The preamp was record store find, a rather temperamental BeoMaster 5500 but it had the badass MCP5500, a remote very fitting of the caliber and power of the system!
This was the main configuration for about two years. The house predictably became party central and hosted several, deafening college ragers over the final few semesters of my college education. Luckily, in 2014 I managed to graduate and secure an amazing opportunity as an R&D engineer in Detroit for a large automotive Tier-1. Sadly this meant the speakers couldn’t come with me and stayed in storage in my parents house for 3+ years or so and then also got handed off to a friends storage unit where they would spend another 2ish years.
Zoom forward to 2020 and I’m living and working in Germany. I had been doing so for over two years at that point and looking for a change. Luckily, in the midst of the pandemic I was able to secure my dream job - becoming a design engineer where I would be developing audio systems for new automobiles. I would start working at Tymphany, one of the largest audio ODM’s on the planet. This meant returning to America and getting my stuff back under the same roof. Luckily this meant I could dust off the A7’s! I managed to find an apartment large enough to contain the A7s and allow me to set the room up properly.
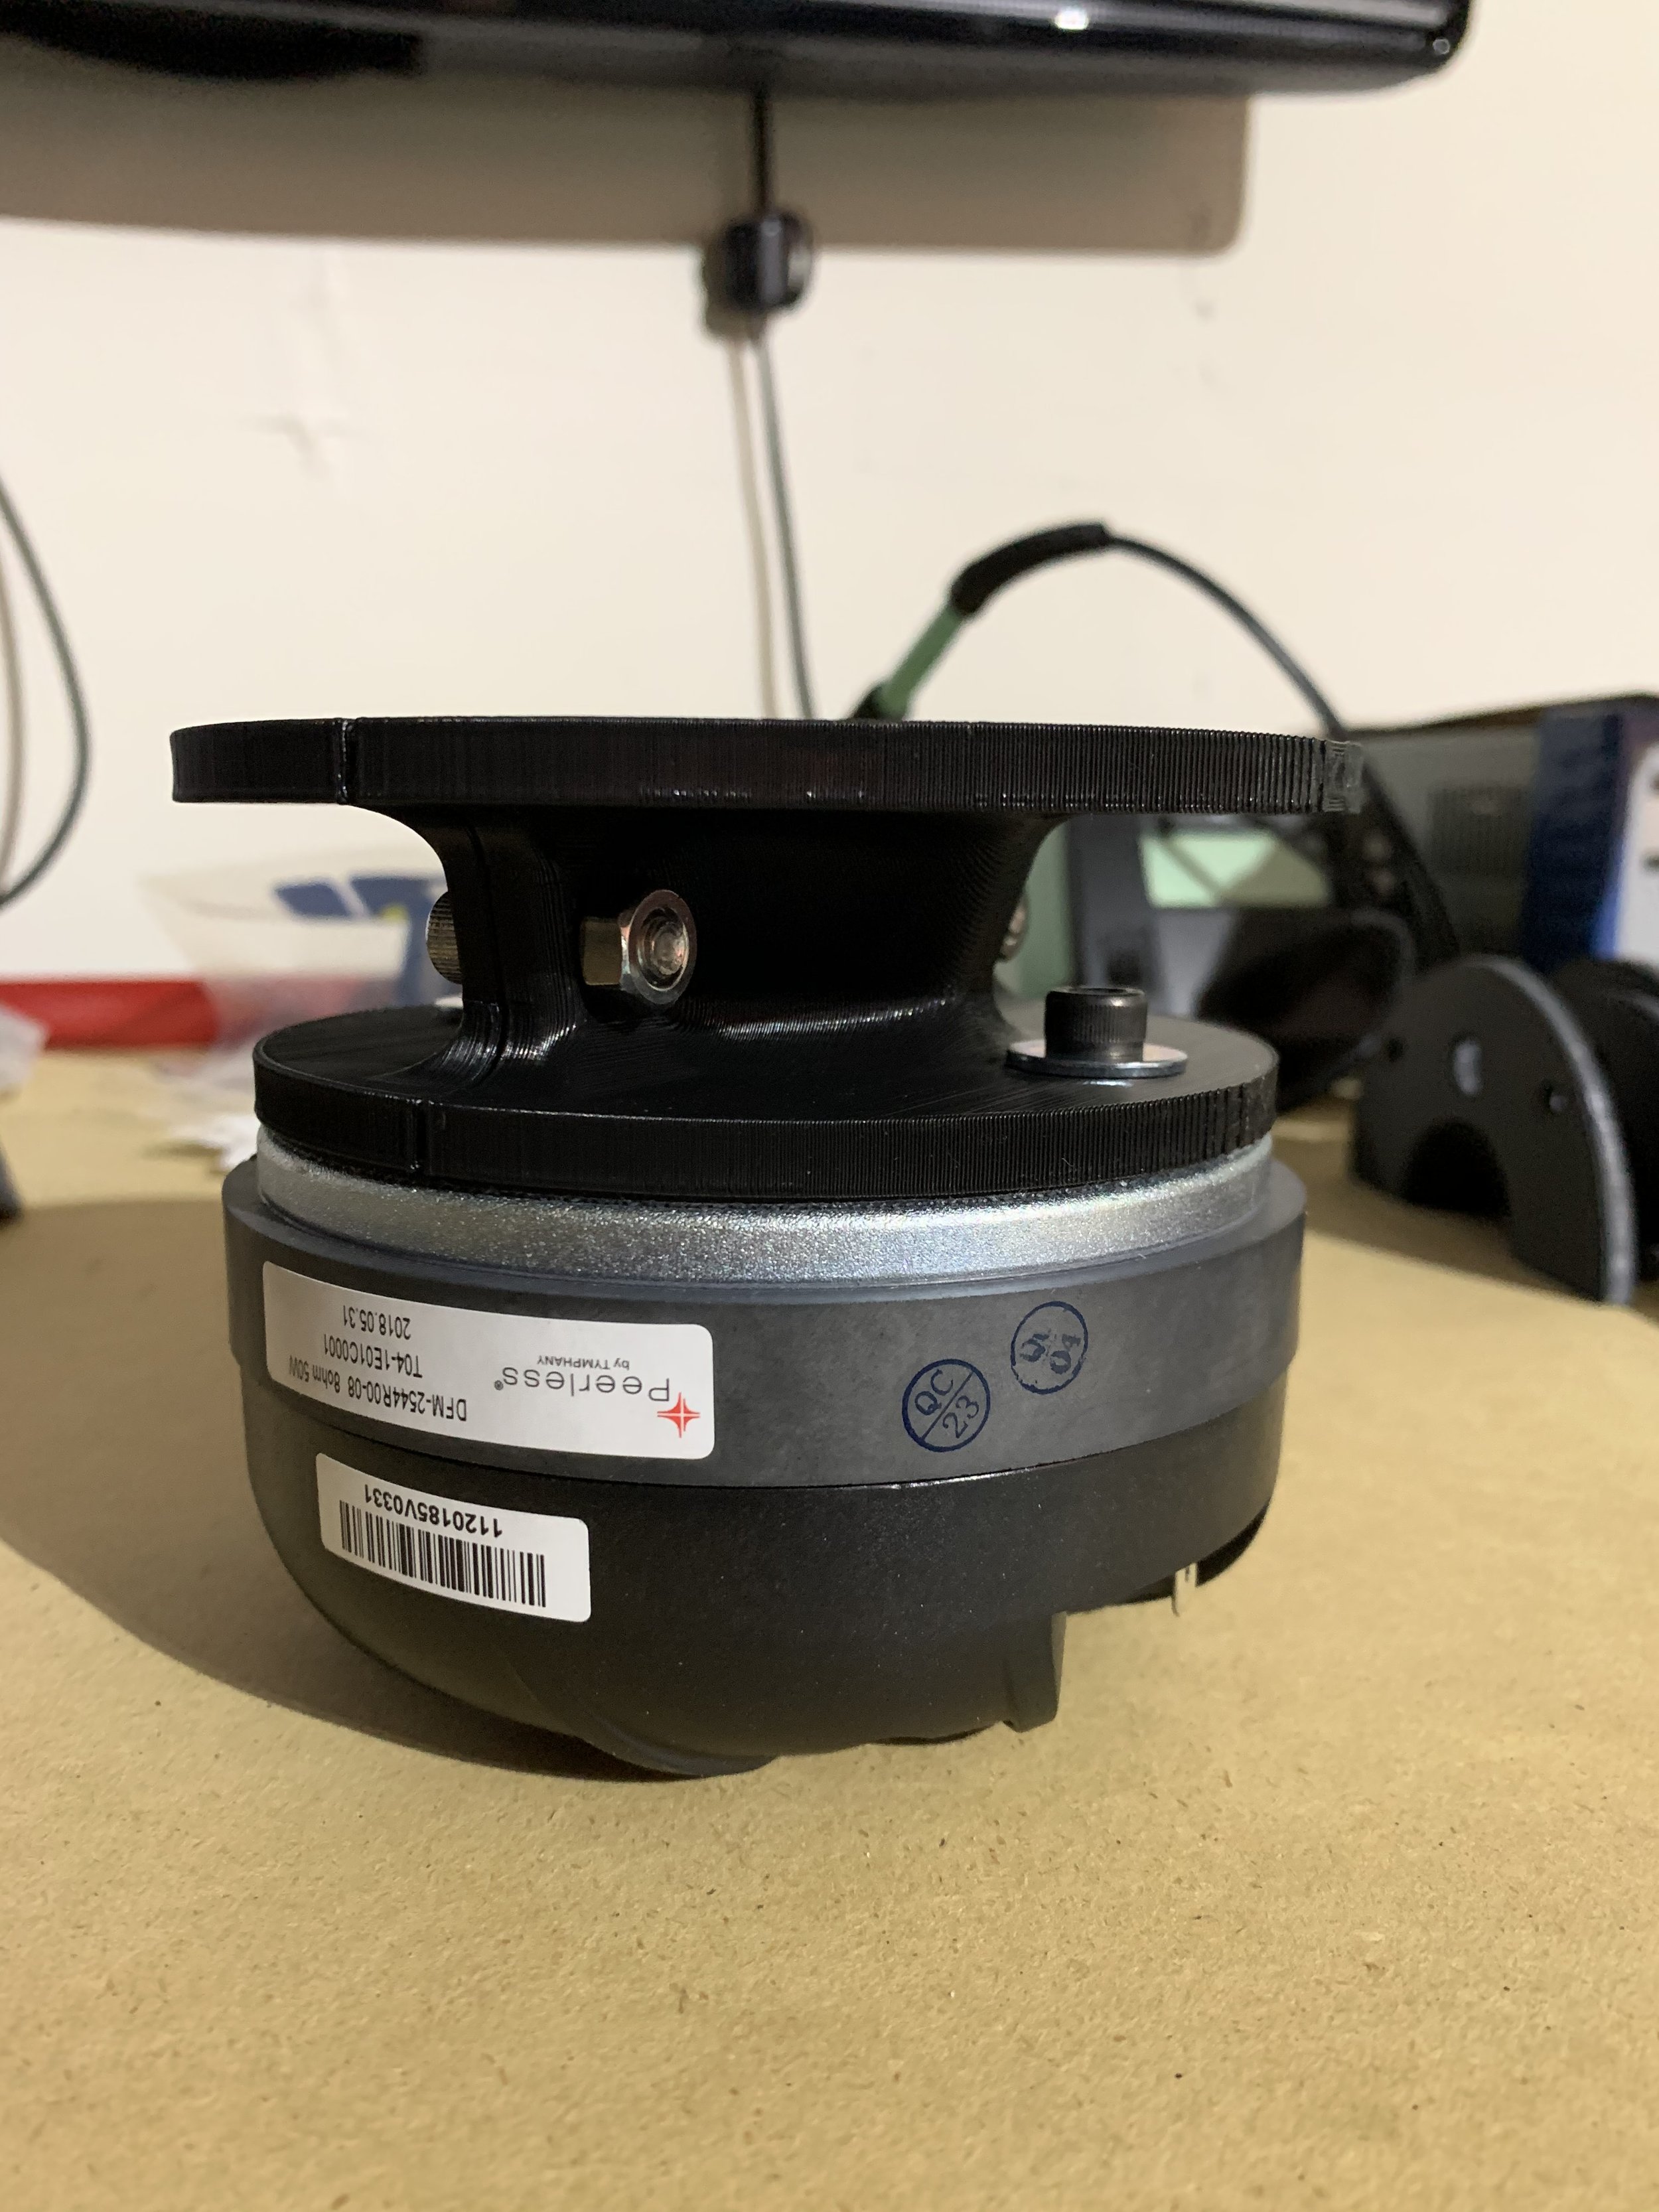
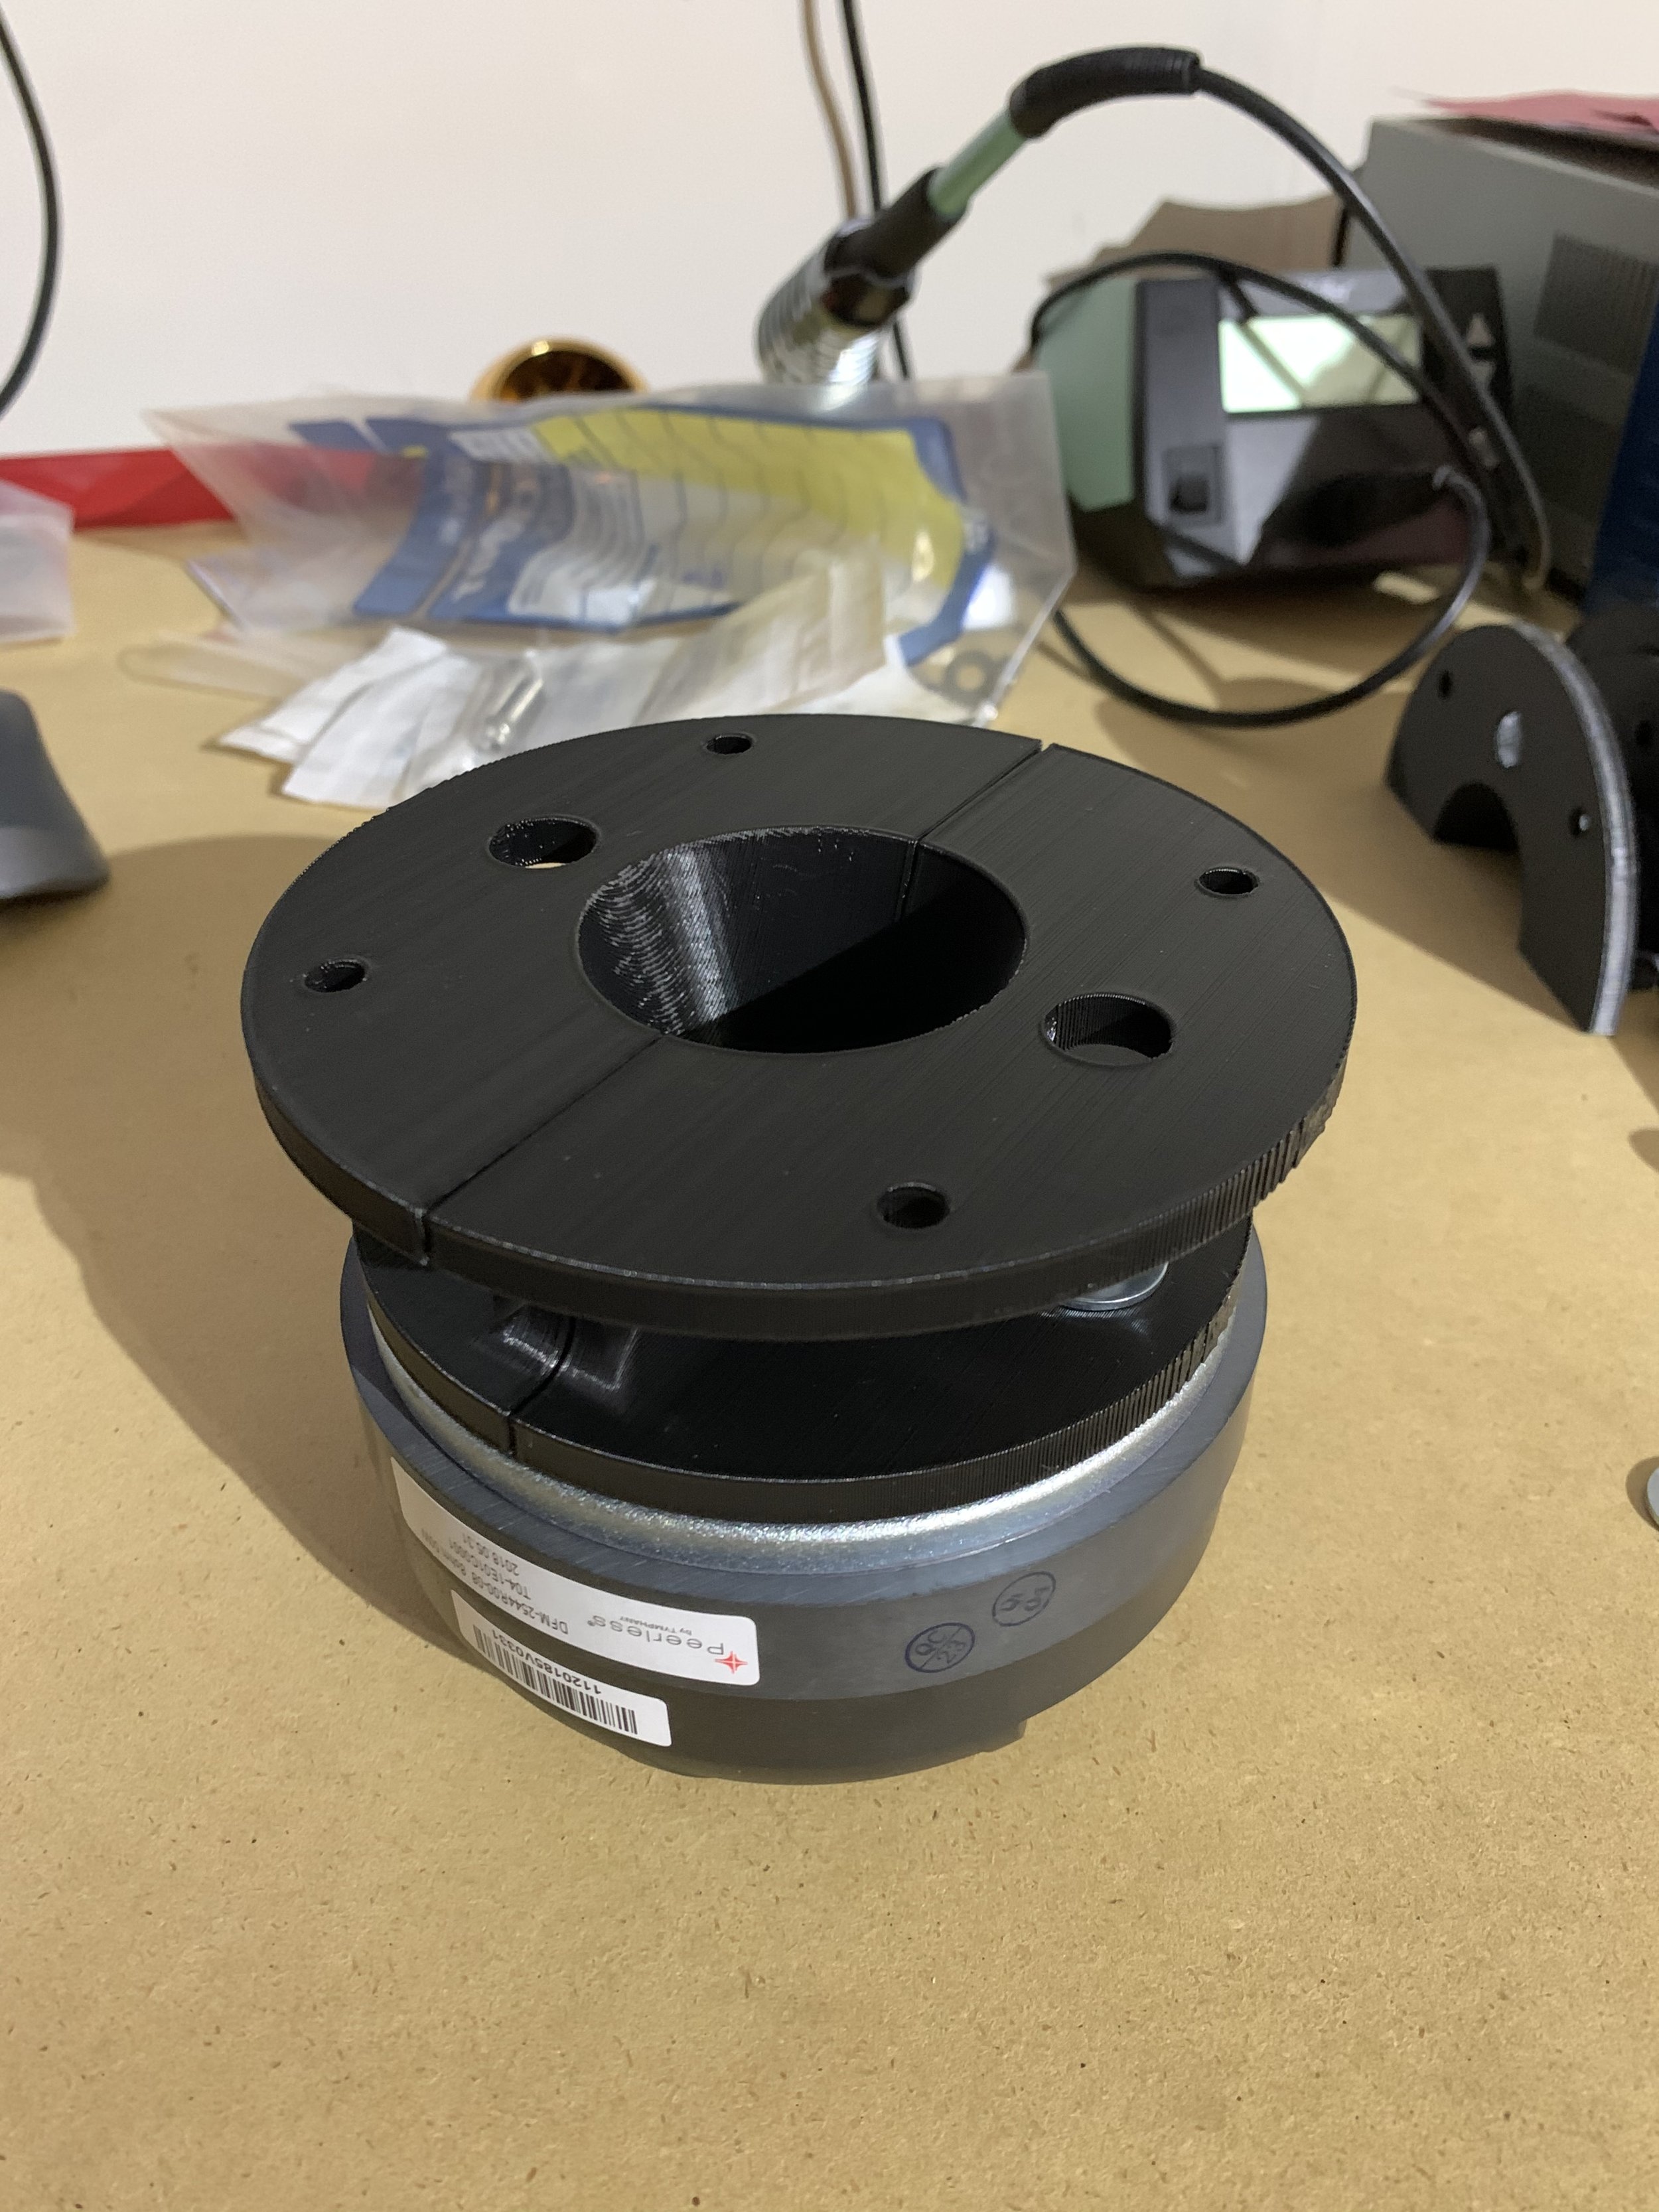
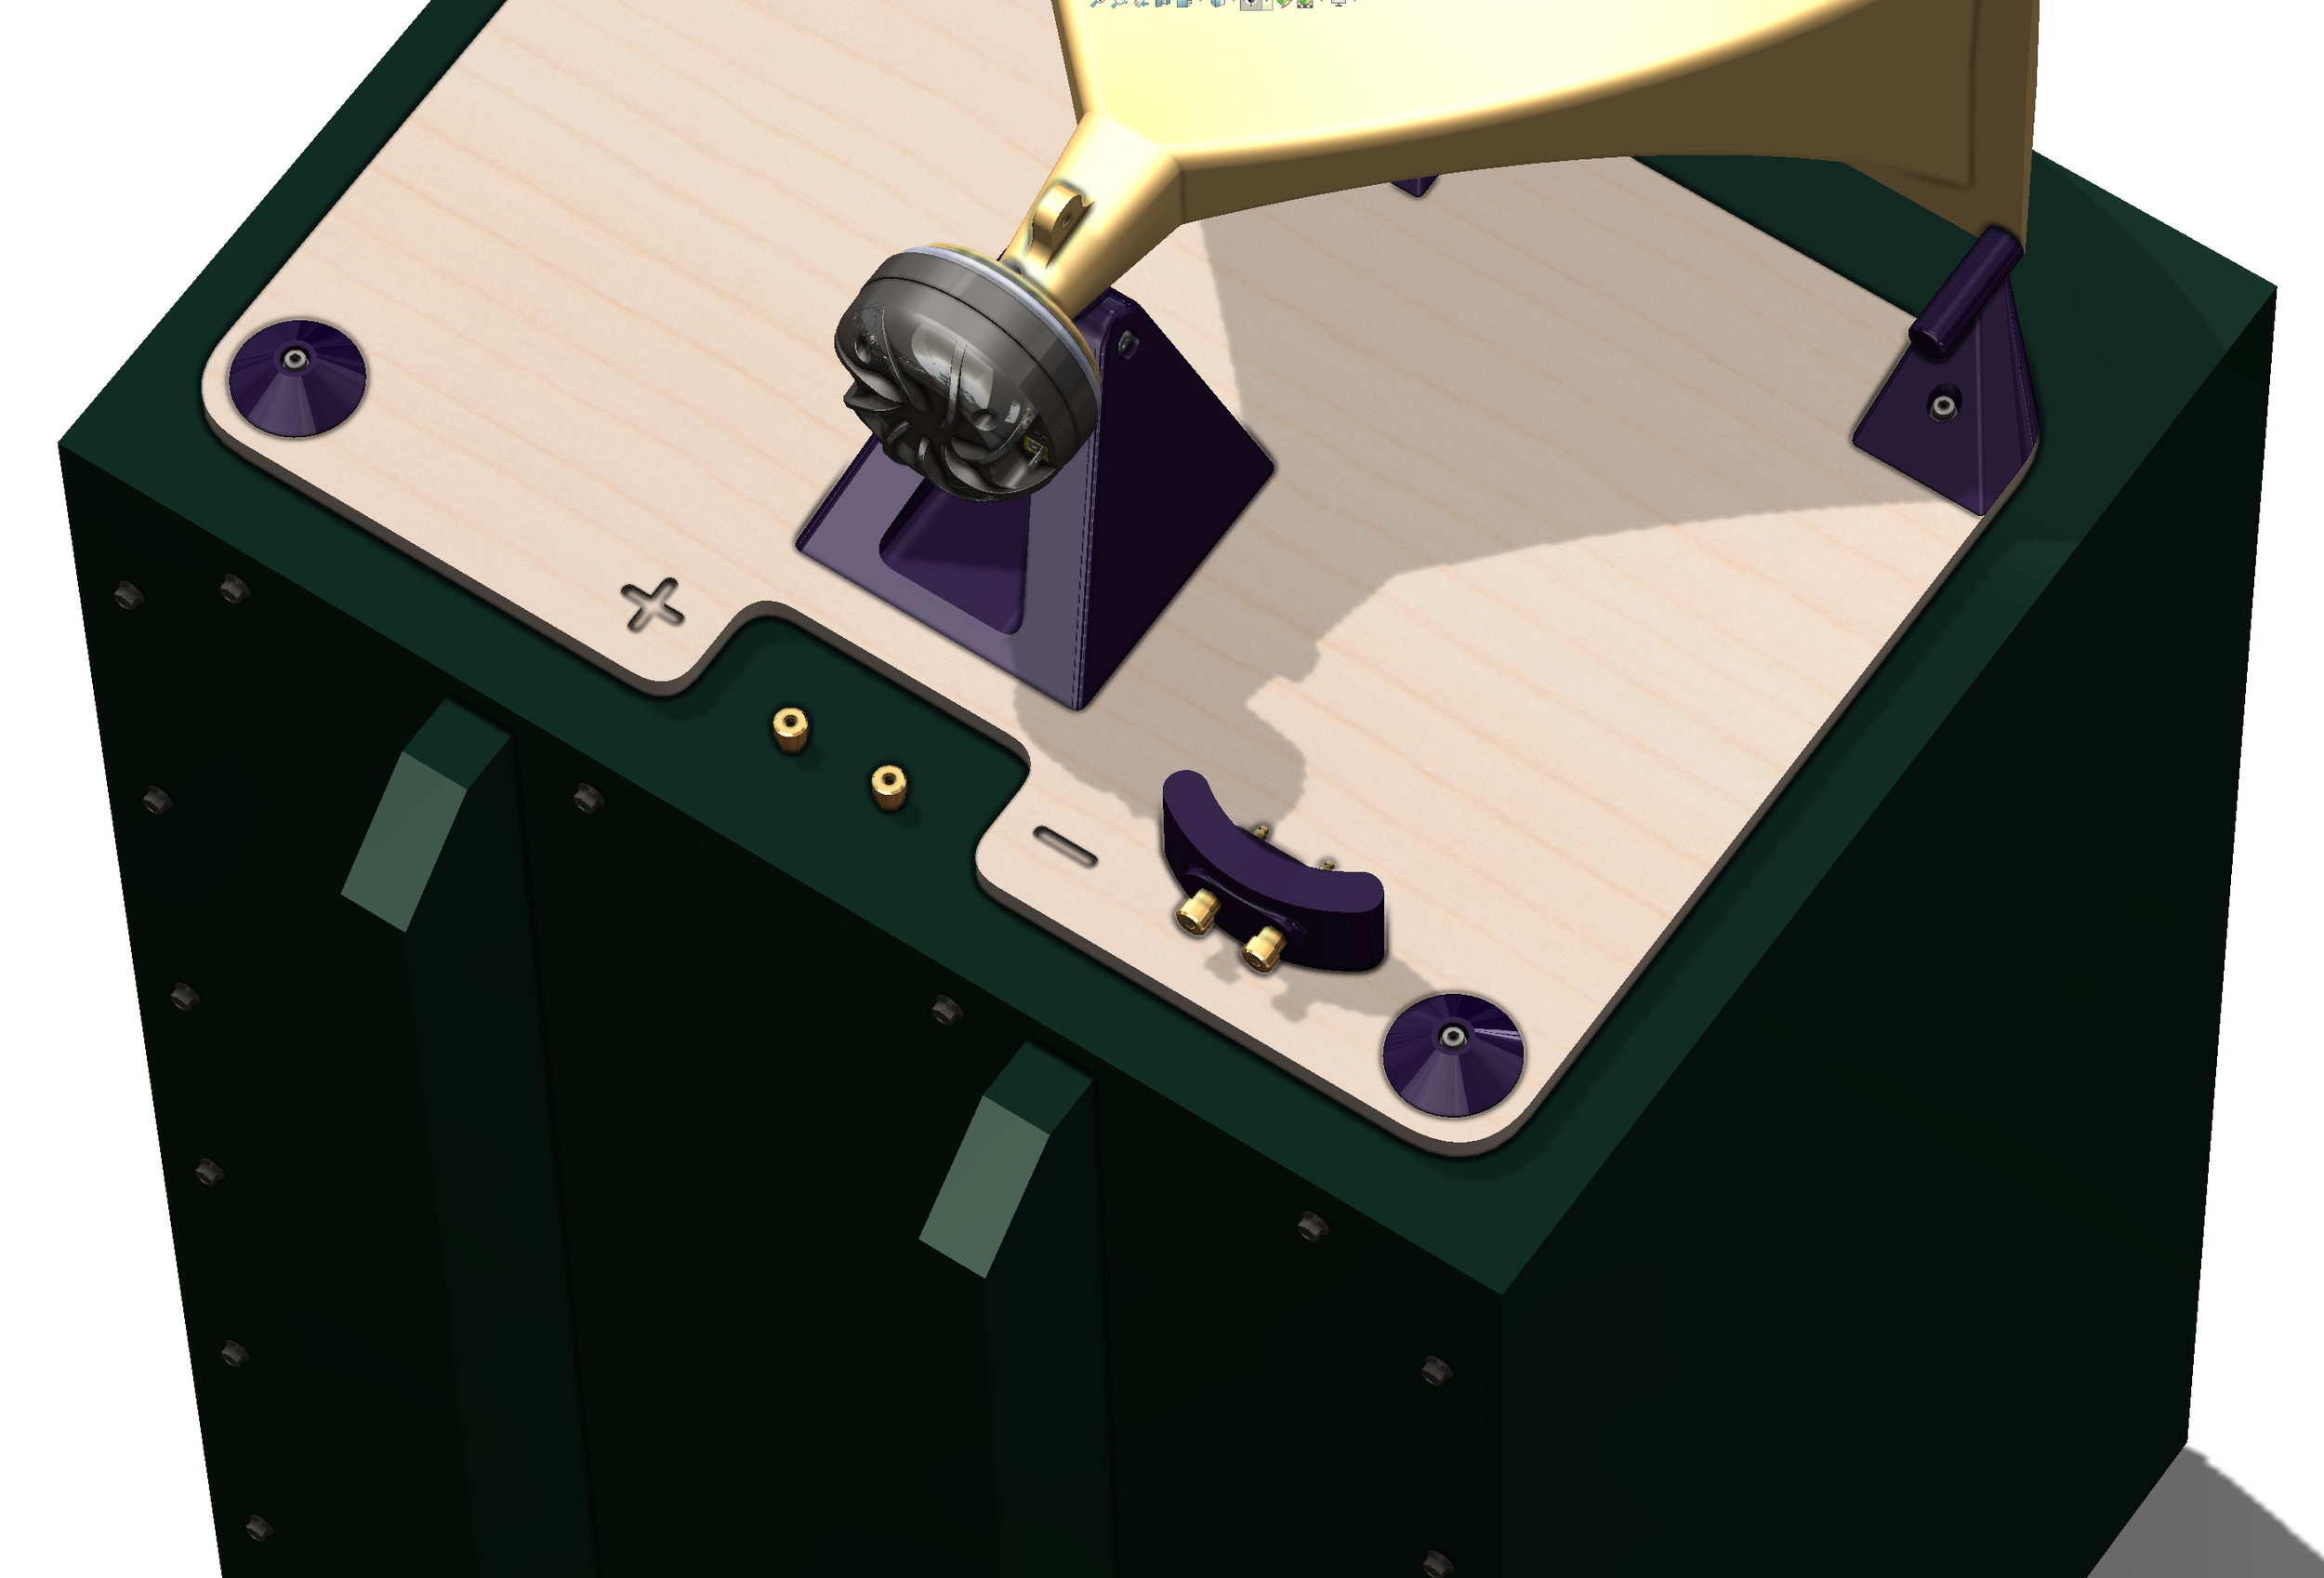
Now fully integrated into the audio industry professionally, I started to up my game with the A7s. First things fist, I added Tymphany Peerless transducers. The Selenium D220Ti was always harsh sounding to my ears so it was great to be able to put some Peerless DFM-2544s on after 3D printing a new adapter (available on downloads page) to mate them to the 2360. I also managed to get my hands on some very early builds of the new Peerless NCP-1540 woofers but I needed to swap in some spacers as they had so much excursion, they could potentially strike the inside baffle face. However that would come much later.
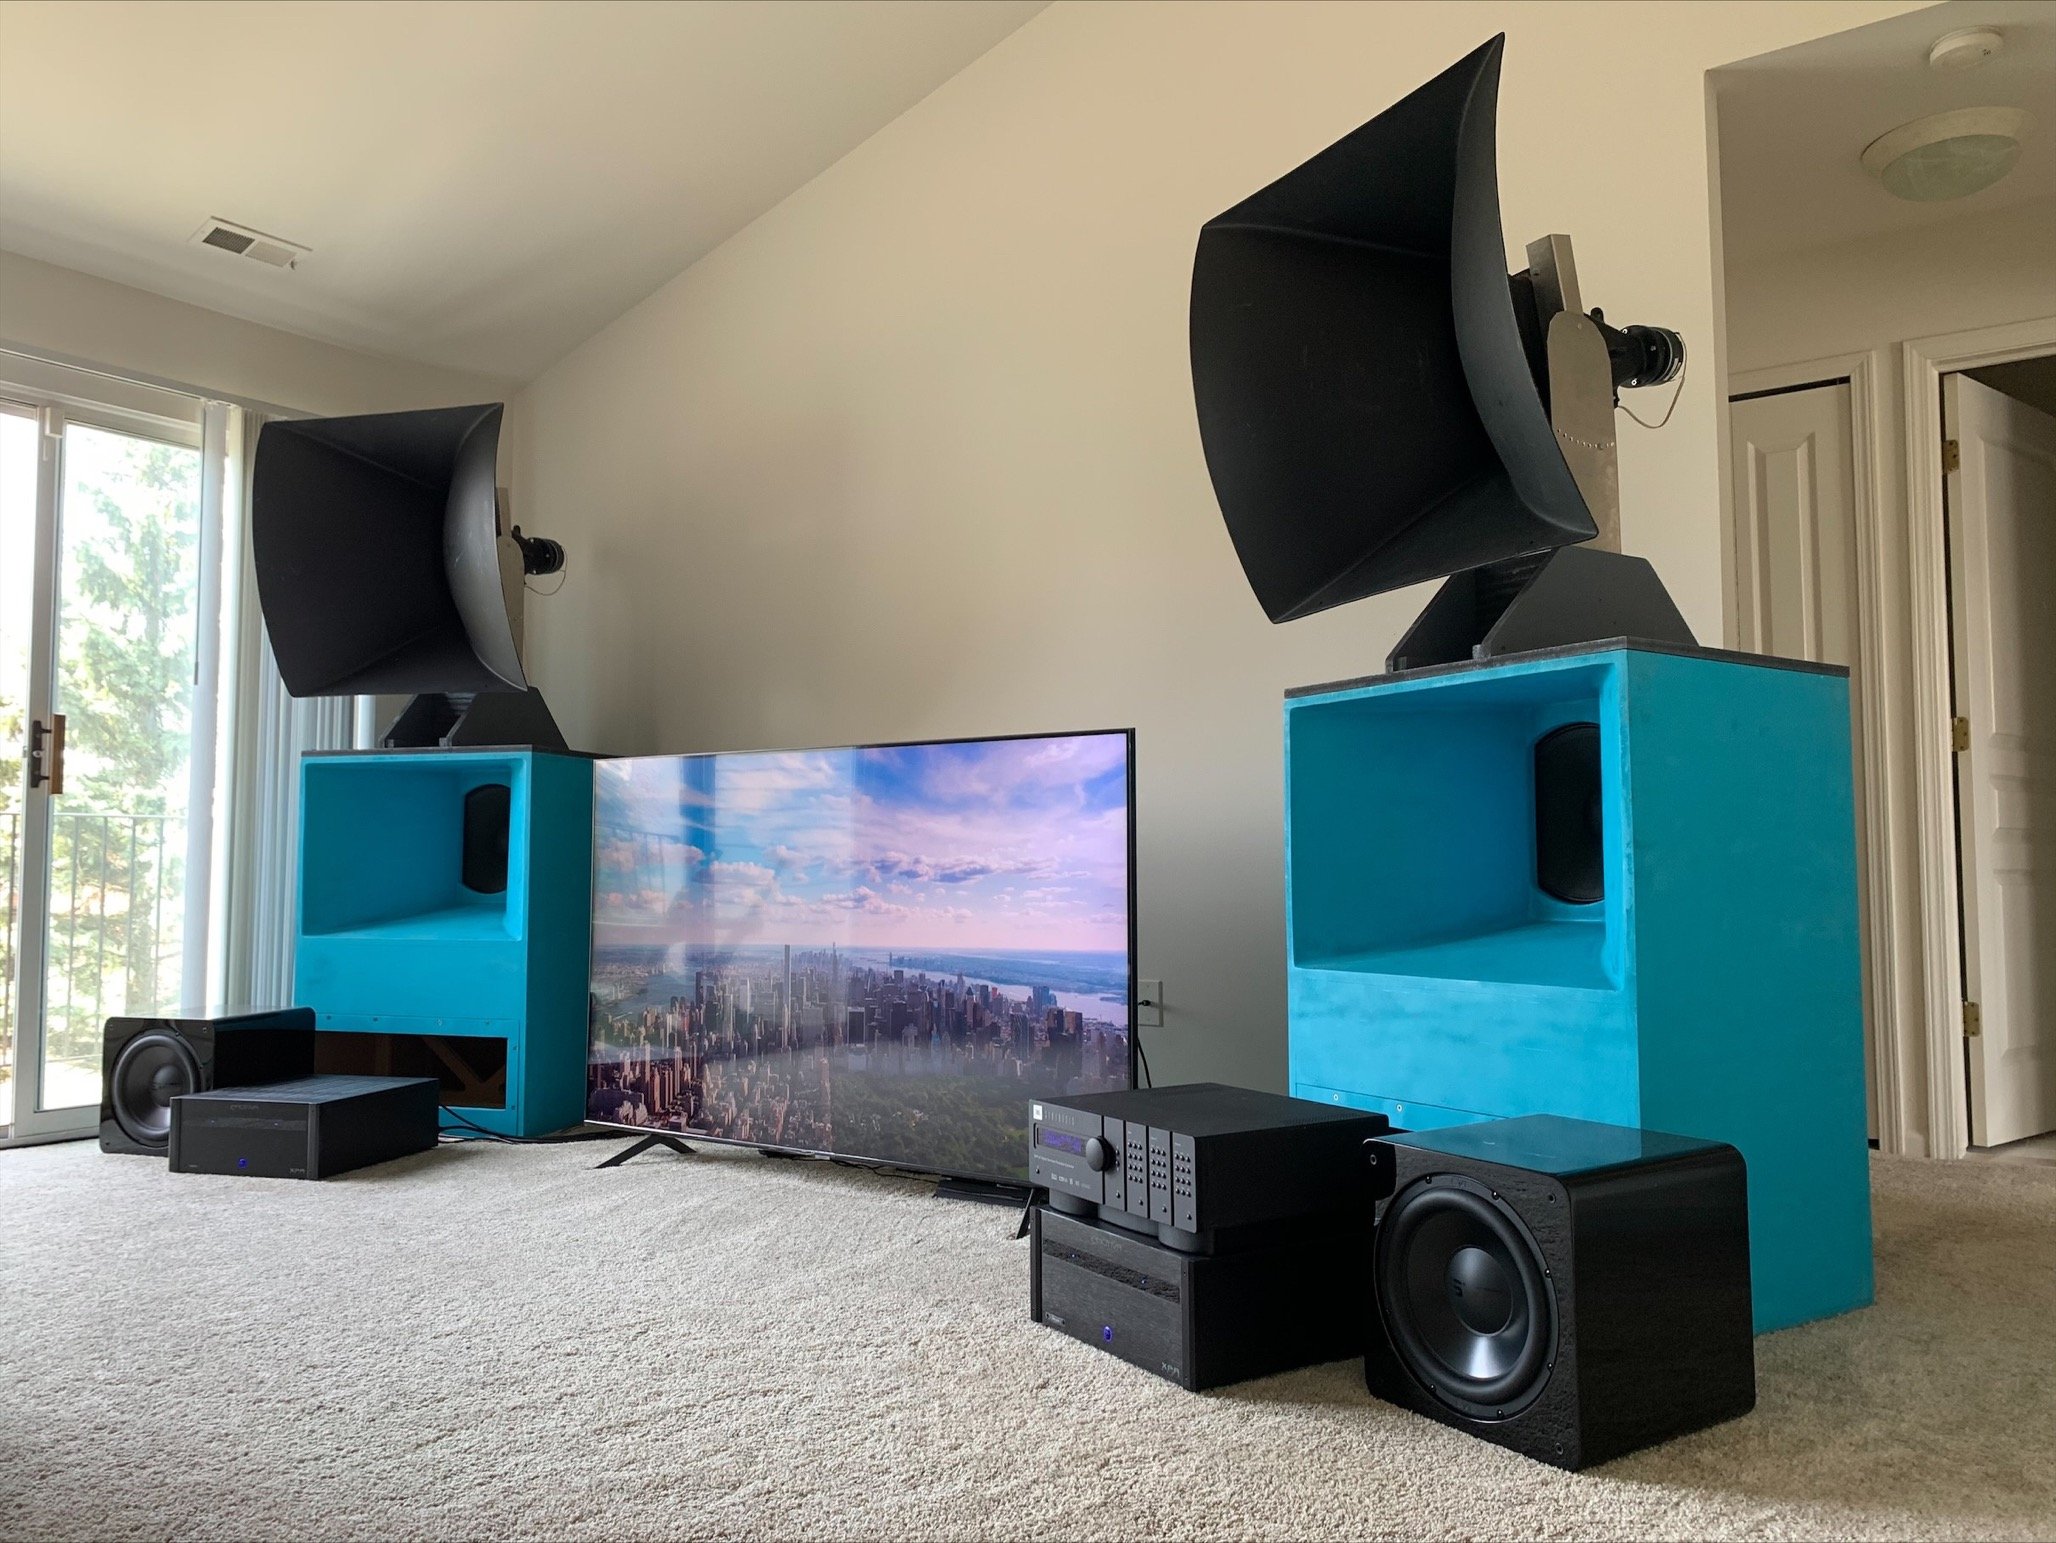
I sold the UREI-5235 and bought a mini DSP 2x4 so I could dive more deeply into the crossover, EQ and some delays to get the time-alignment dialed in. Also new was a pair of Emotiva XPA-2 amplifiers that displaced my old, temperamental Yamaha unit. Driving the system would be another piece of dream gear, a JBL Synthesis SDP-40. To round things out for a total tour-de-force system like this was a set of four SVS SB2000 Pro subwoofers, one for each corner of the room. The result was unreal. Watching movies would never be the same. This system had the greatest dynamics I have ever experienced.
While not completely “unfortunate”, life has thrown some more curveballs and moved me around the planet again causing the me to put the A7’s back into storage. If I find the time to dive back in (now that they have those kickass Peerless woofers installed) and put them into use somewhere, I will add some updates here. But for now, that’s all!
2025 Update - the sprint to ‘finish’ these units.
A follow up section to the massive saga of my A7s. Many threads combine to yield the final result so this may be a long write up.
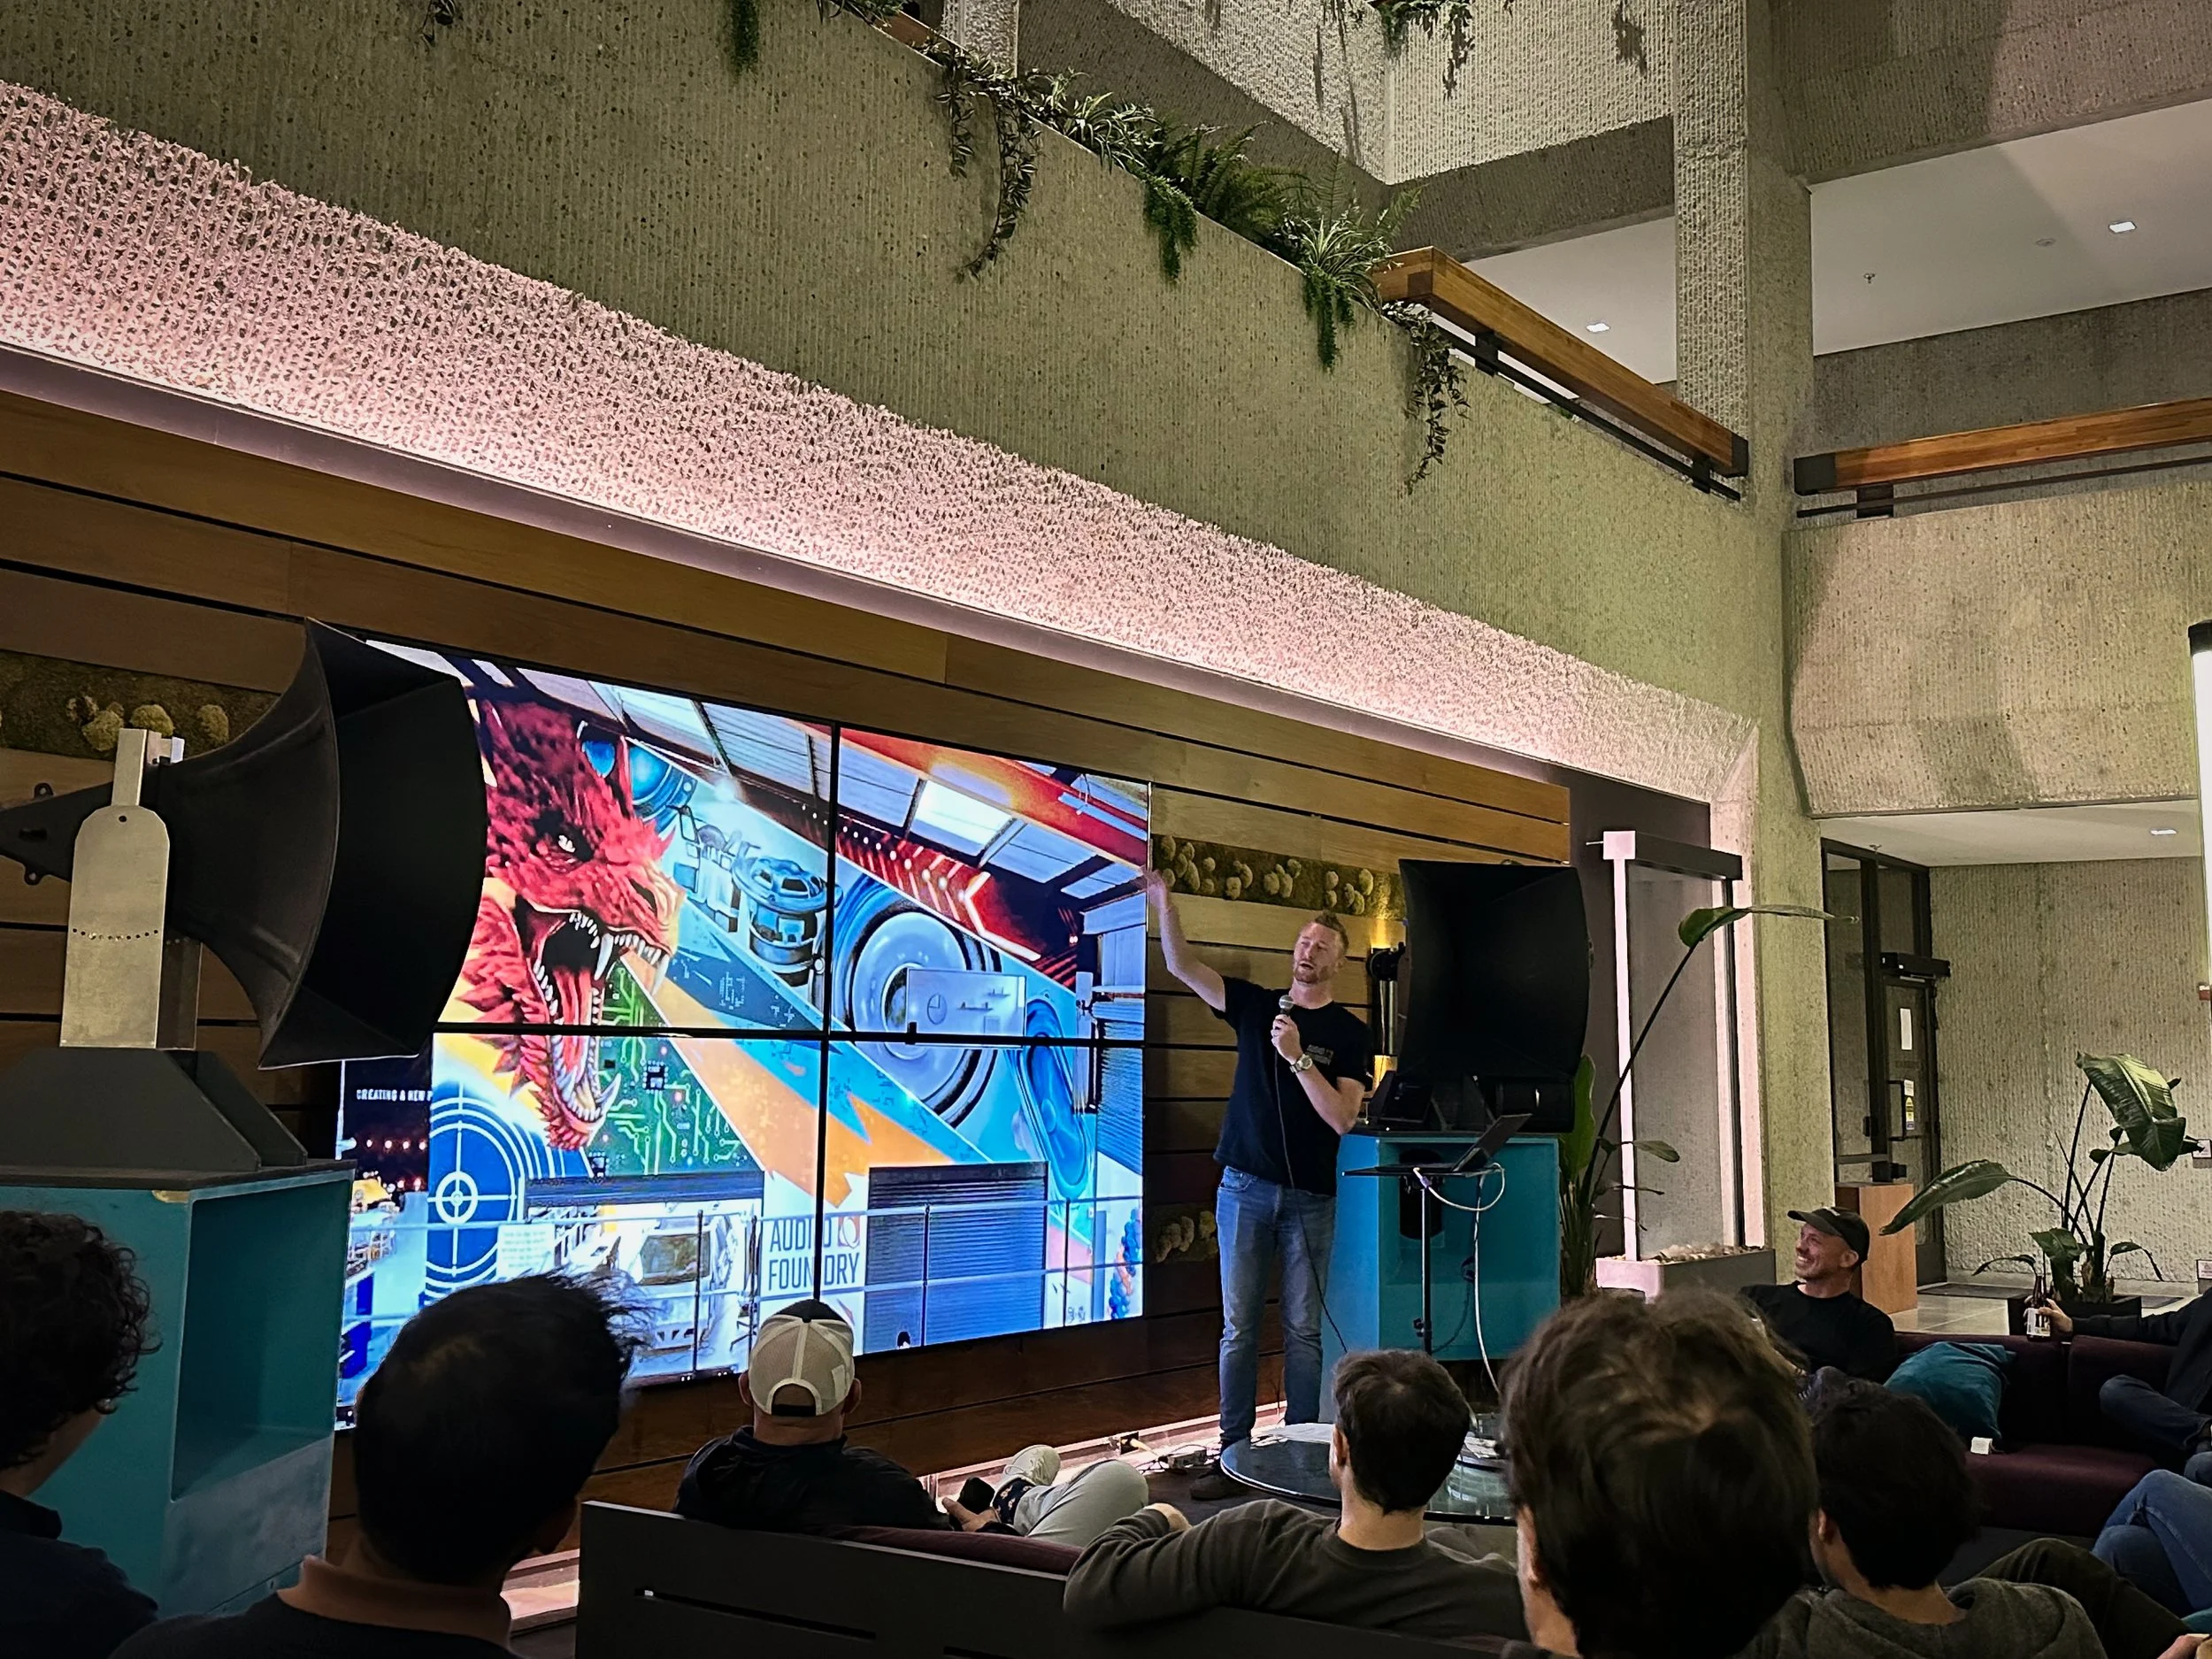
Presenting a teardown with your friends is a ton of fun - highly recommended.
Way back in April of 2025 I volunteered to host a teardown event at my office where we did a deep dive into some wild new consumer audio products. This social, happy hour-style networking teardown hangout was a collaboration between the local hardware community, a few of my colleagues and myself.
Working for an audio hardware company, we obviously needed some speakers to play background tunes on and the idea to use my A7s (which are stored on site) weirdly came from a colleague of mine and not myself. However after short consideration of alternatives and the fact that we wanted something interesting and less typical, we decided to make the A7s ready for the party. My main collaborator in this story is a talented acoustics engineer and was able to perform a quick and dirty tune so we could feed our ears with decent sounds.
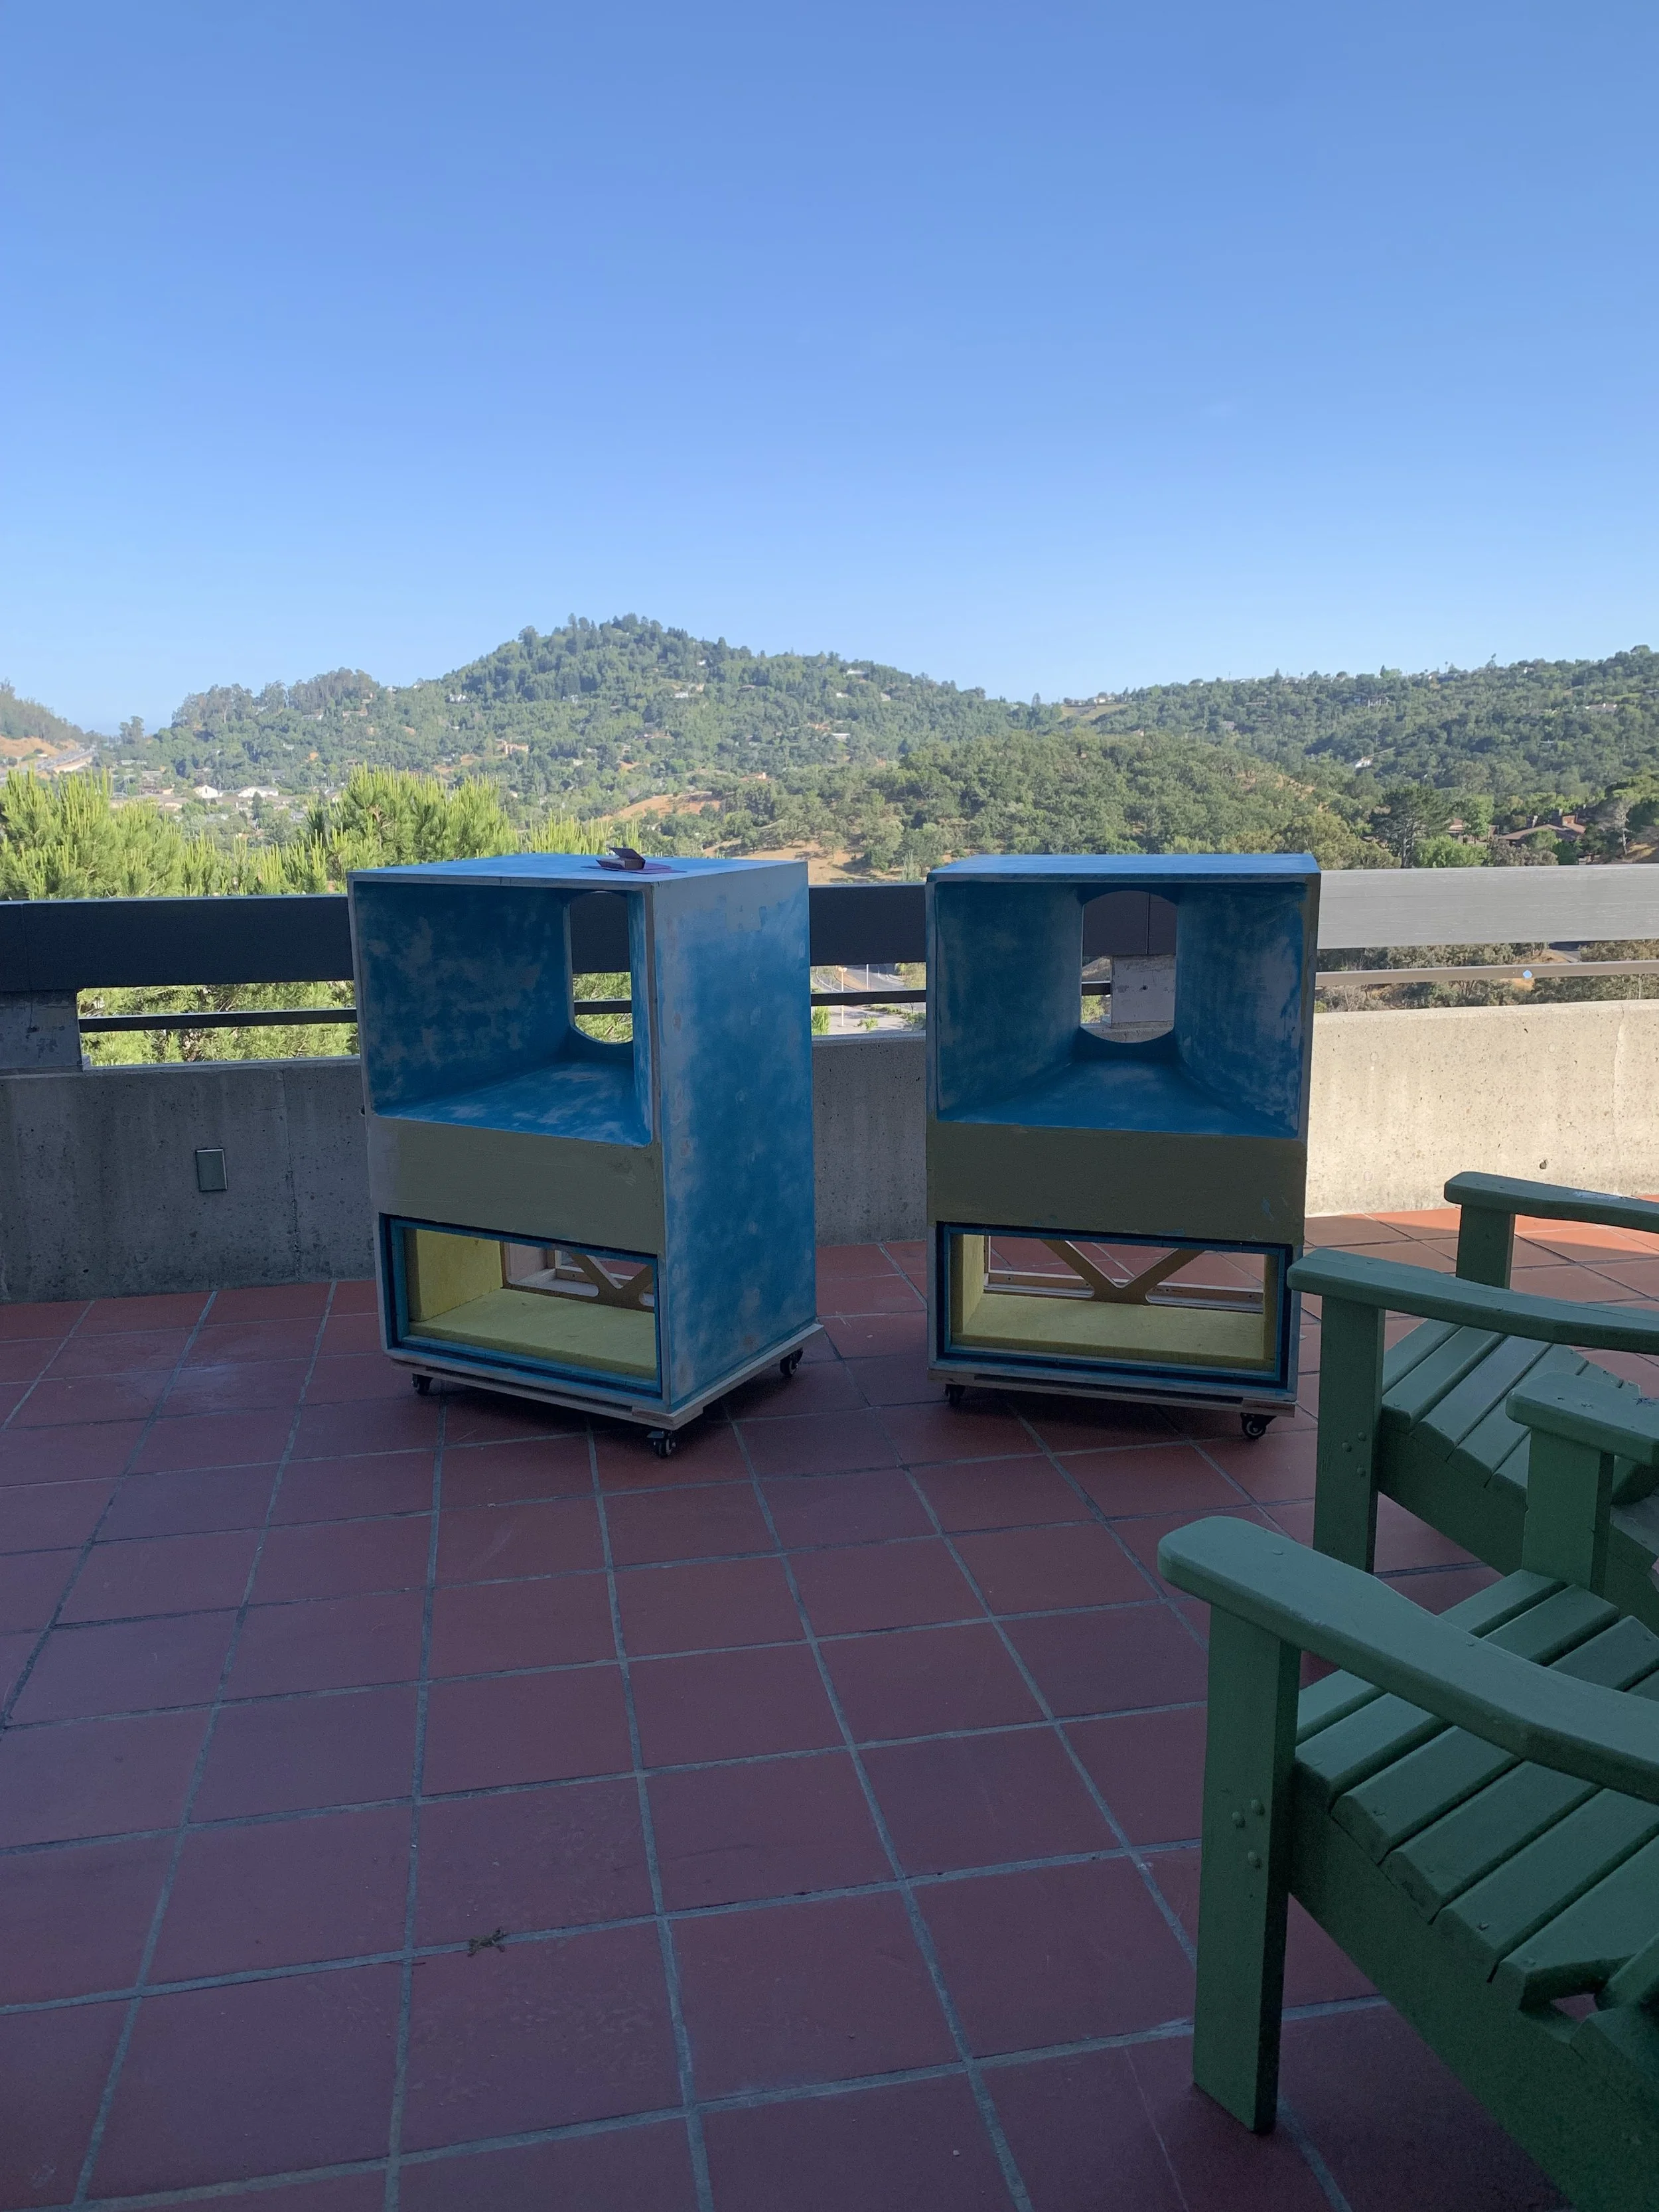
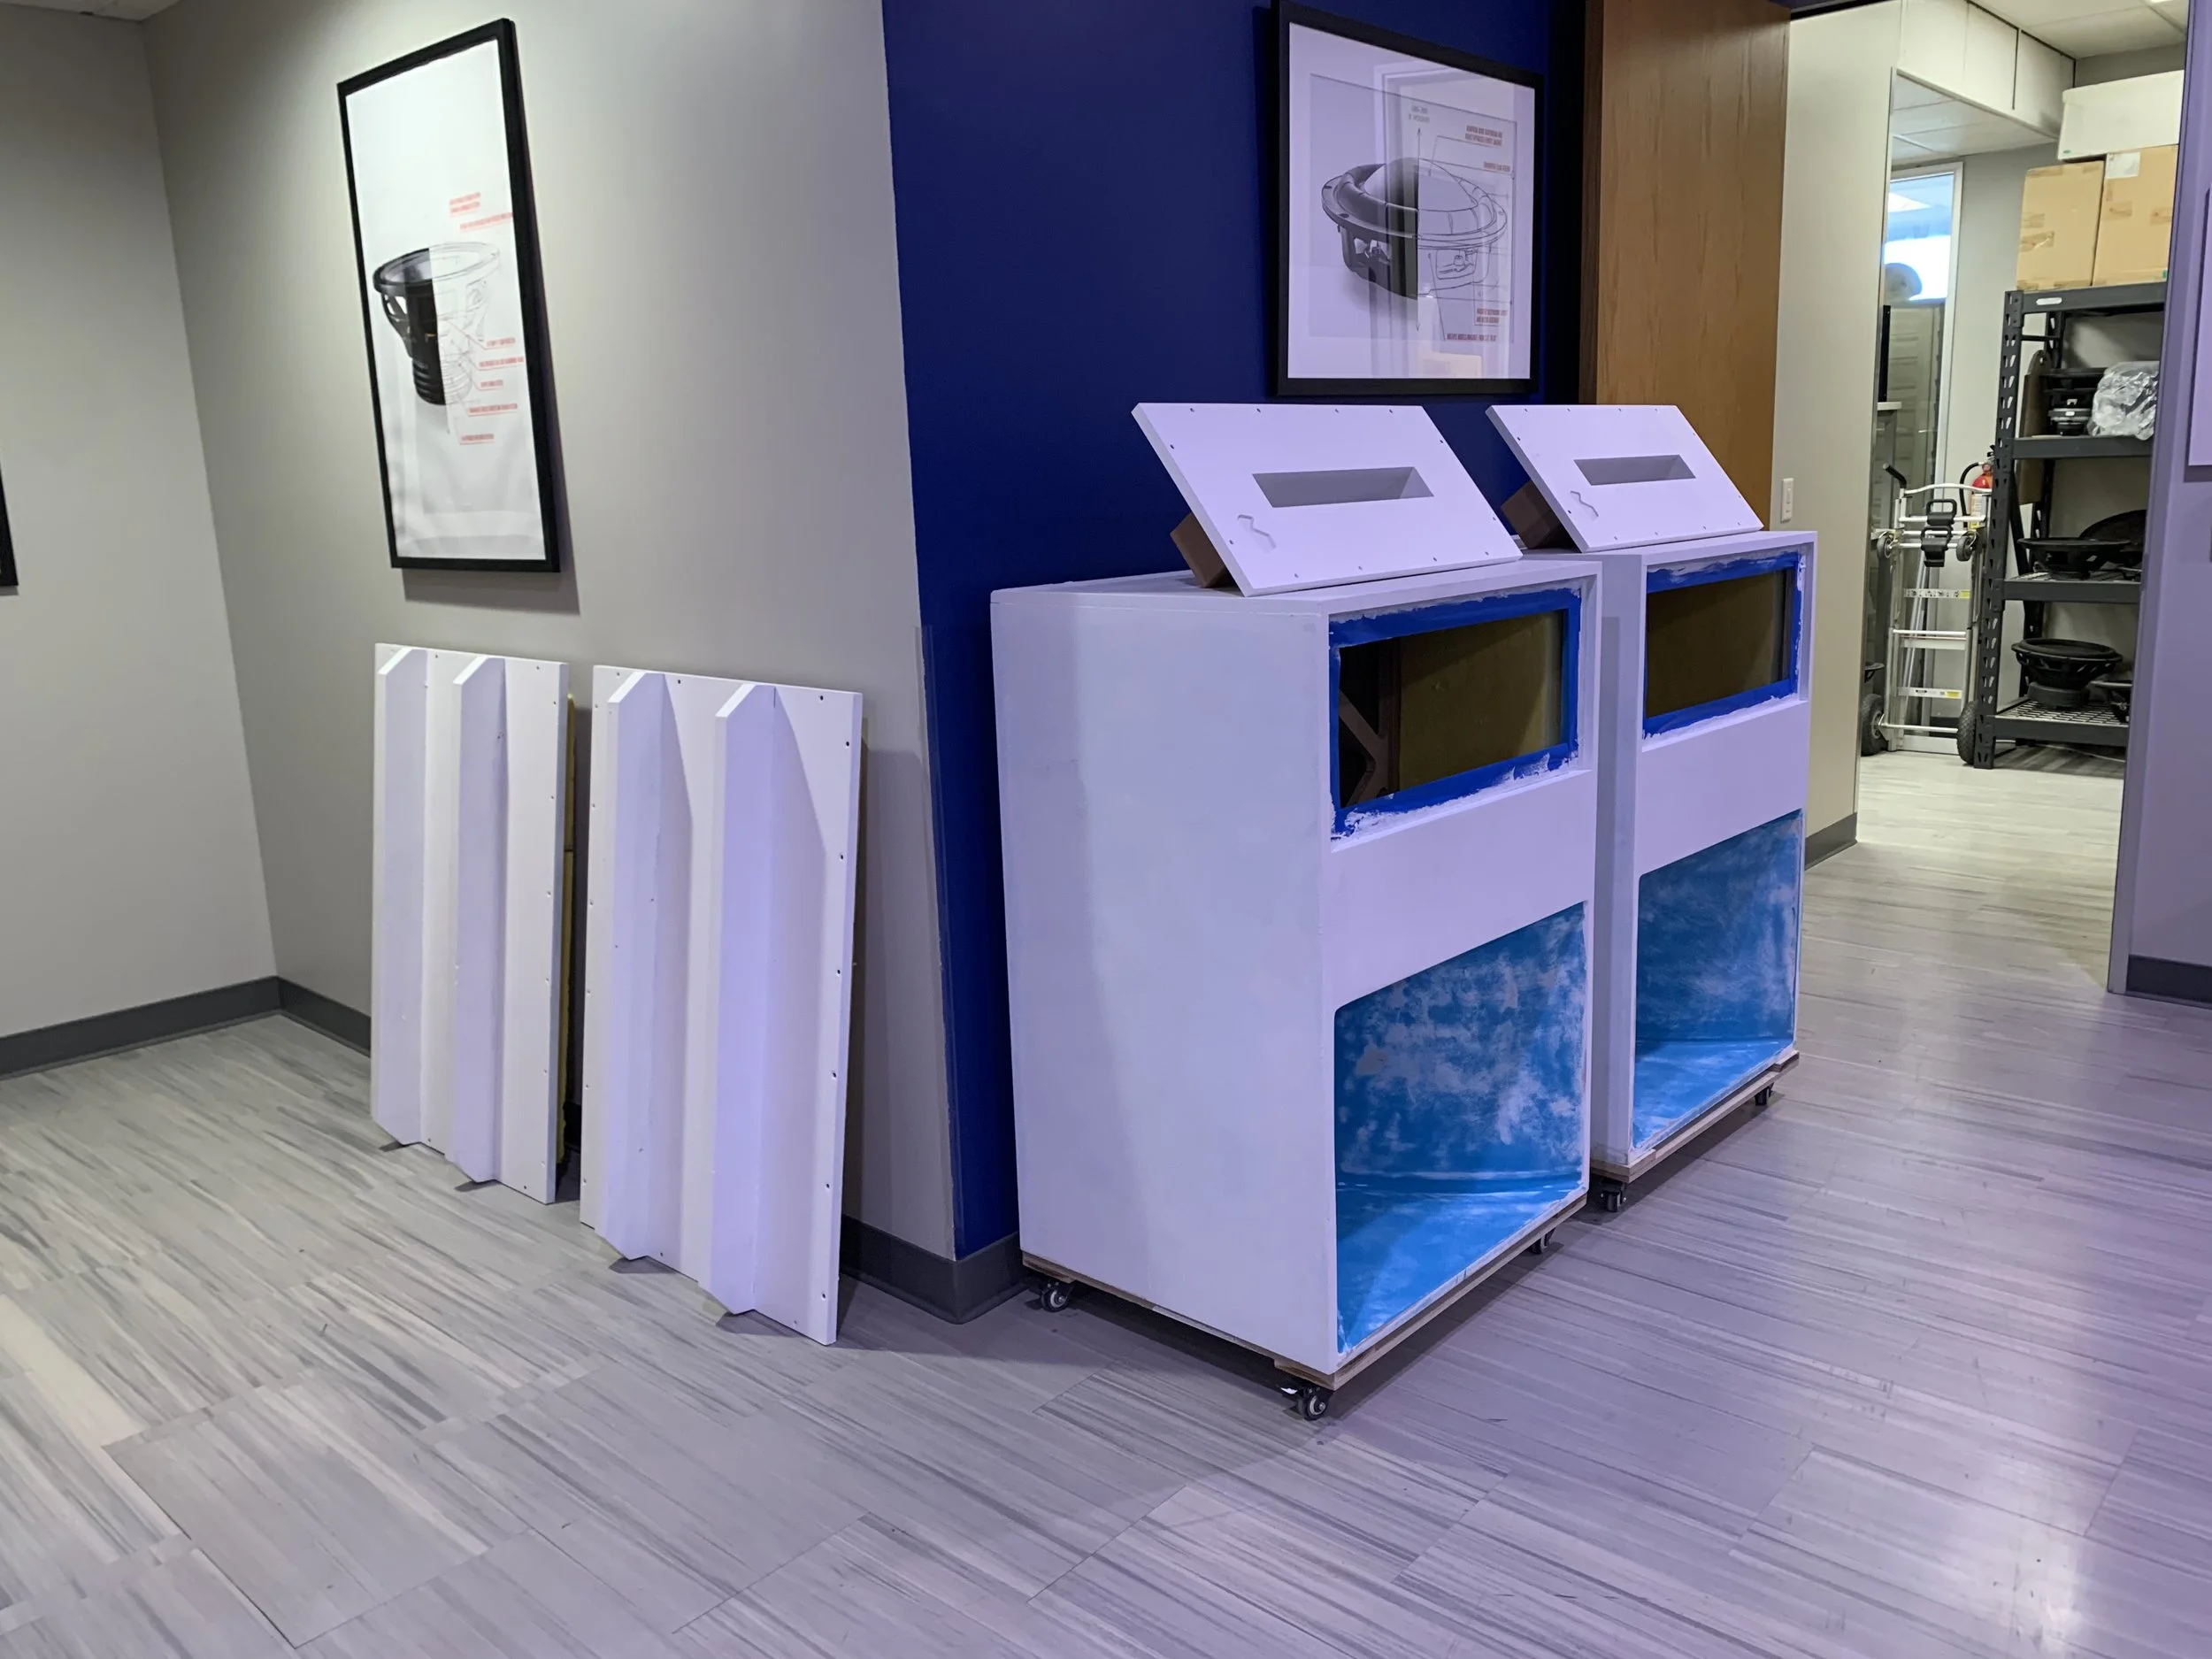
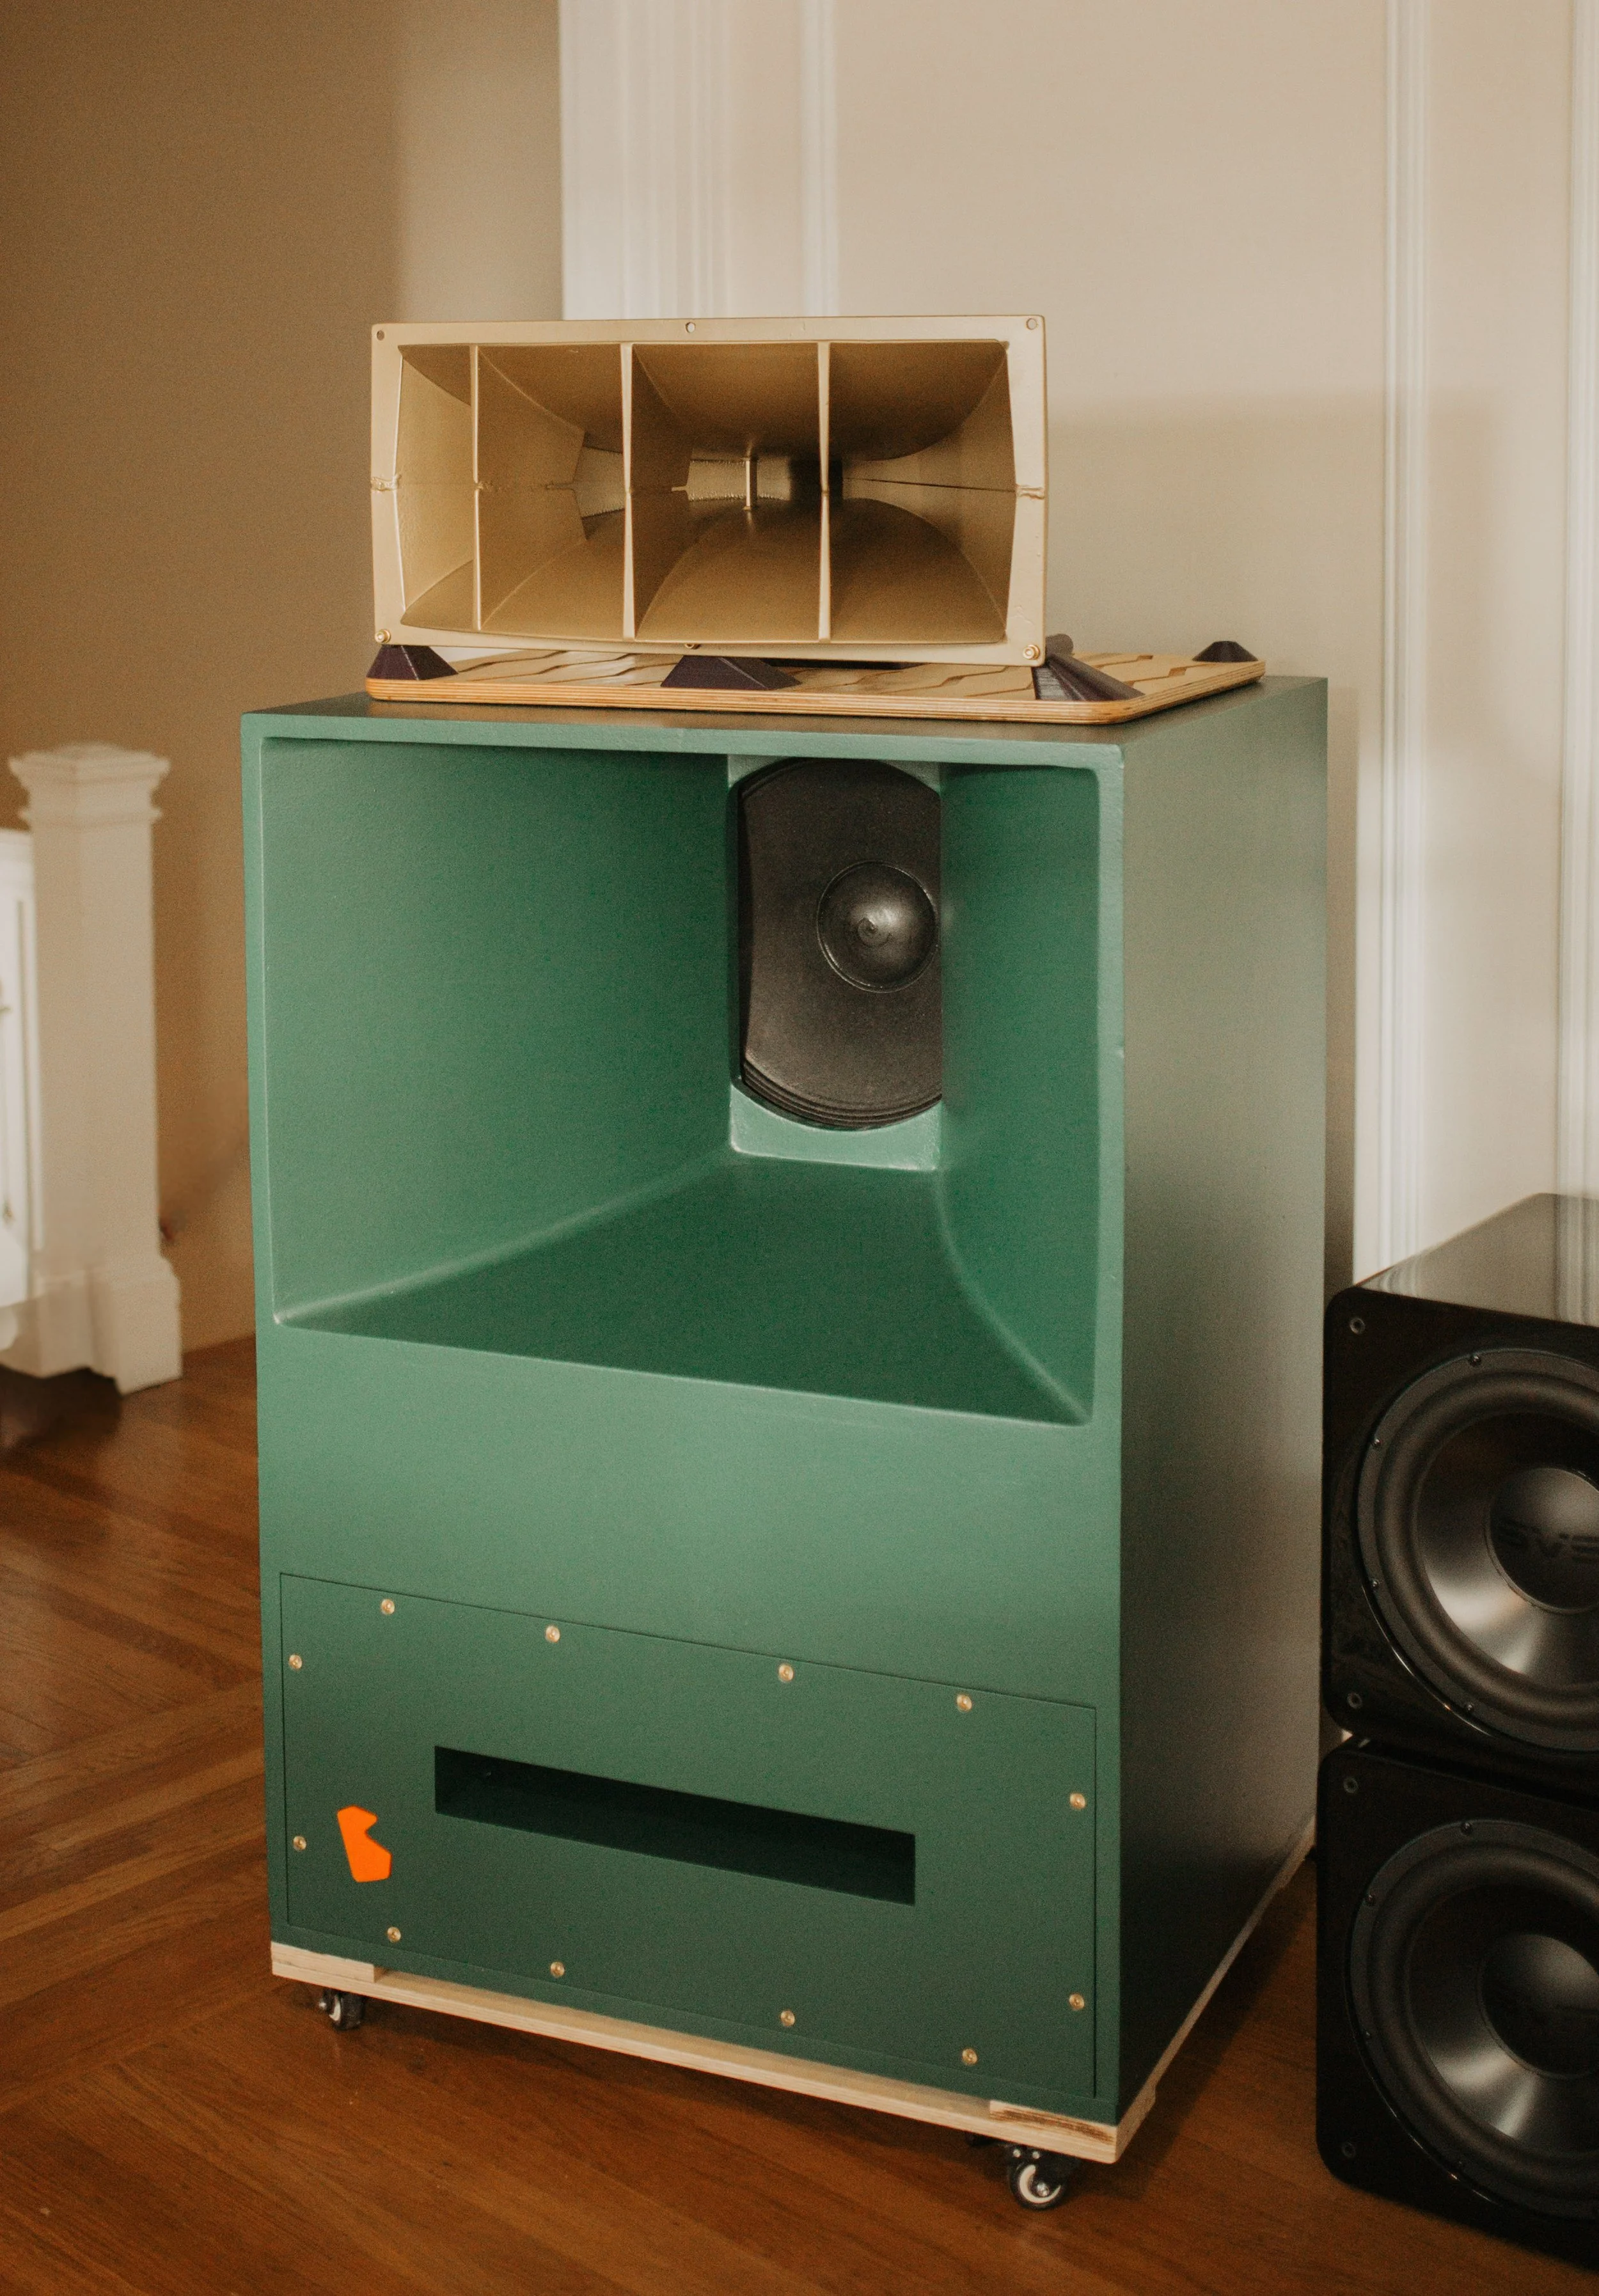
The important part of this story is that dusting off the A7s was very fun and reinvigorated my interest in the project. Not long after our teardown event, the closet I was borrowing to store these speakers in was no longer available to me and I needed to do something with them. It was time to bring them home. So I needed to ‘finish’ them. What does ‘finish’ them mean? Well, basically the entire speaker needed to be overhauled, beautified and re-engineered. They had the wrong horns, were pretty hideous (yes, I finally admit it) and needed to be tightened up acoustically since they were using Peerless parts and would go into a domestic environment.
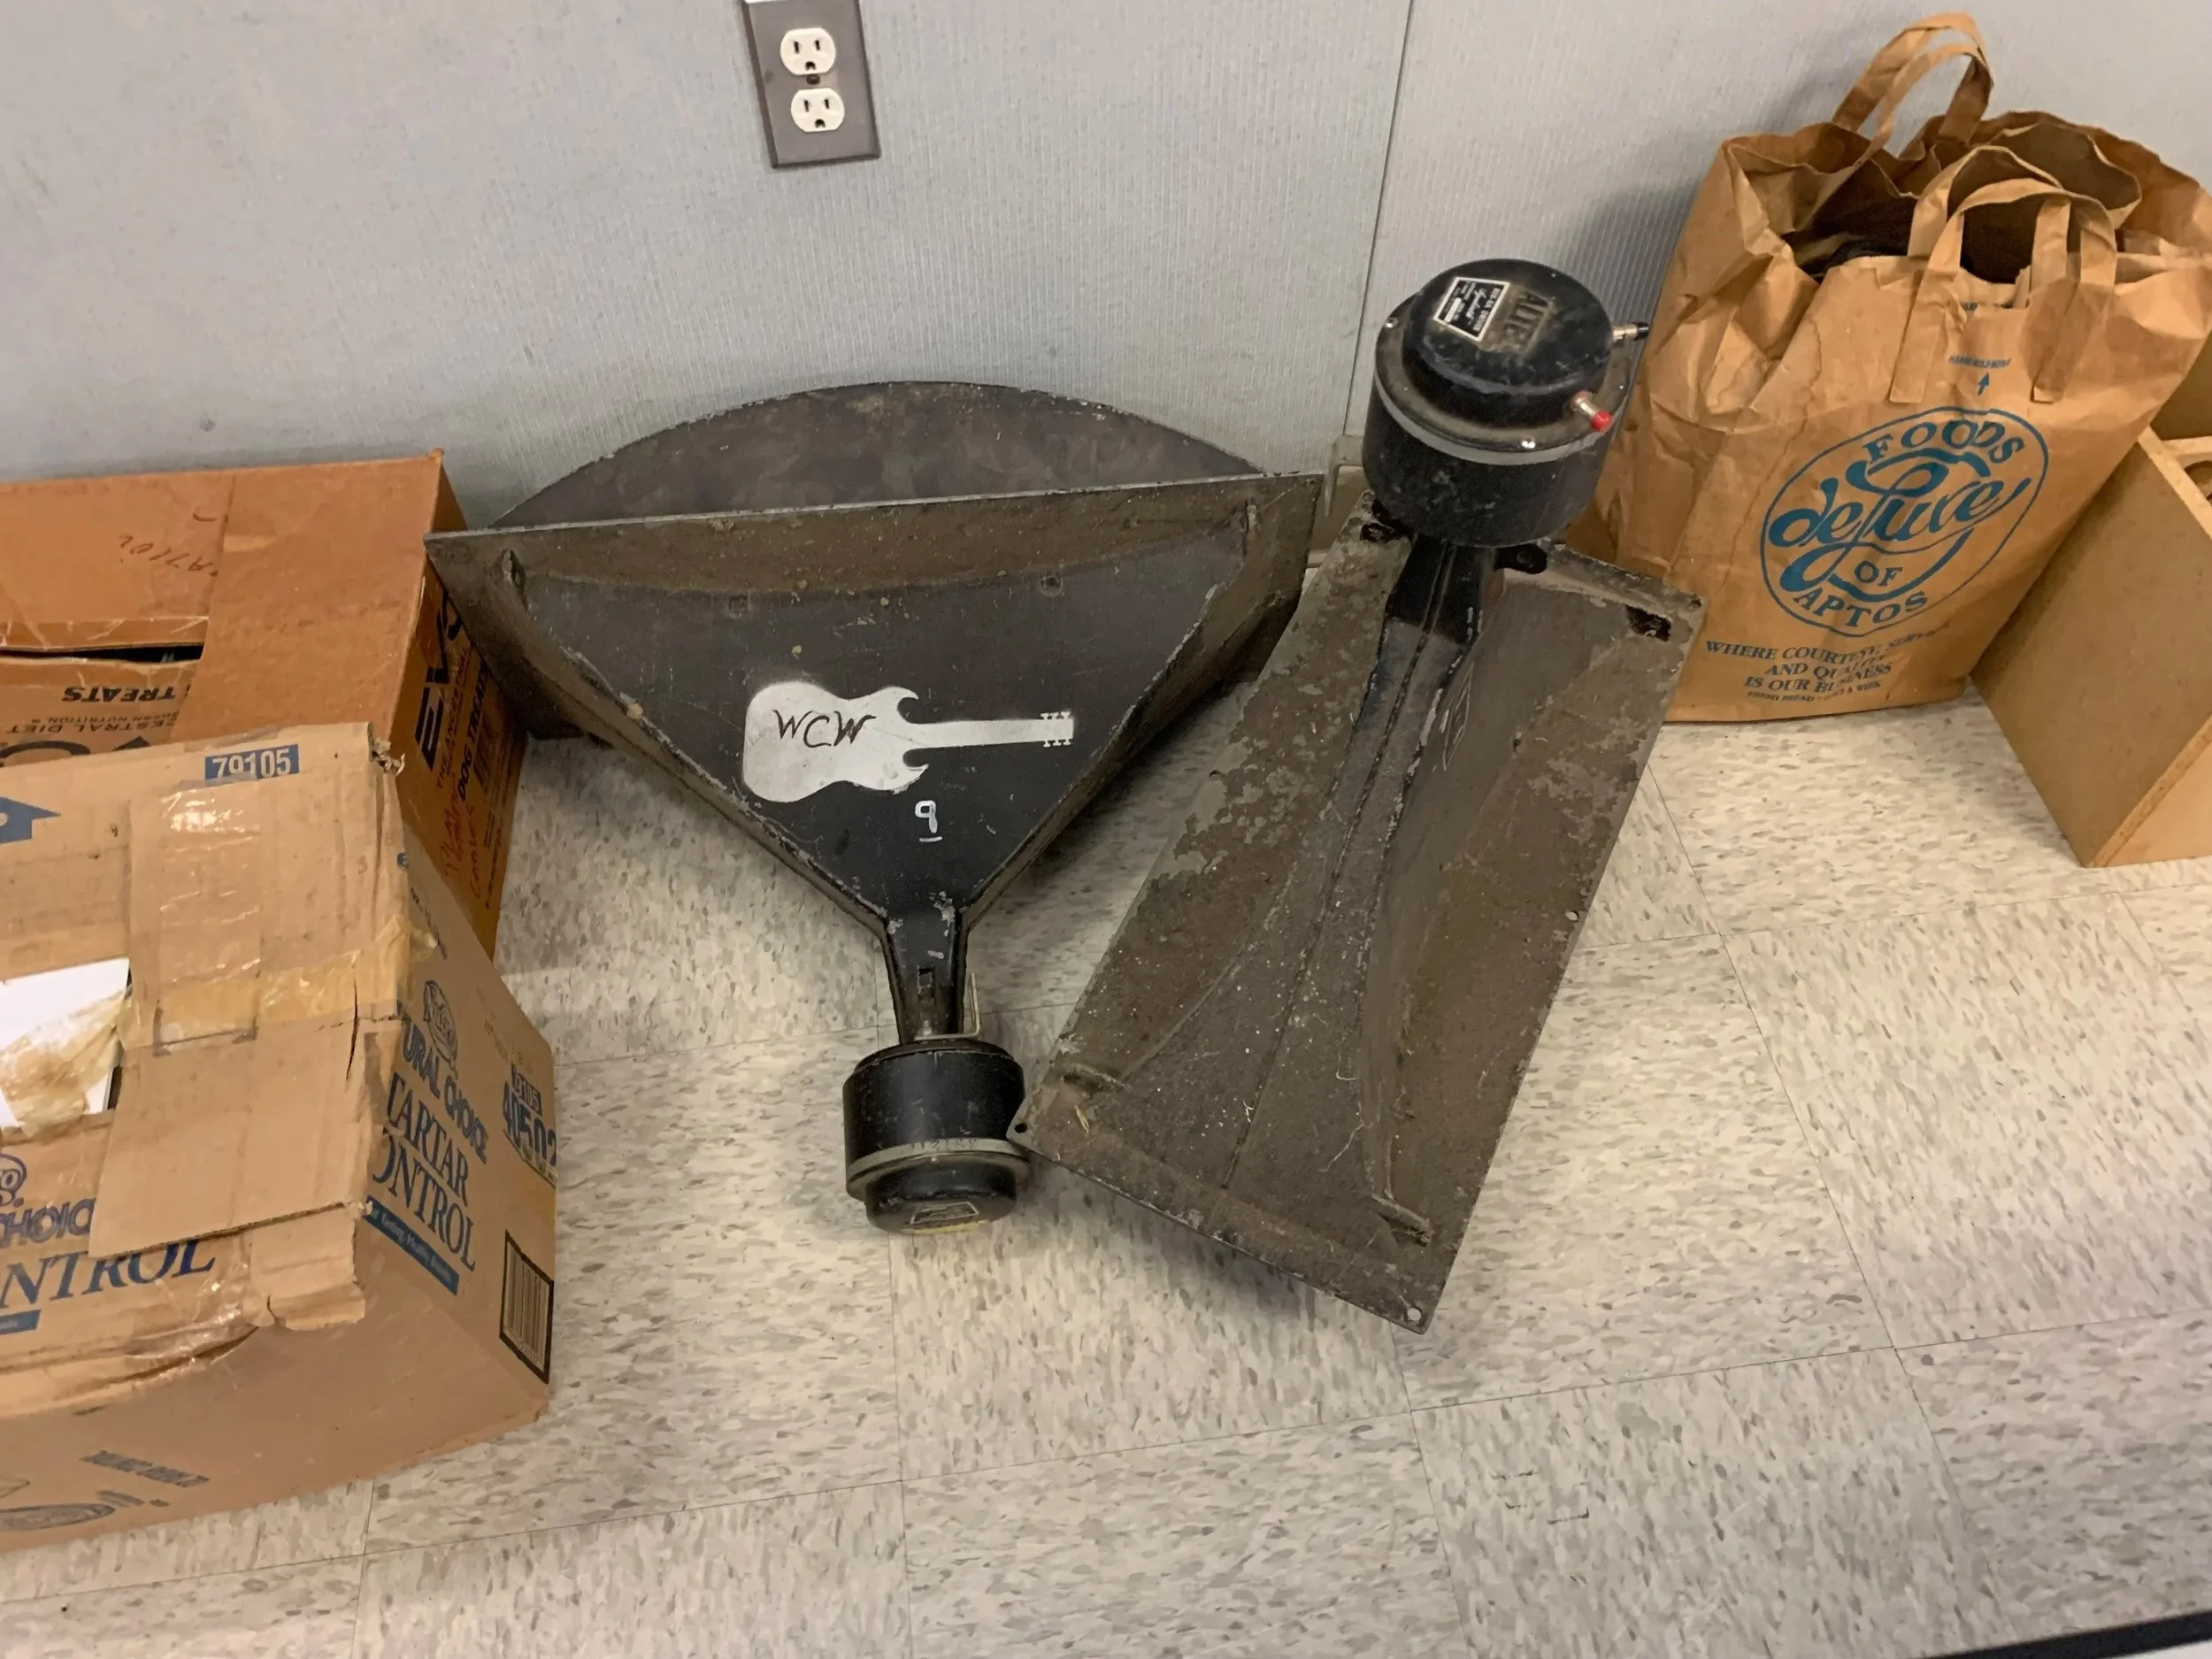
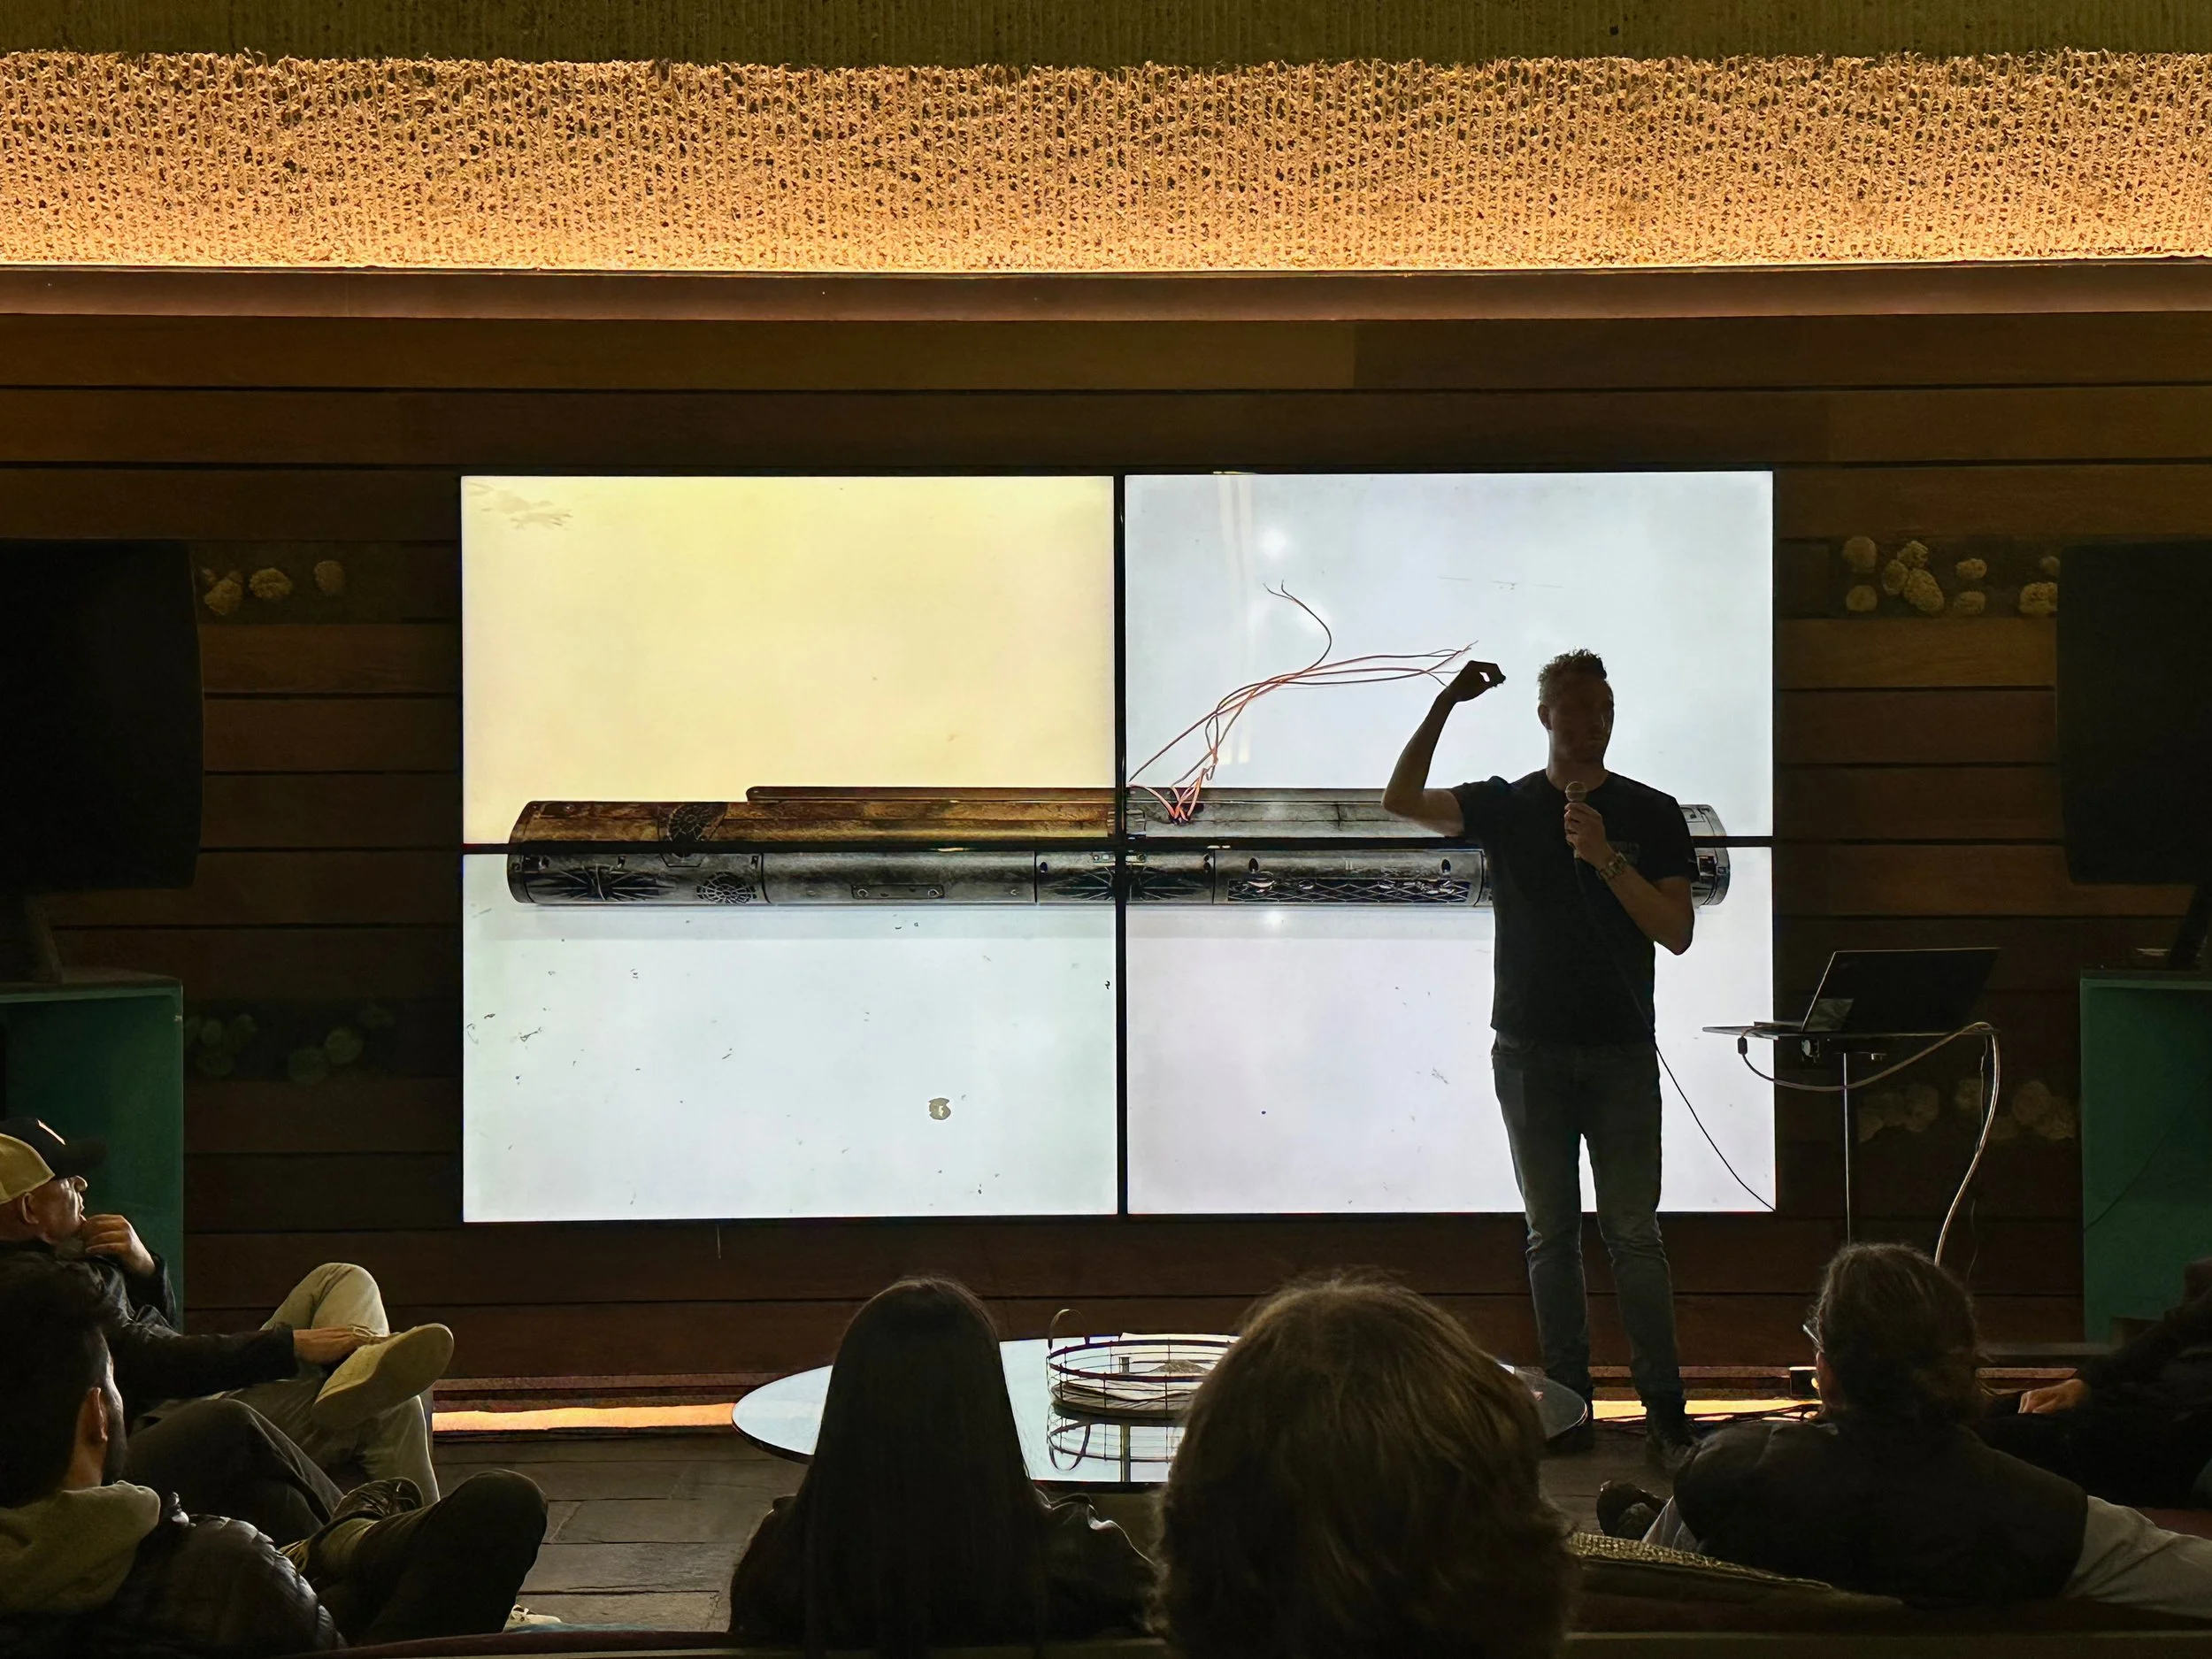
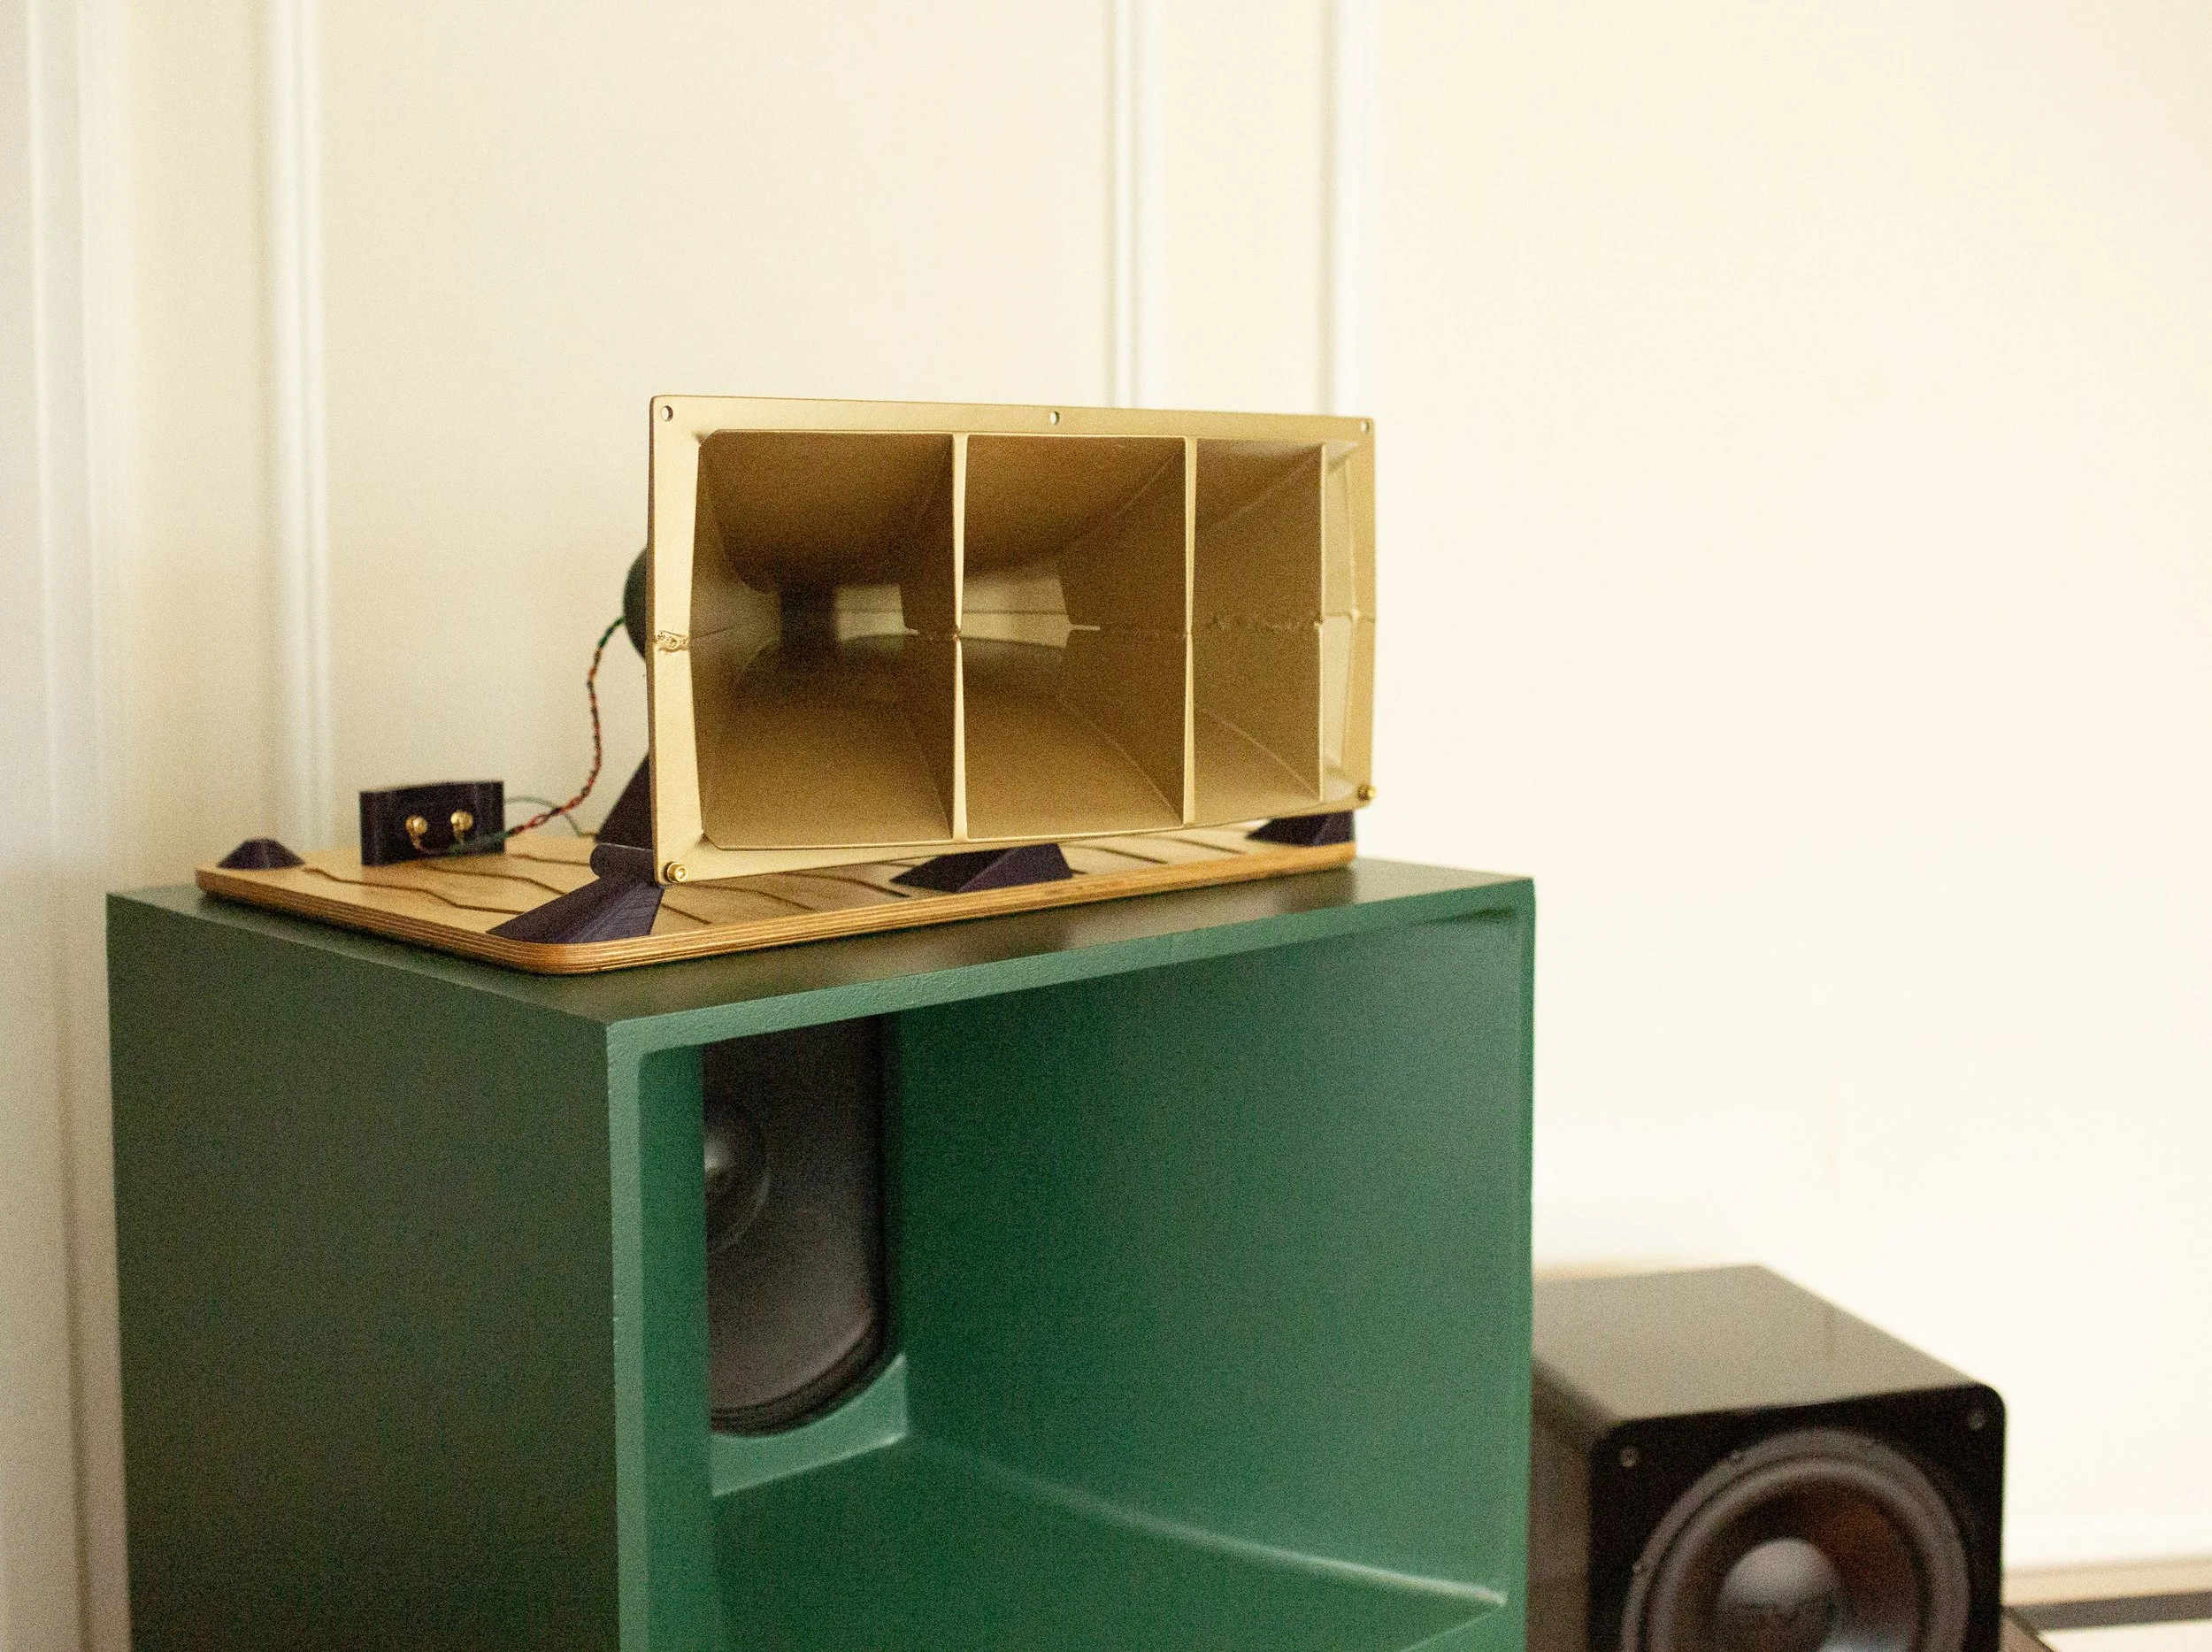
Important foreshadowing here. This is a set of Altec 511 horns with 808 drivers sat in the corner of the swap meet area of Burning Amp 2024. These were FREE if you can believe it. I promptly tossed them in my car and took them home. This single find has a massive impact on the redesign.
Also if you know what band or whoever used these before, I’d love to know who they used to belong to. They clearly had great taste in touring sound.

Since I had the motivation to resume this massive project, I decided to start in the place where I can do my most precise planning and design - CAD. It’s my safe space. I’m a perfectionist and if I’m going to do something, I tend to over do it and want to make sure it looks and feels right before cutting/printing/painting etc.
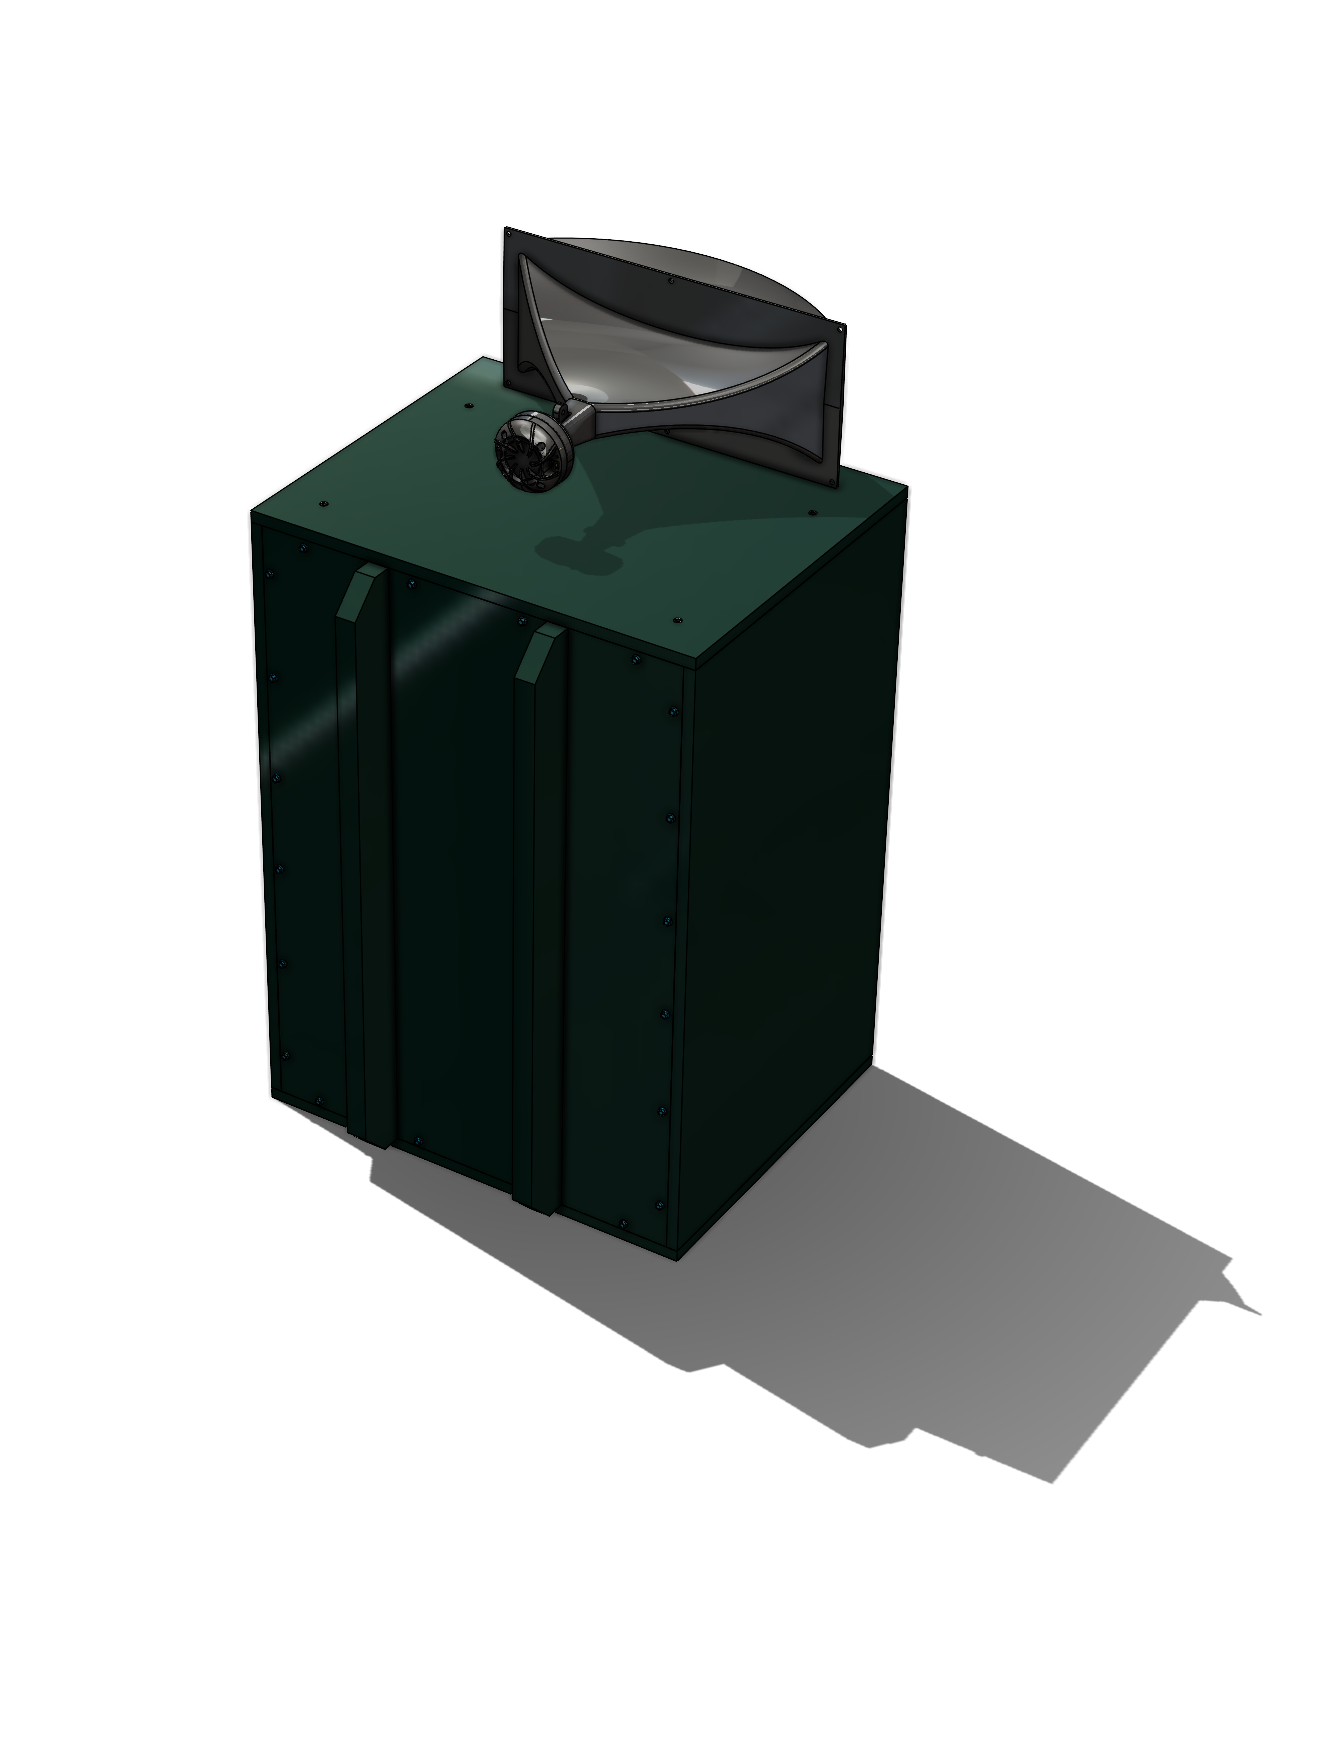
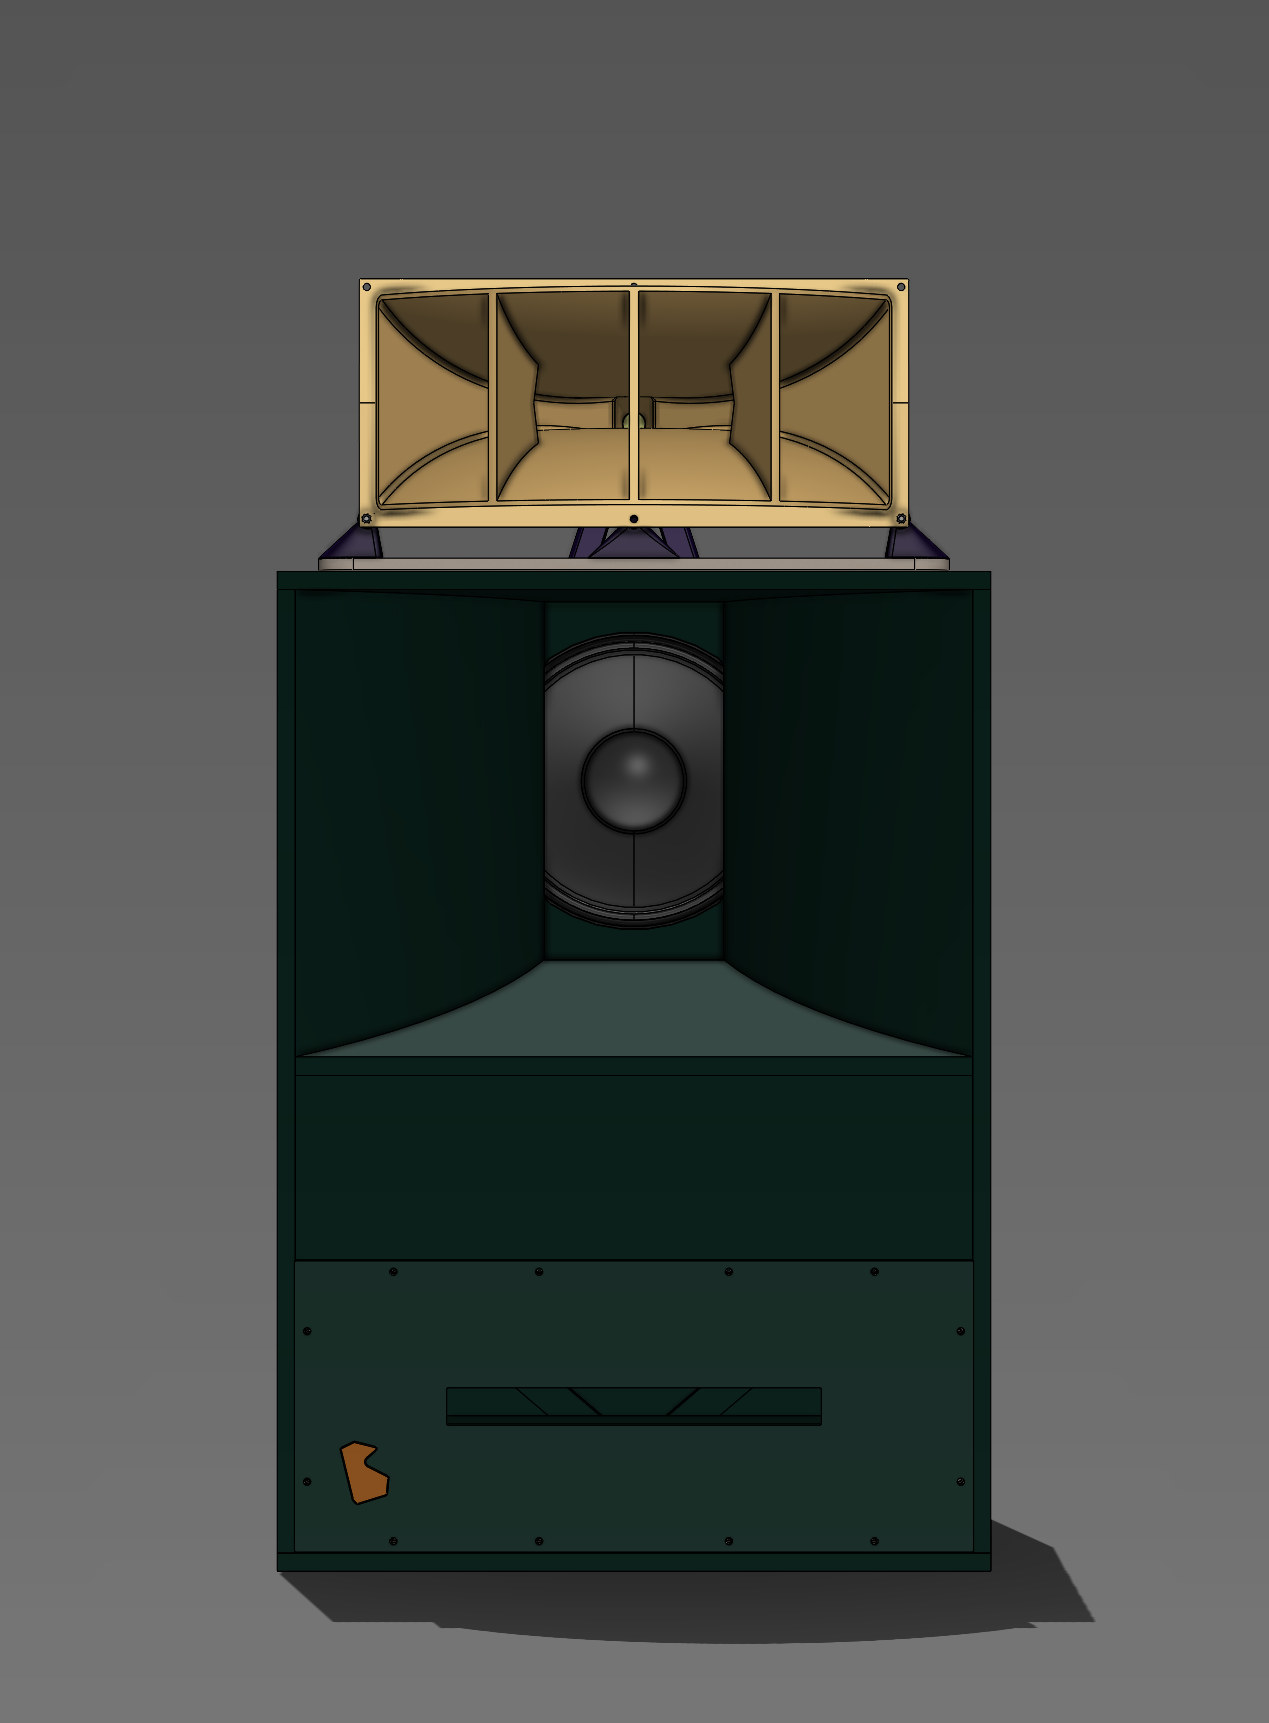
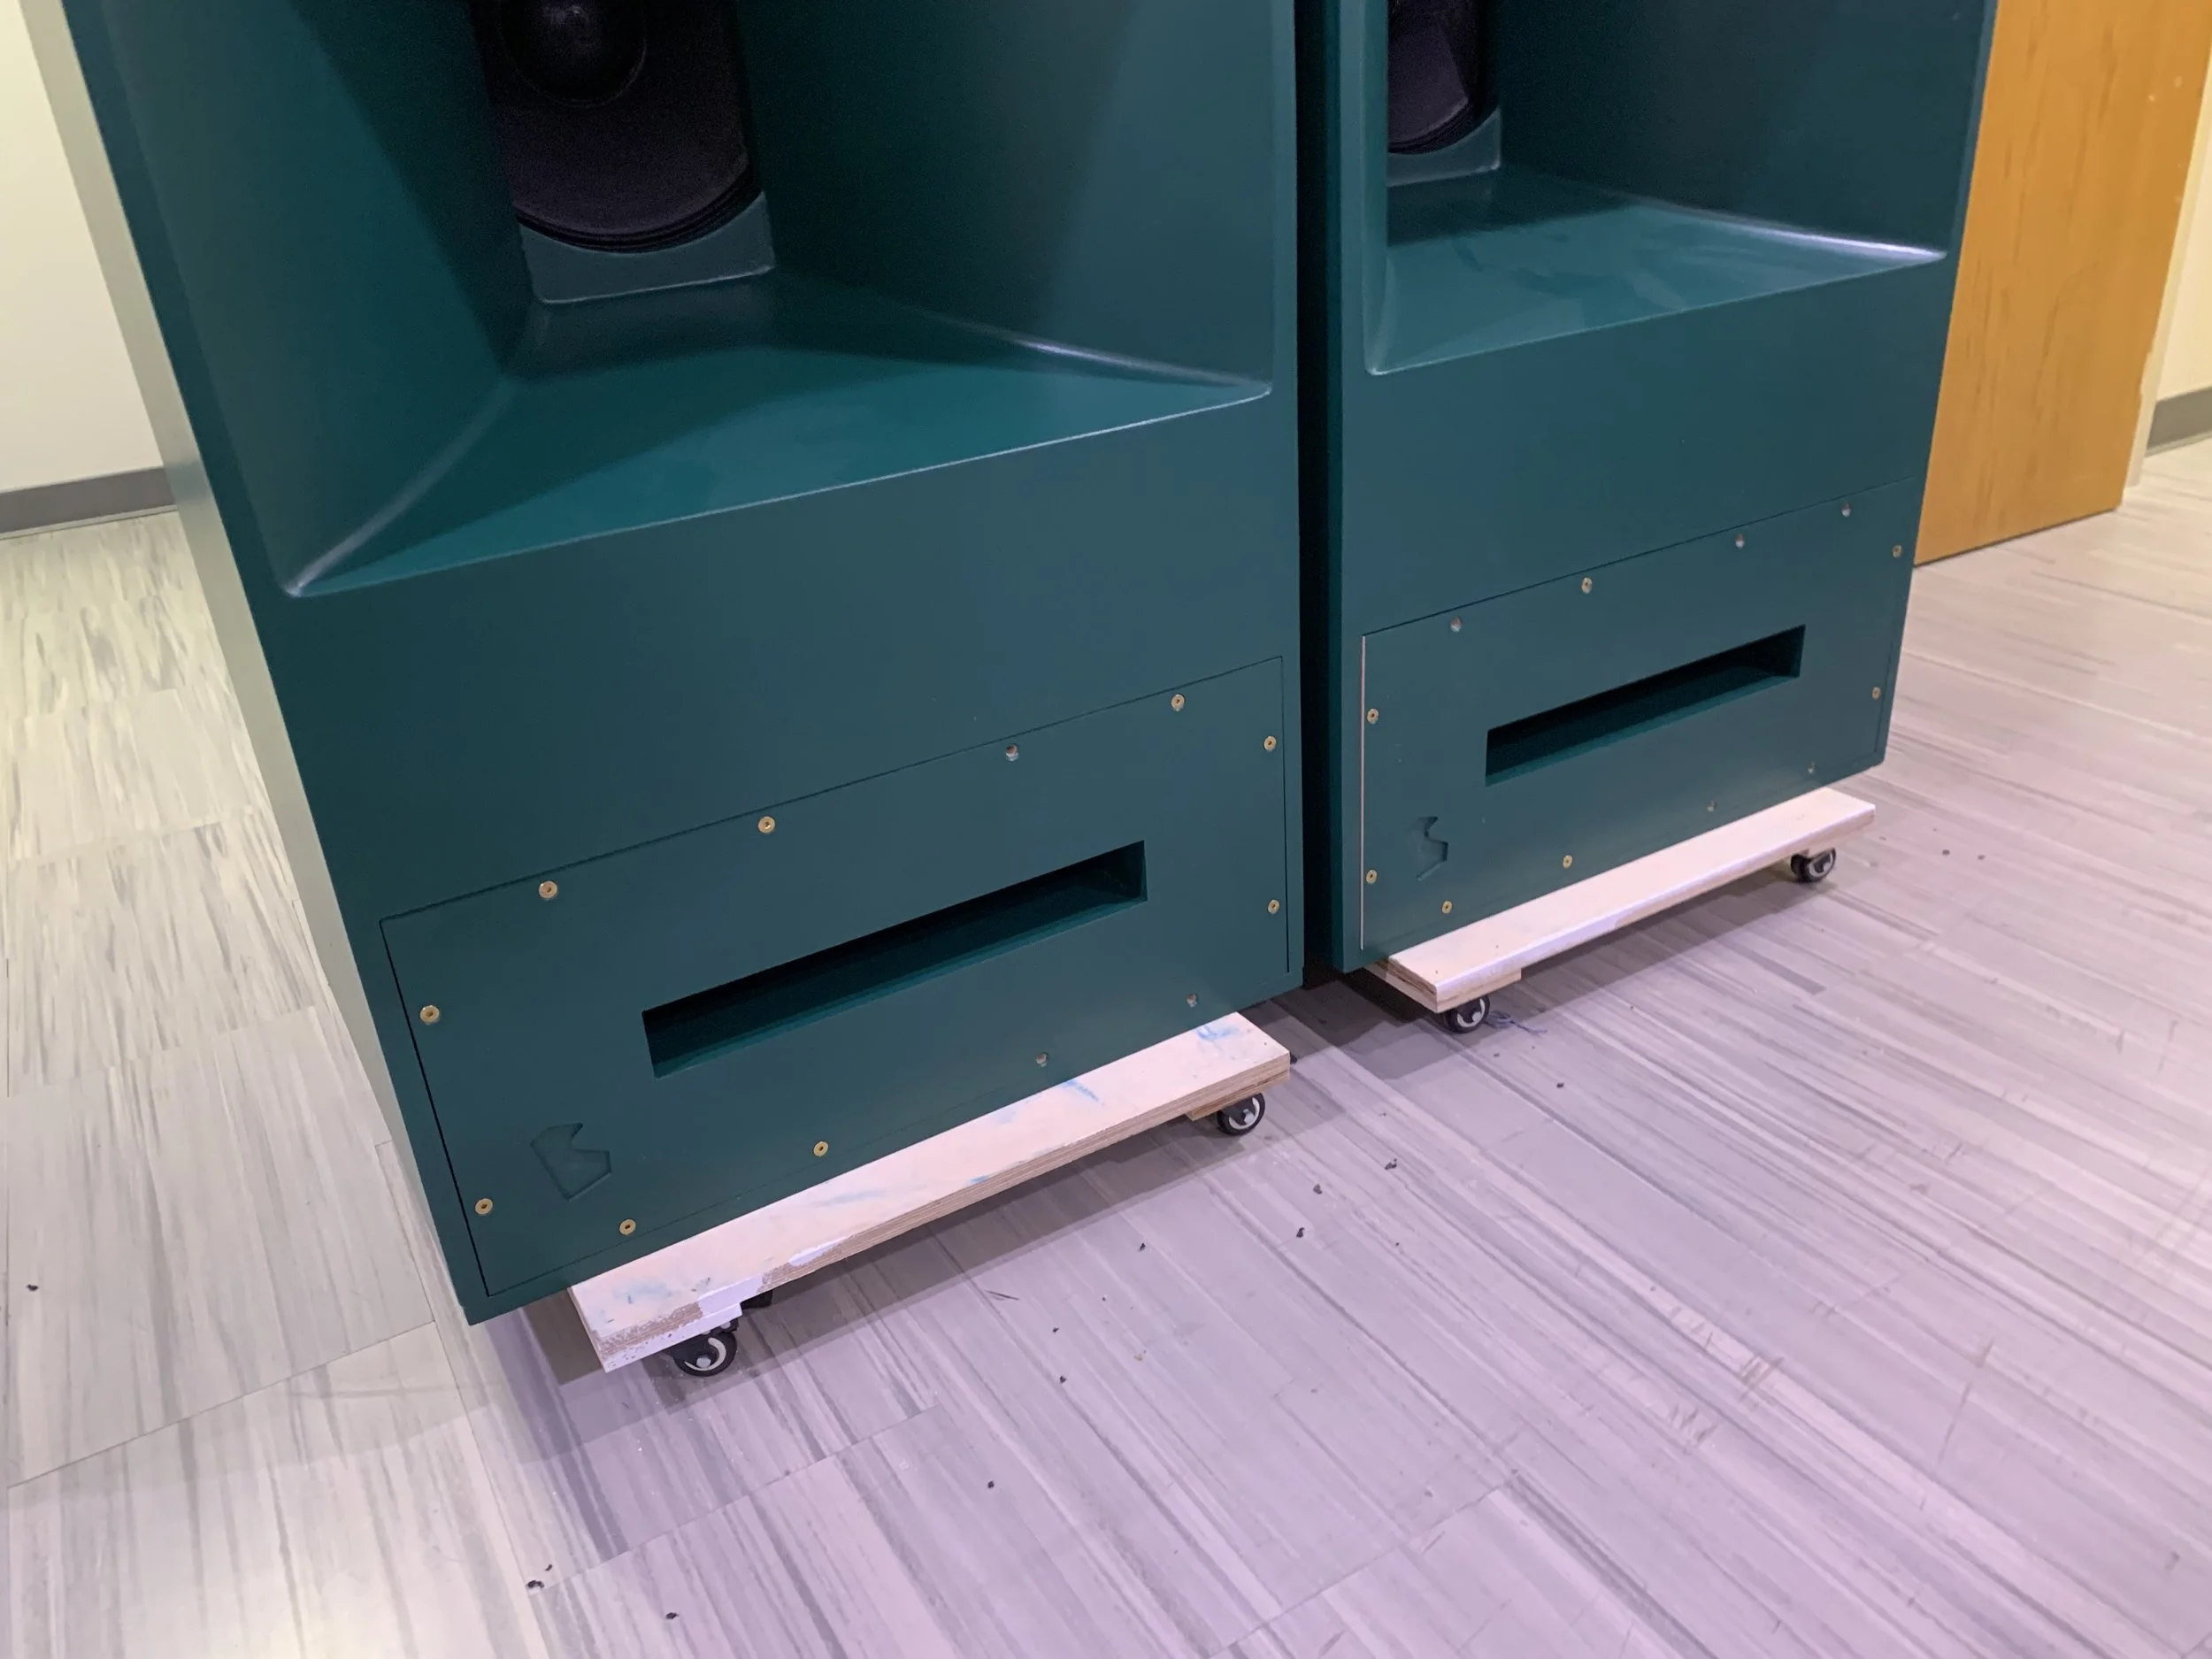
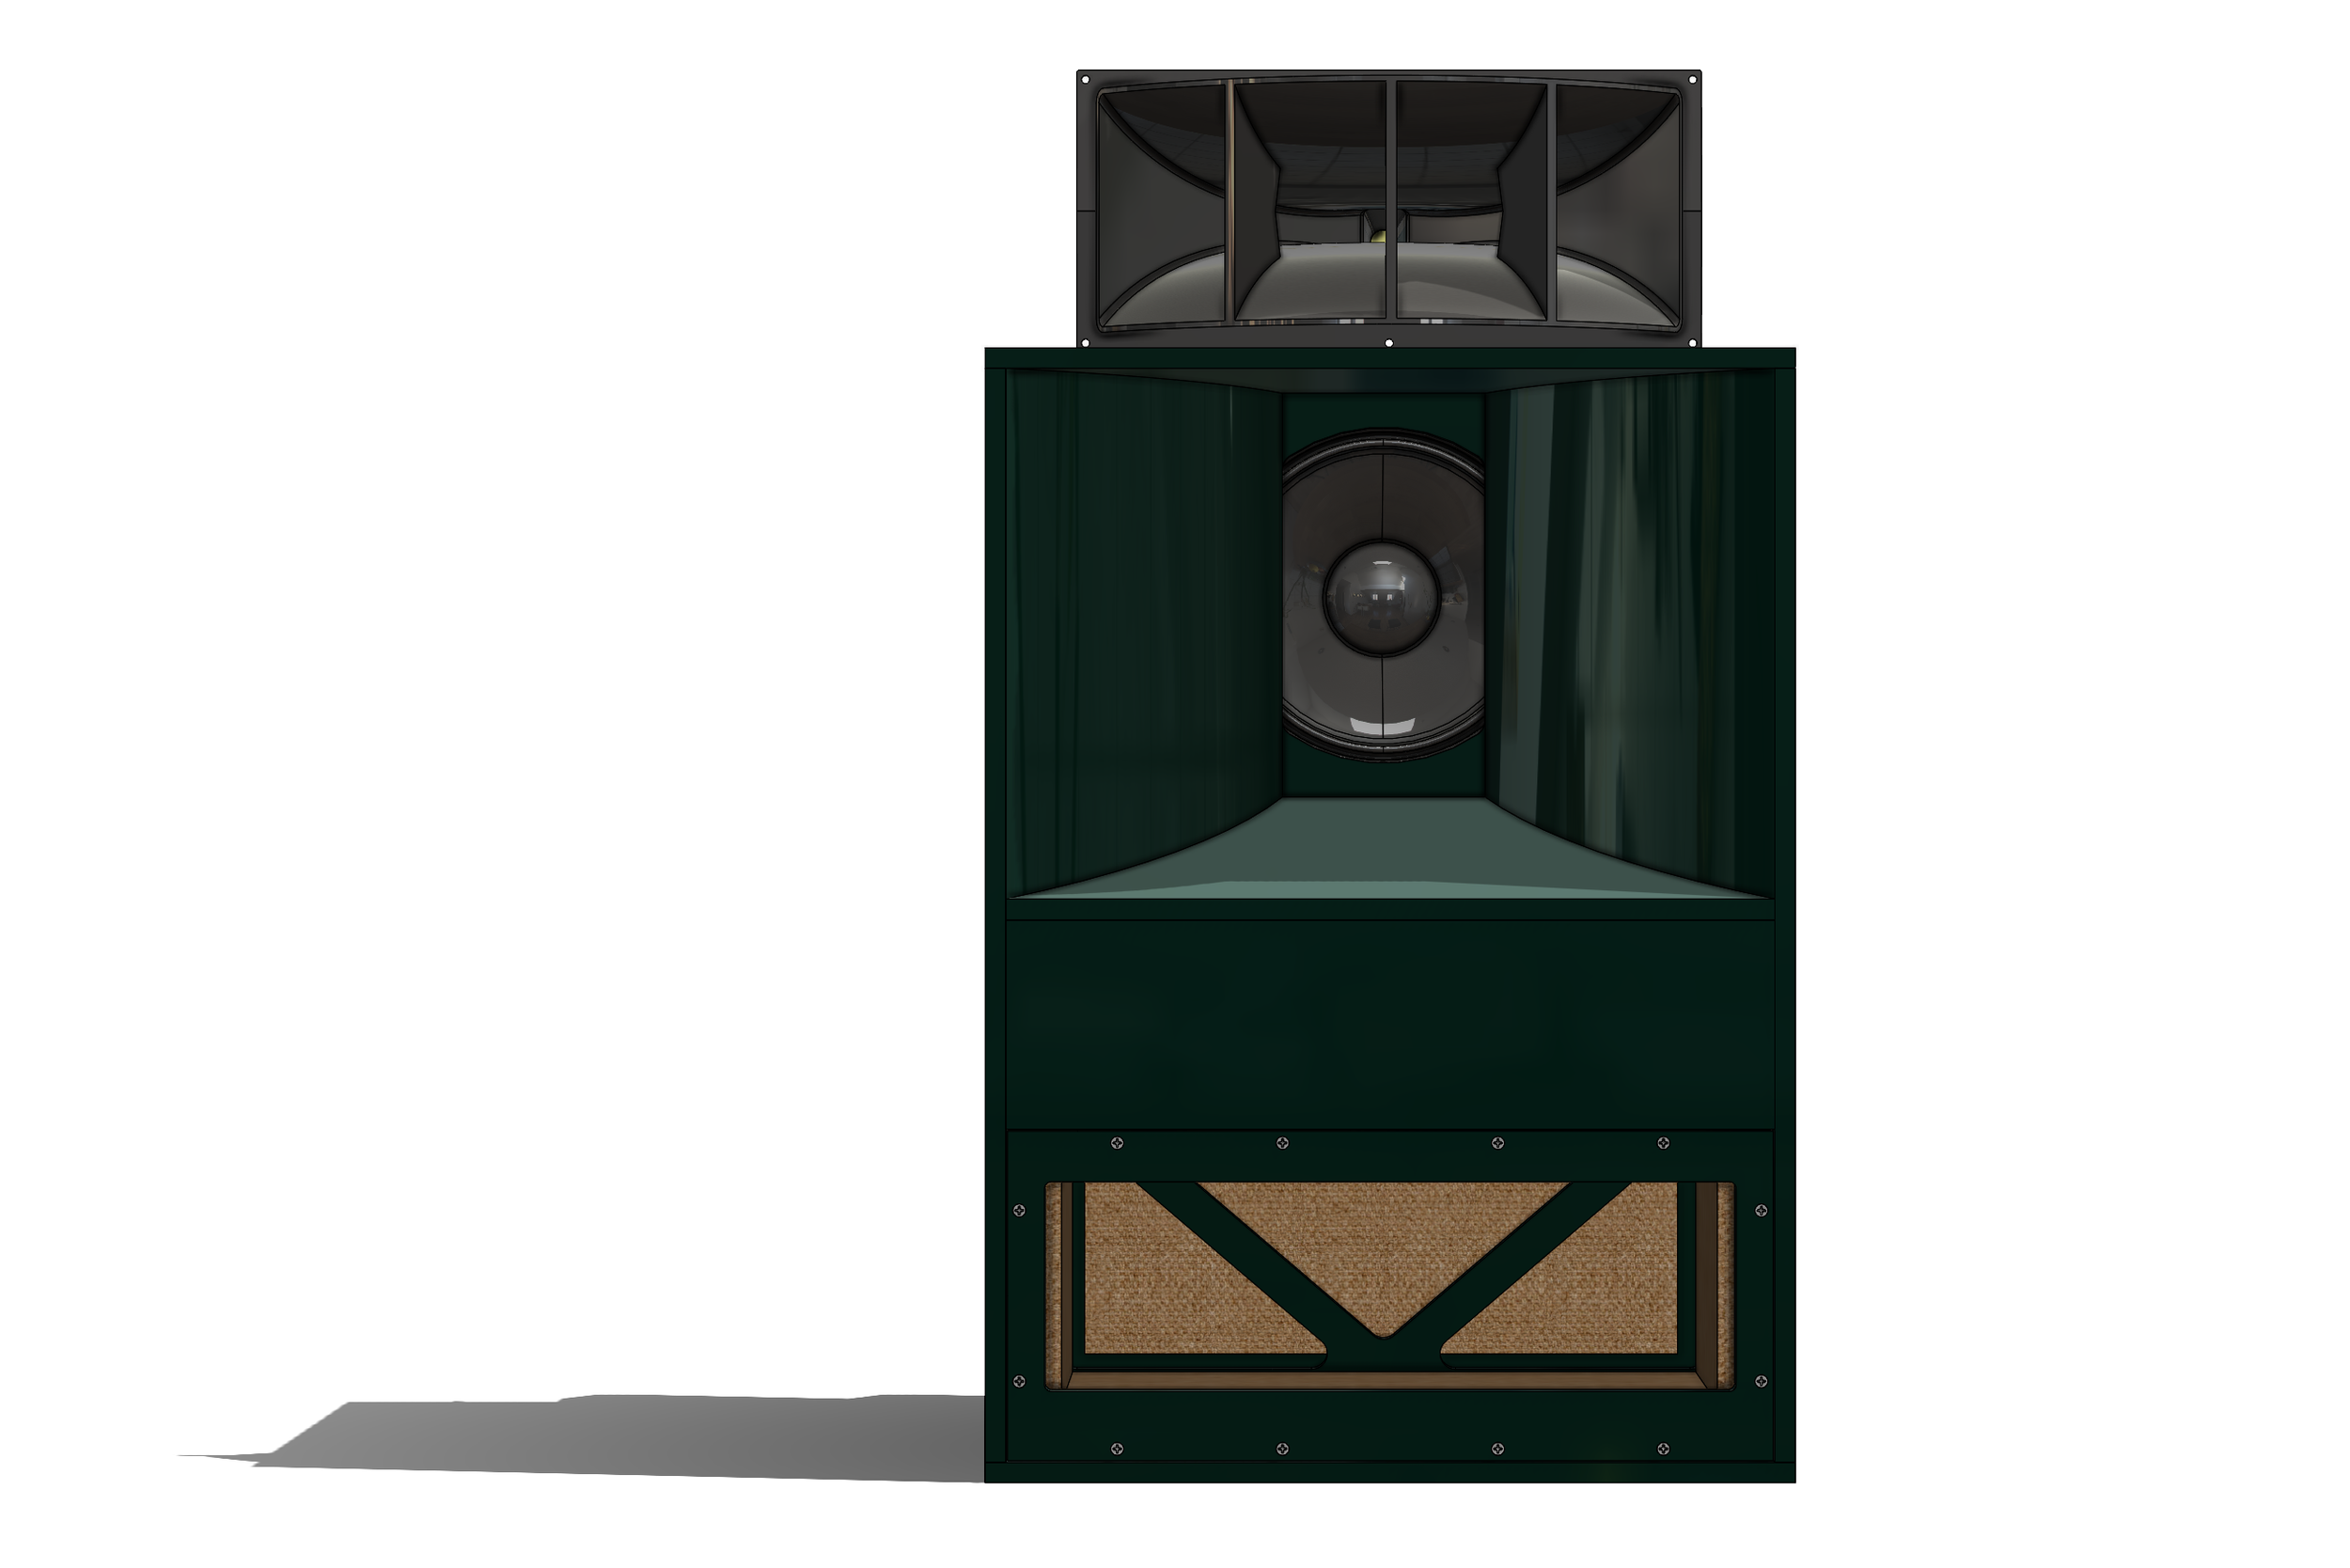
This was the early model with the original port and the 511 horn tossed on top. Changed the main speaker bin to a dark green (easy decision, is my favorite color). Starting to look cool but needs more hi-fi cool factor.
So many hours went into this model. I love whimsical design and wanted the horn integration to be much more than just a wooden bracket like Altec used to offer. There are more detail shots following below, don’t worry.
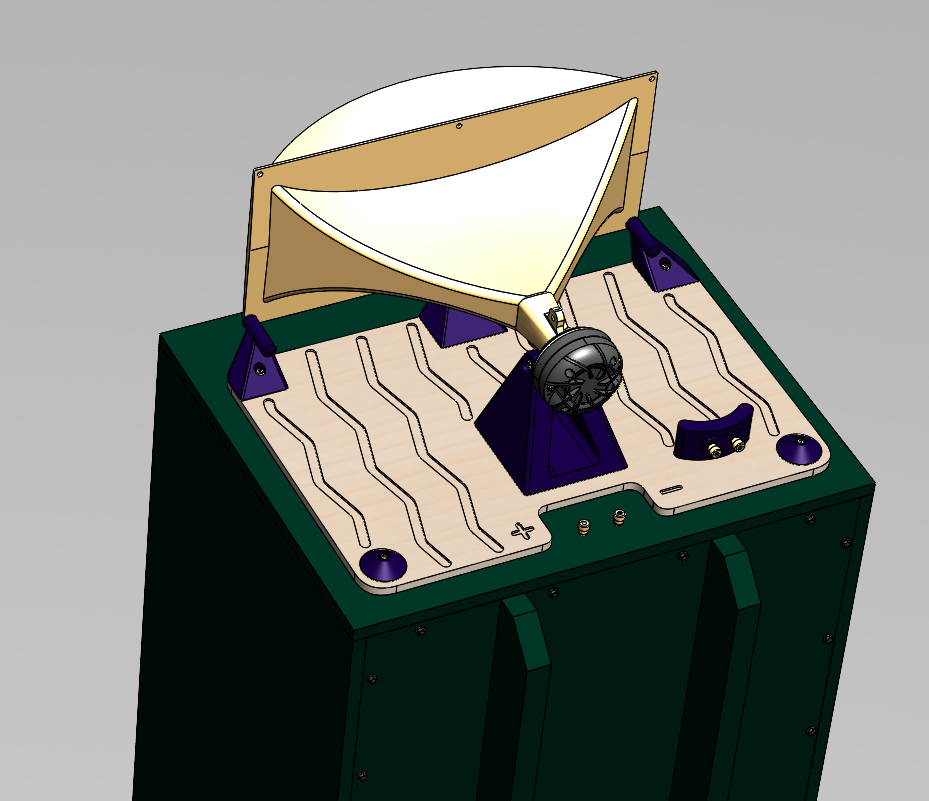
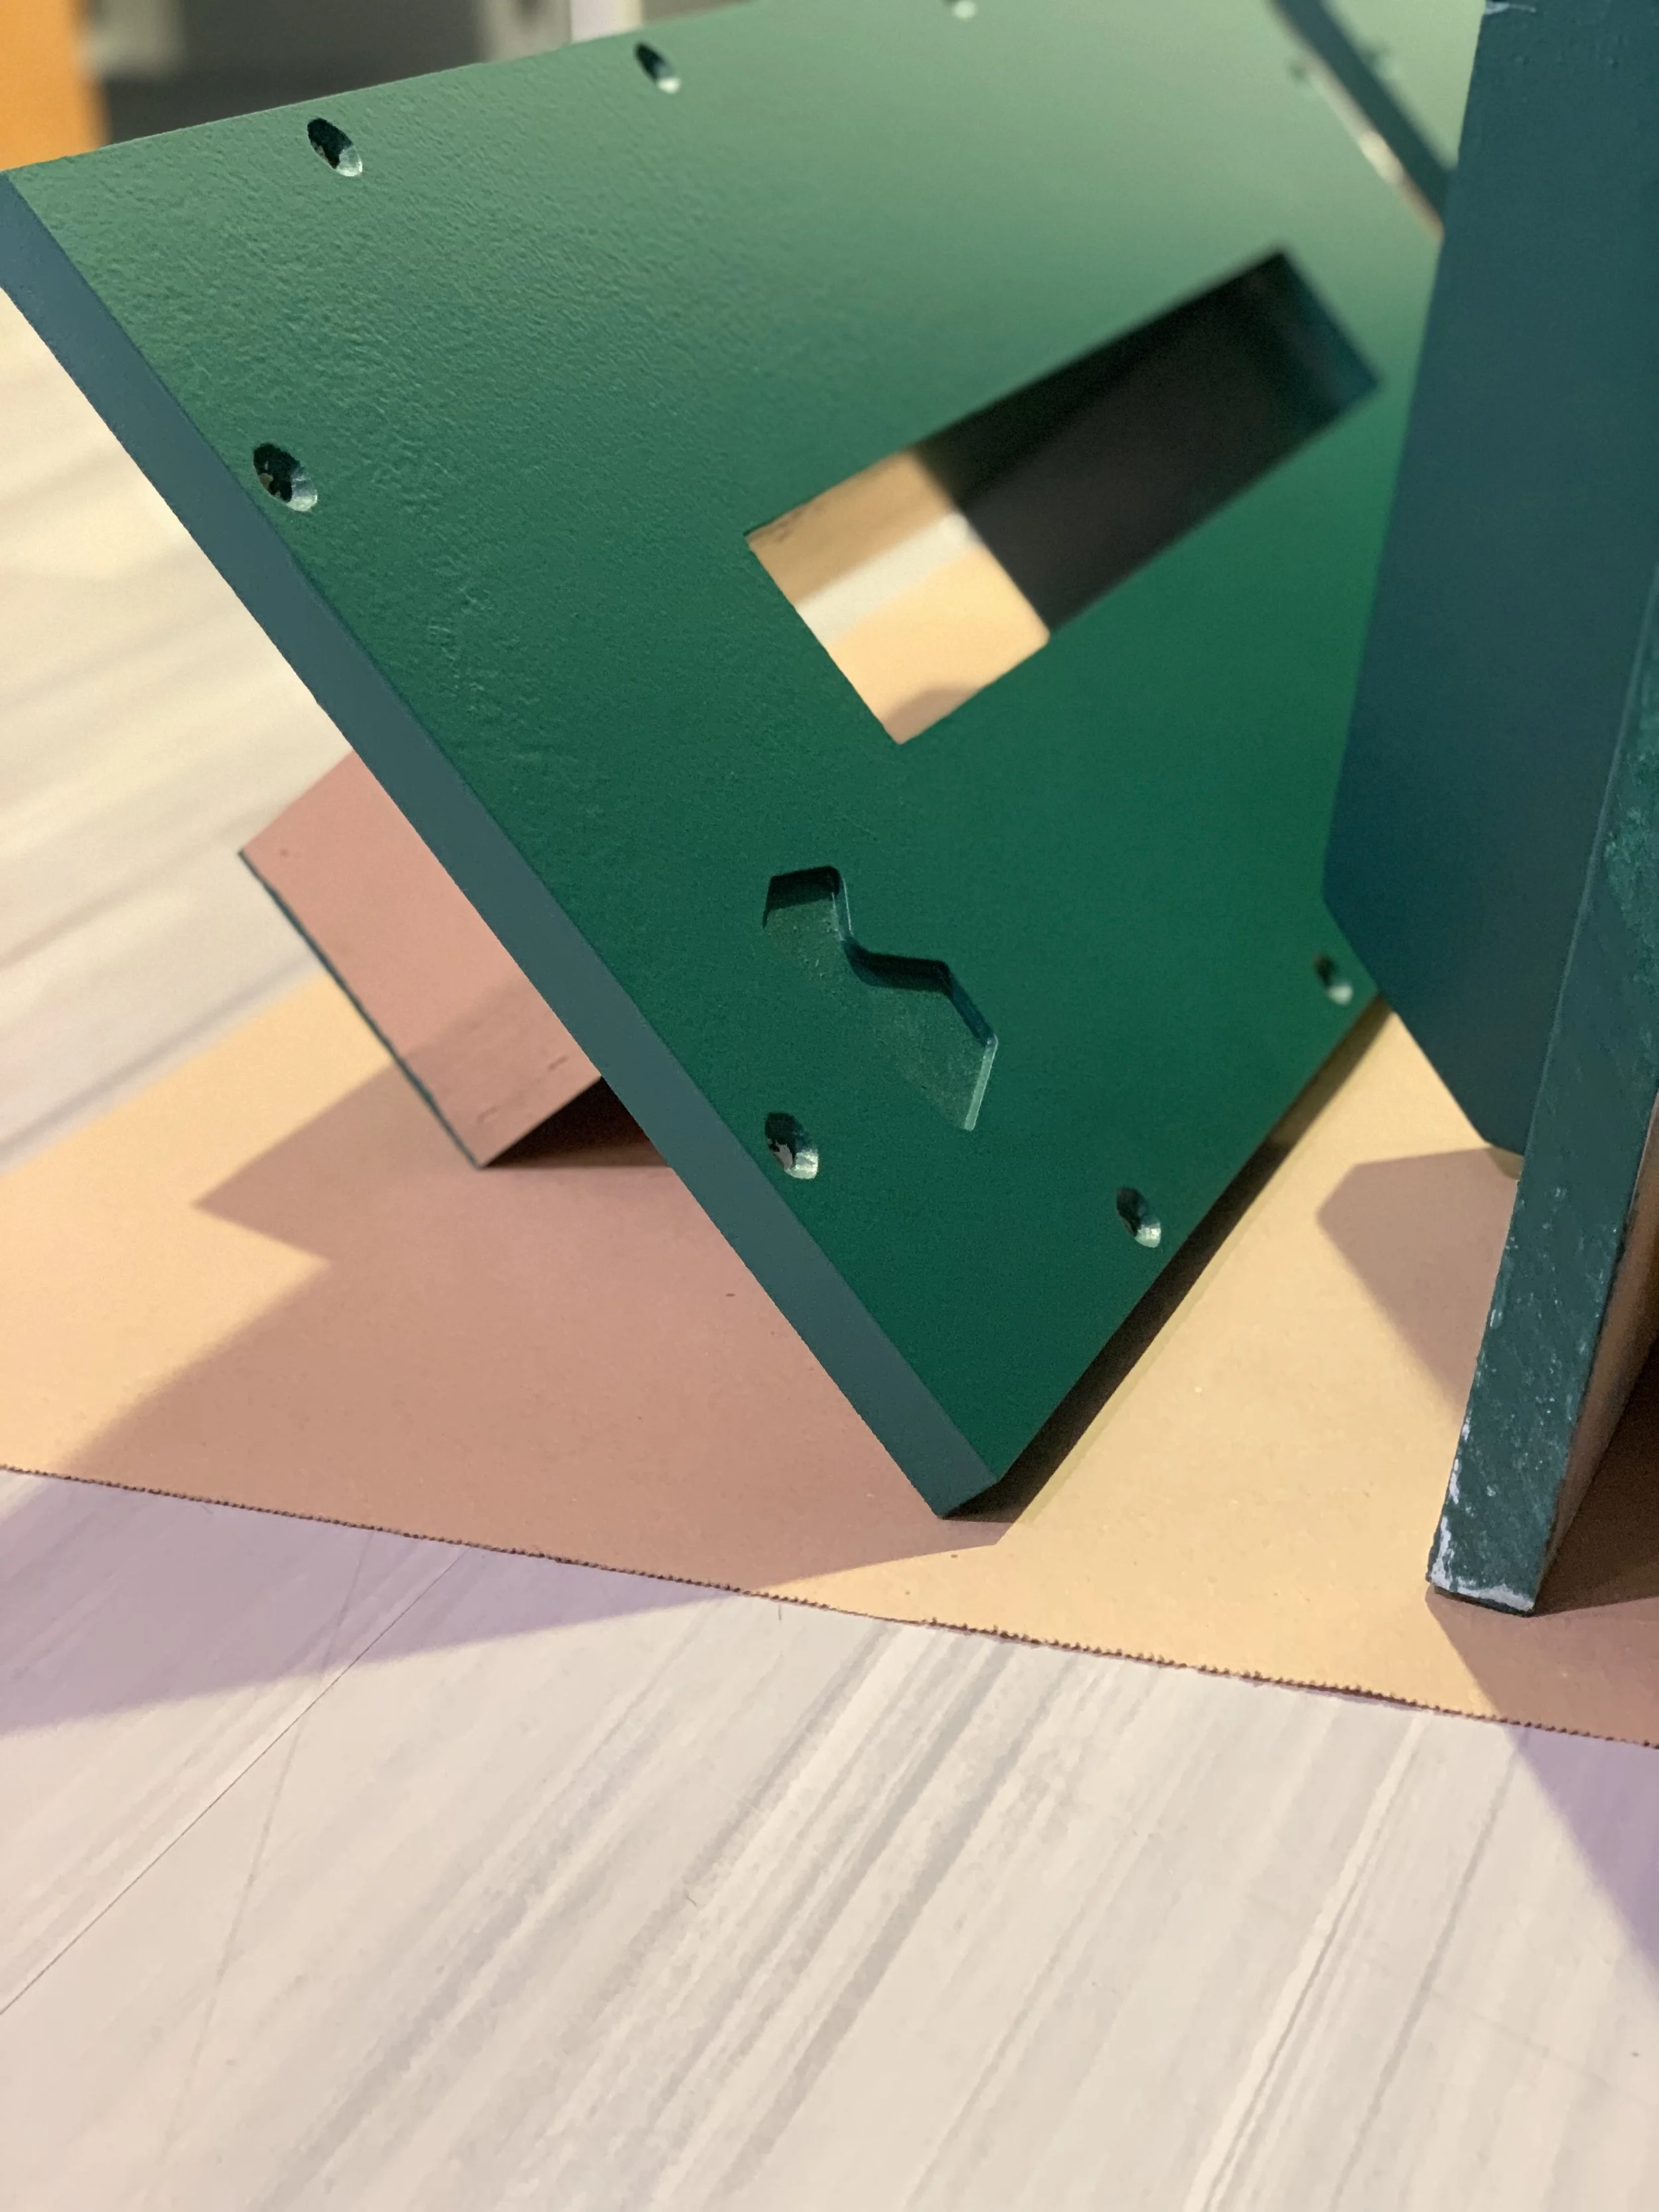
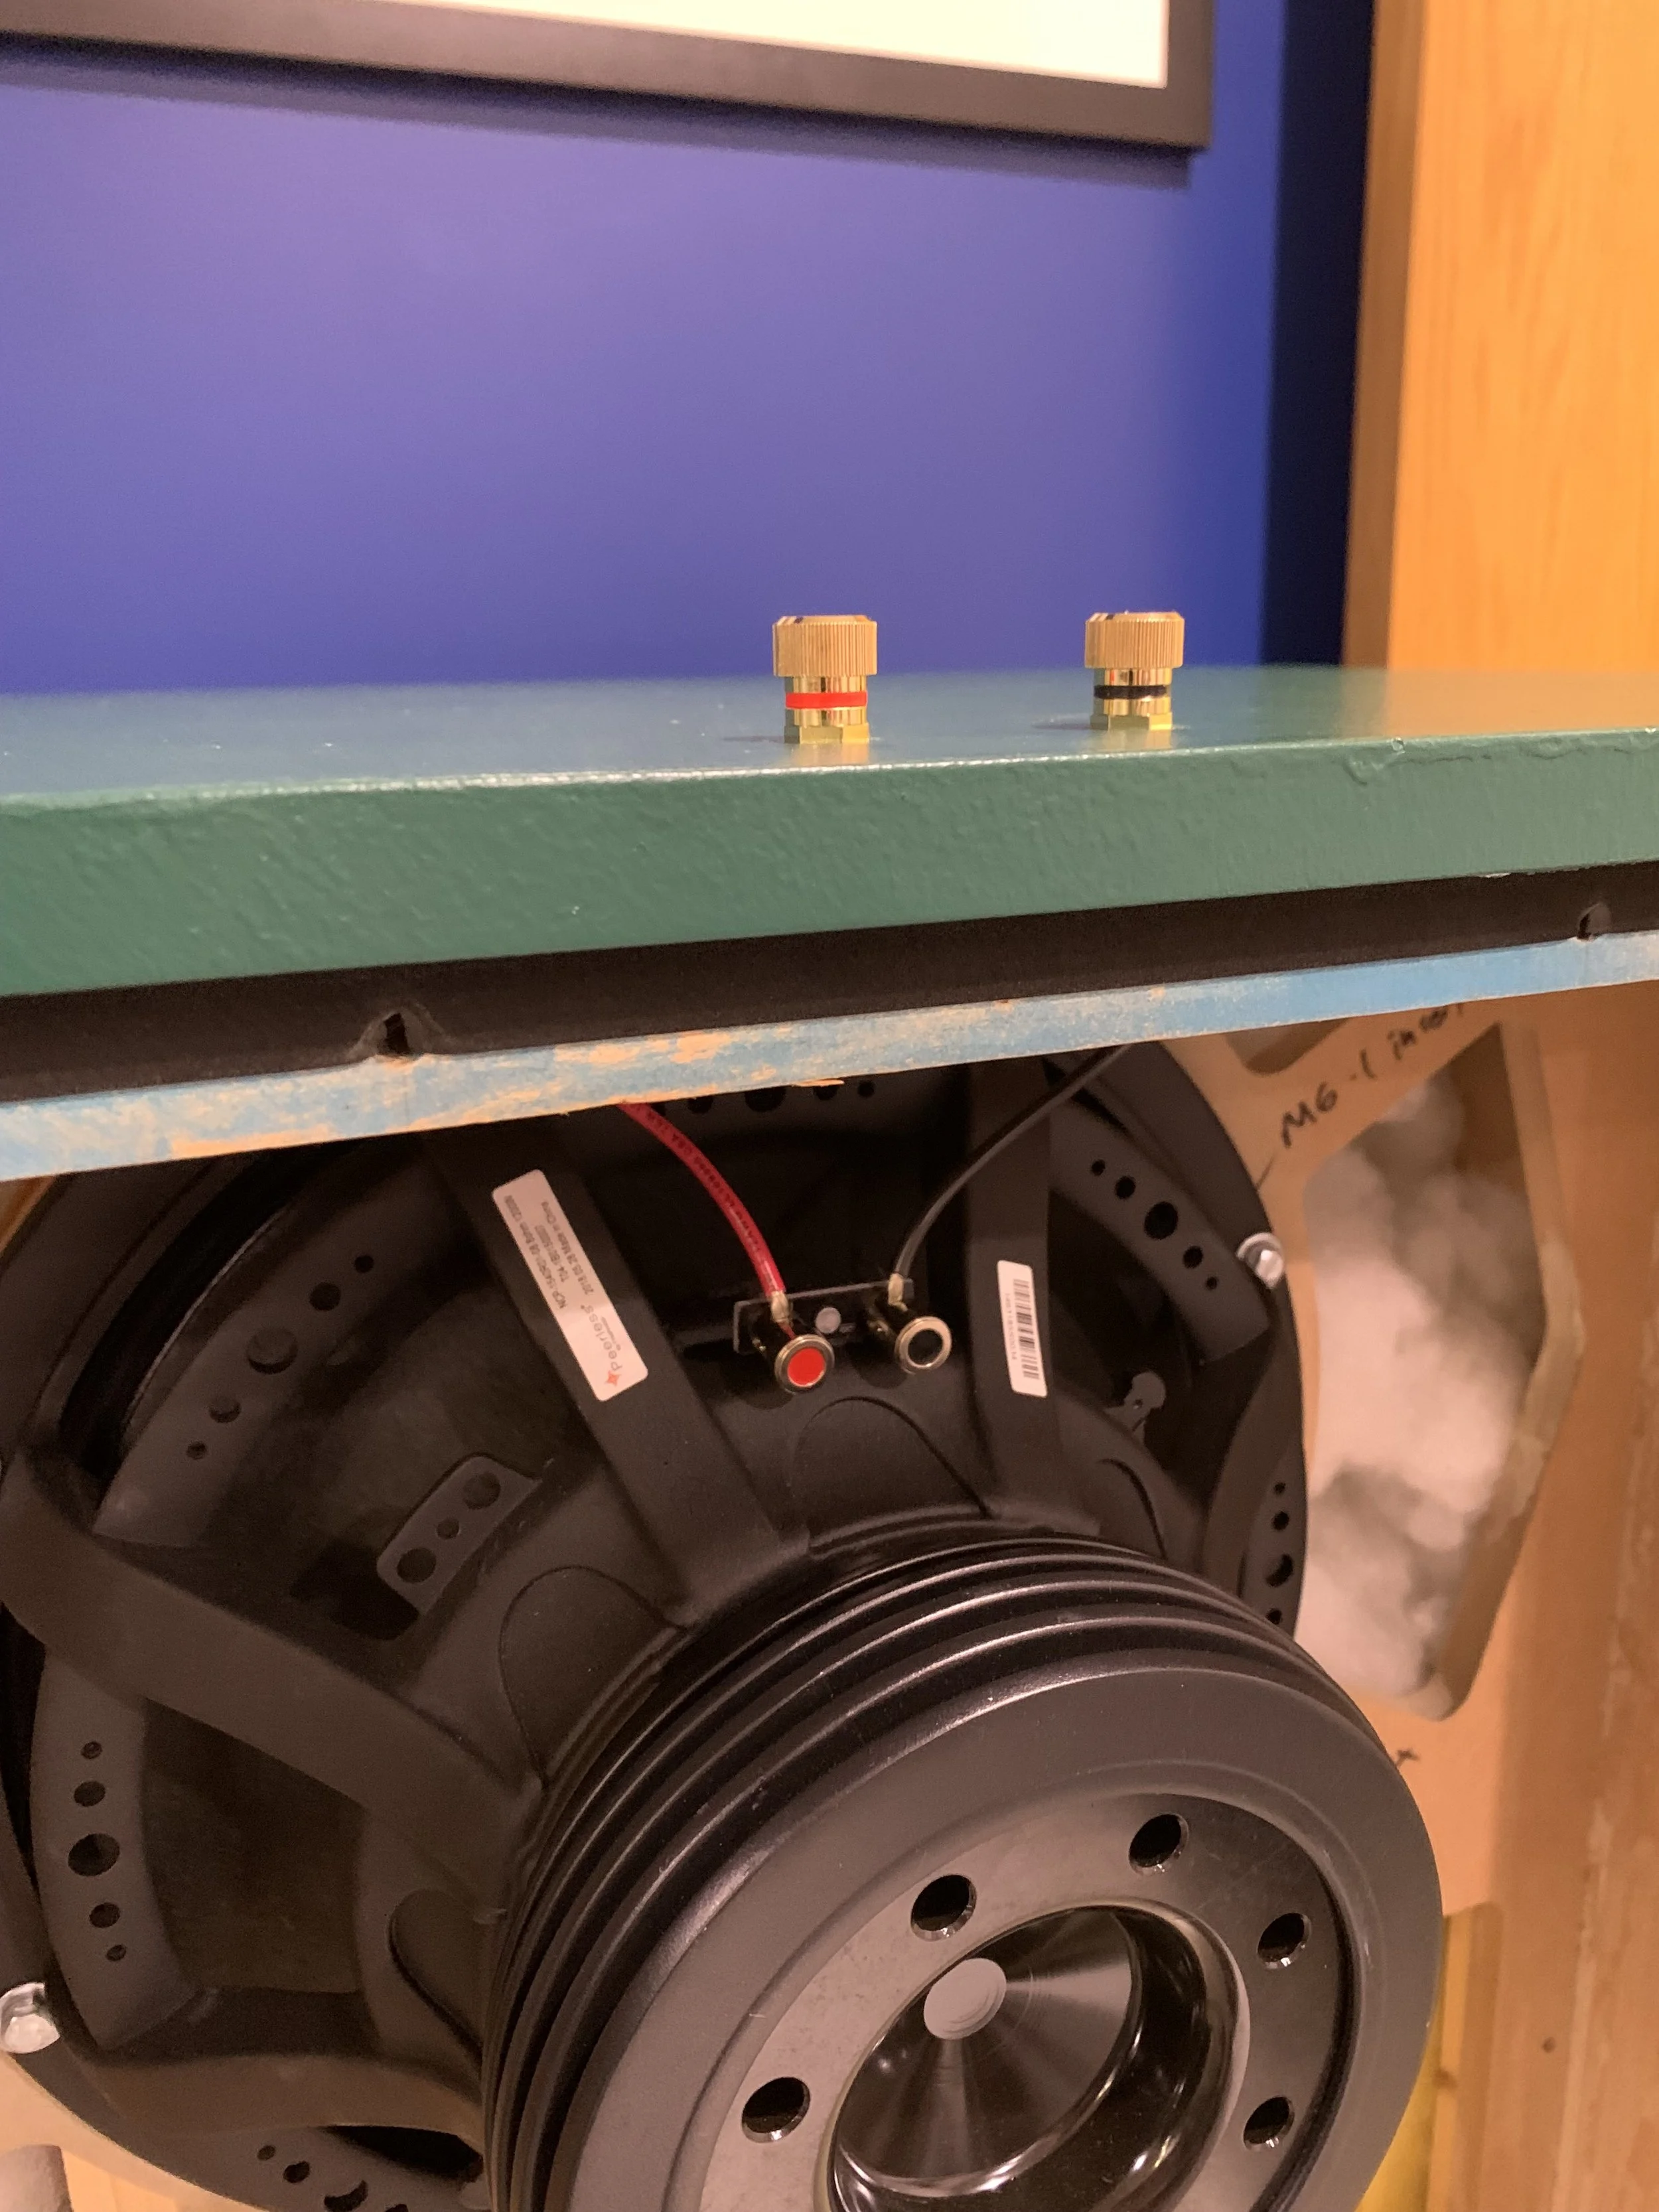
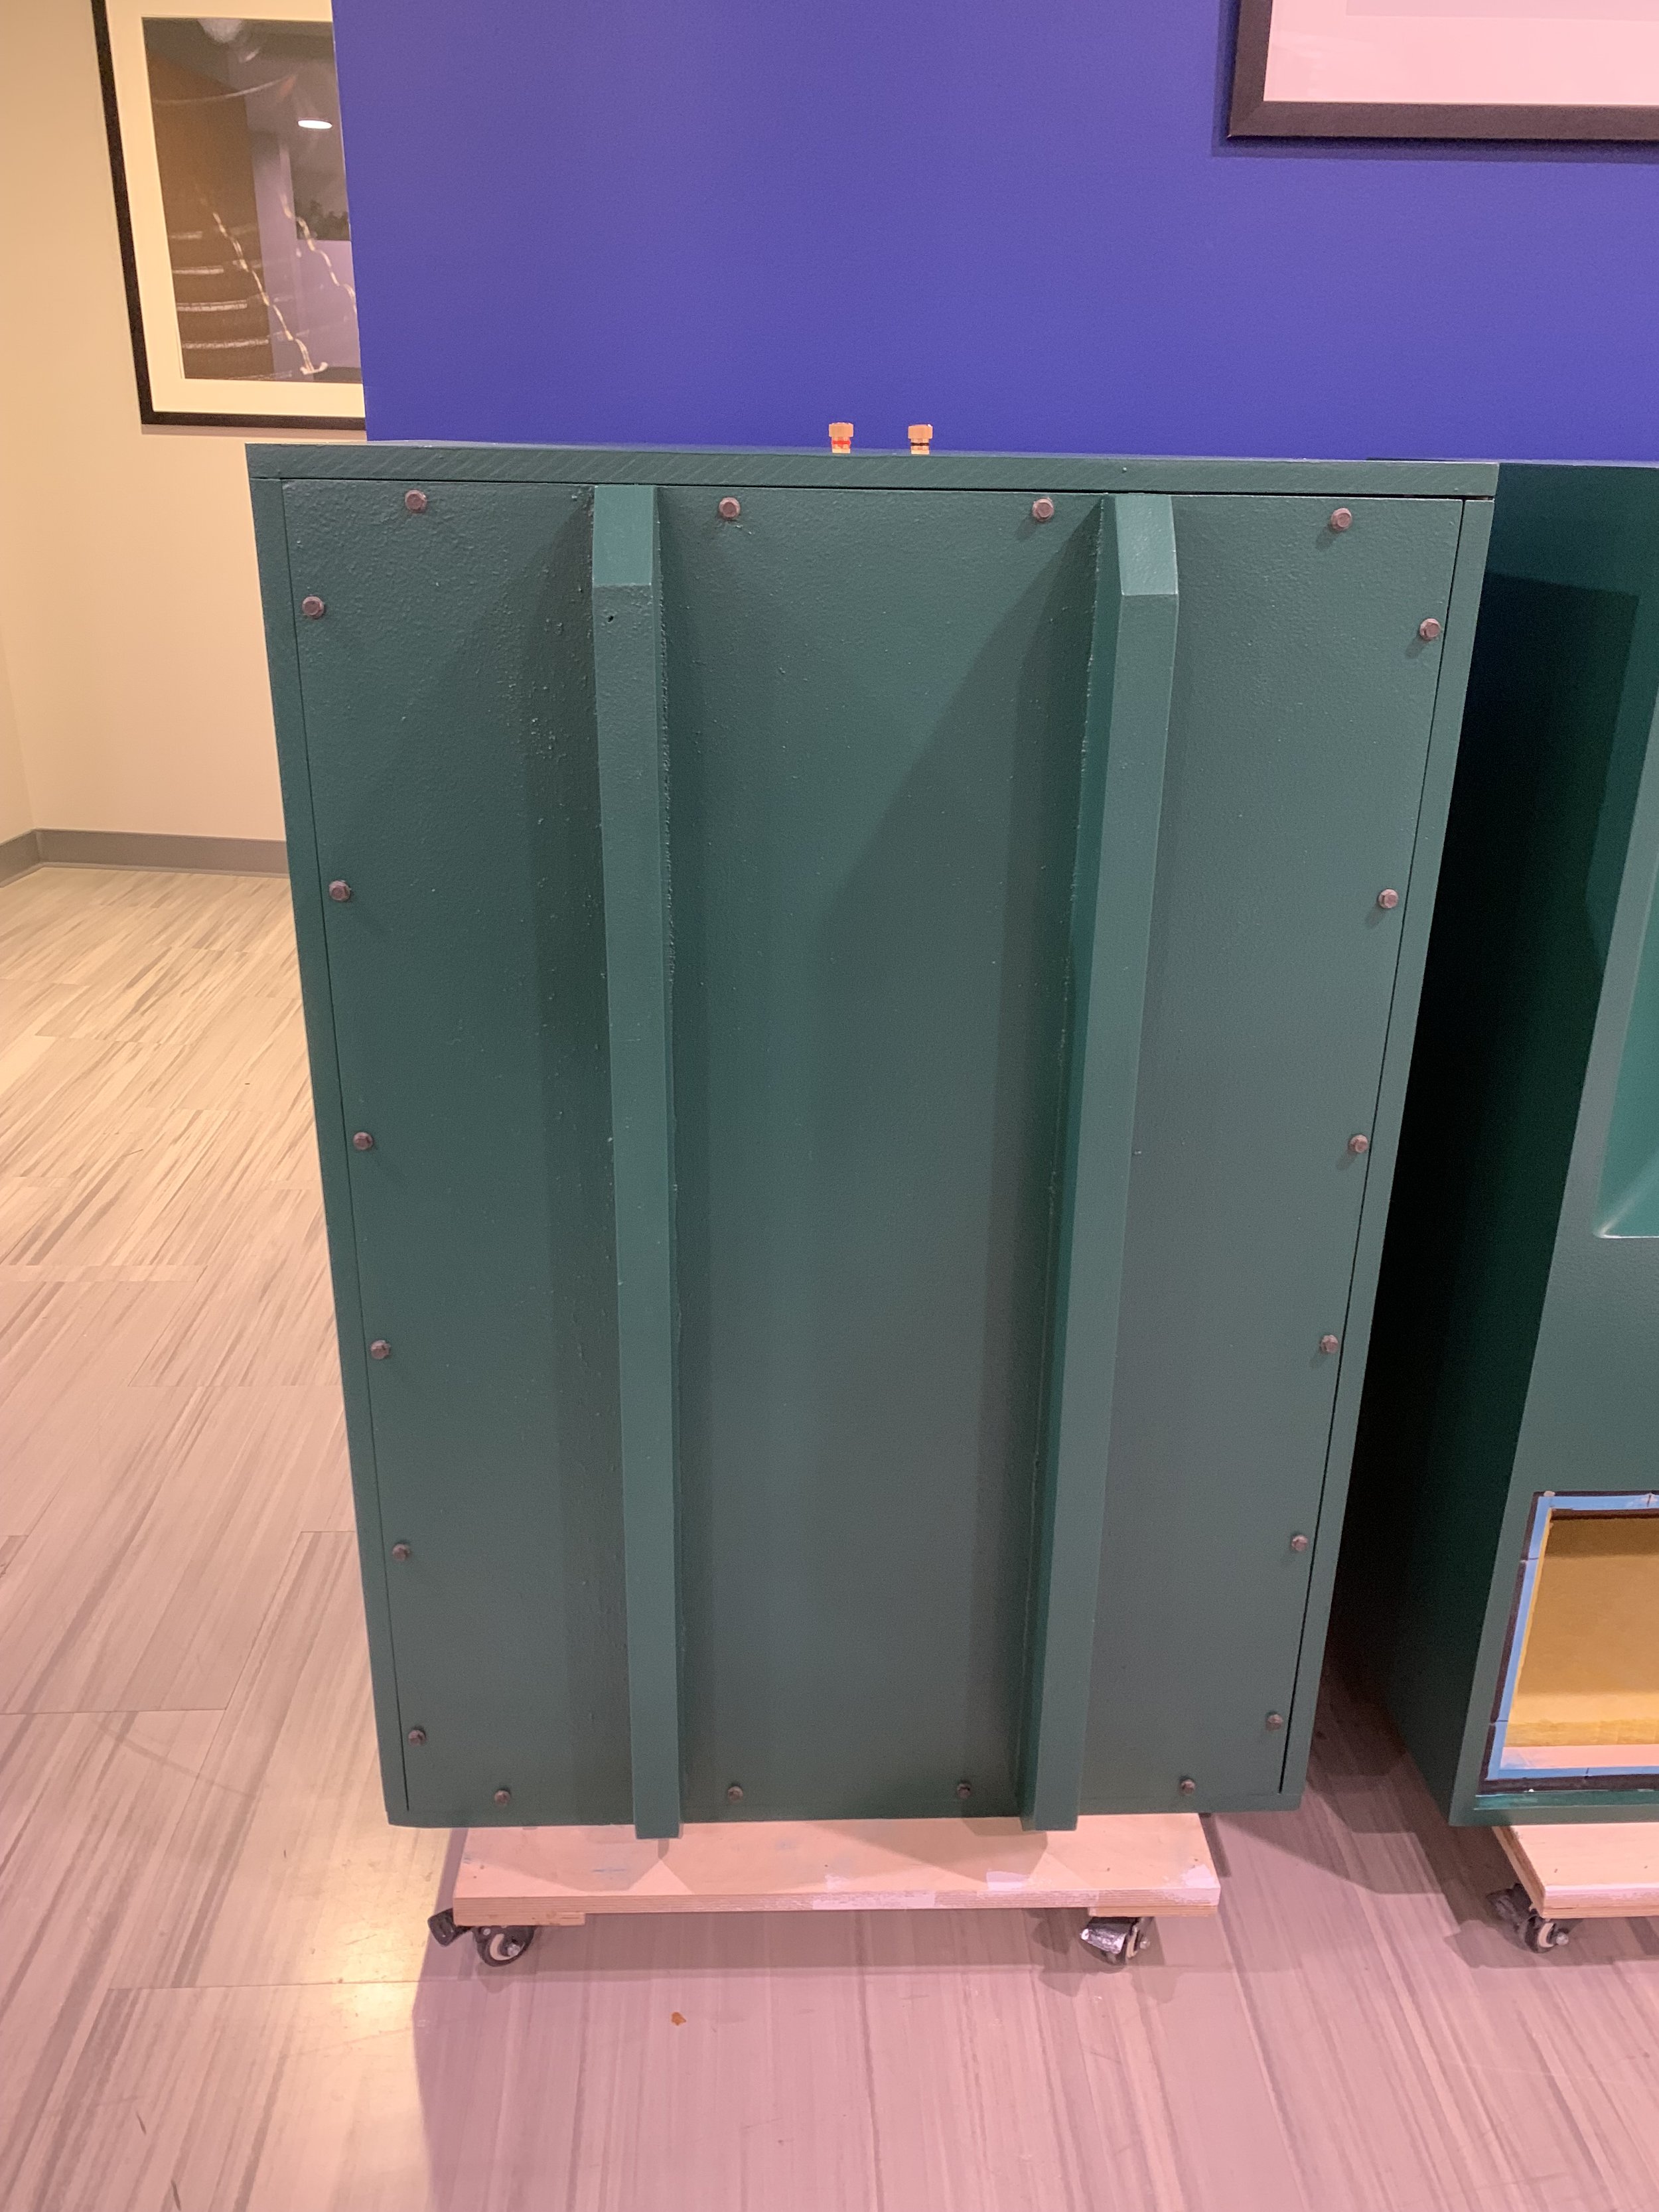
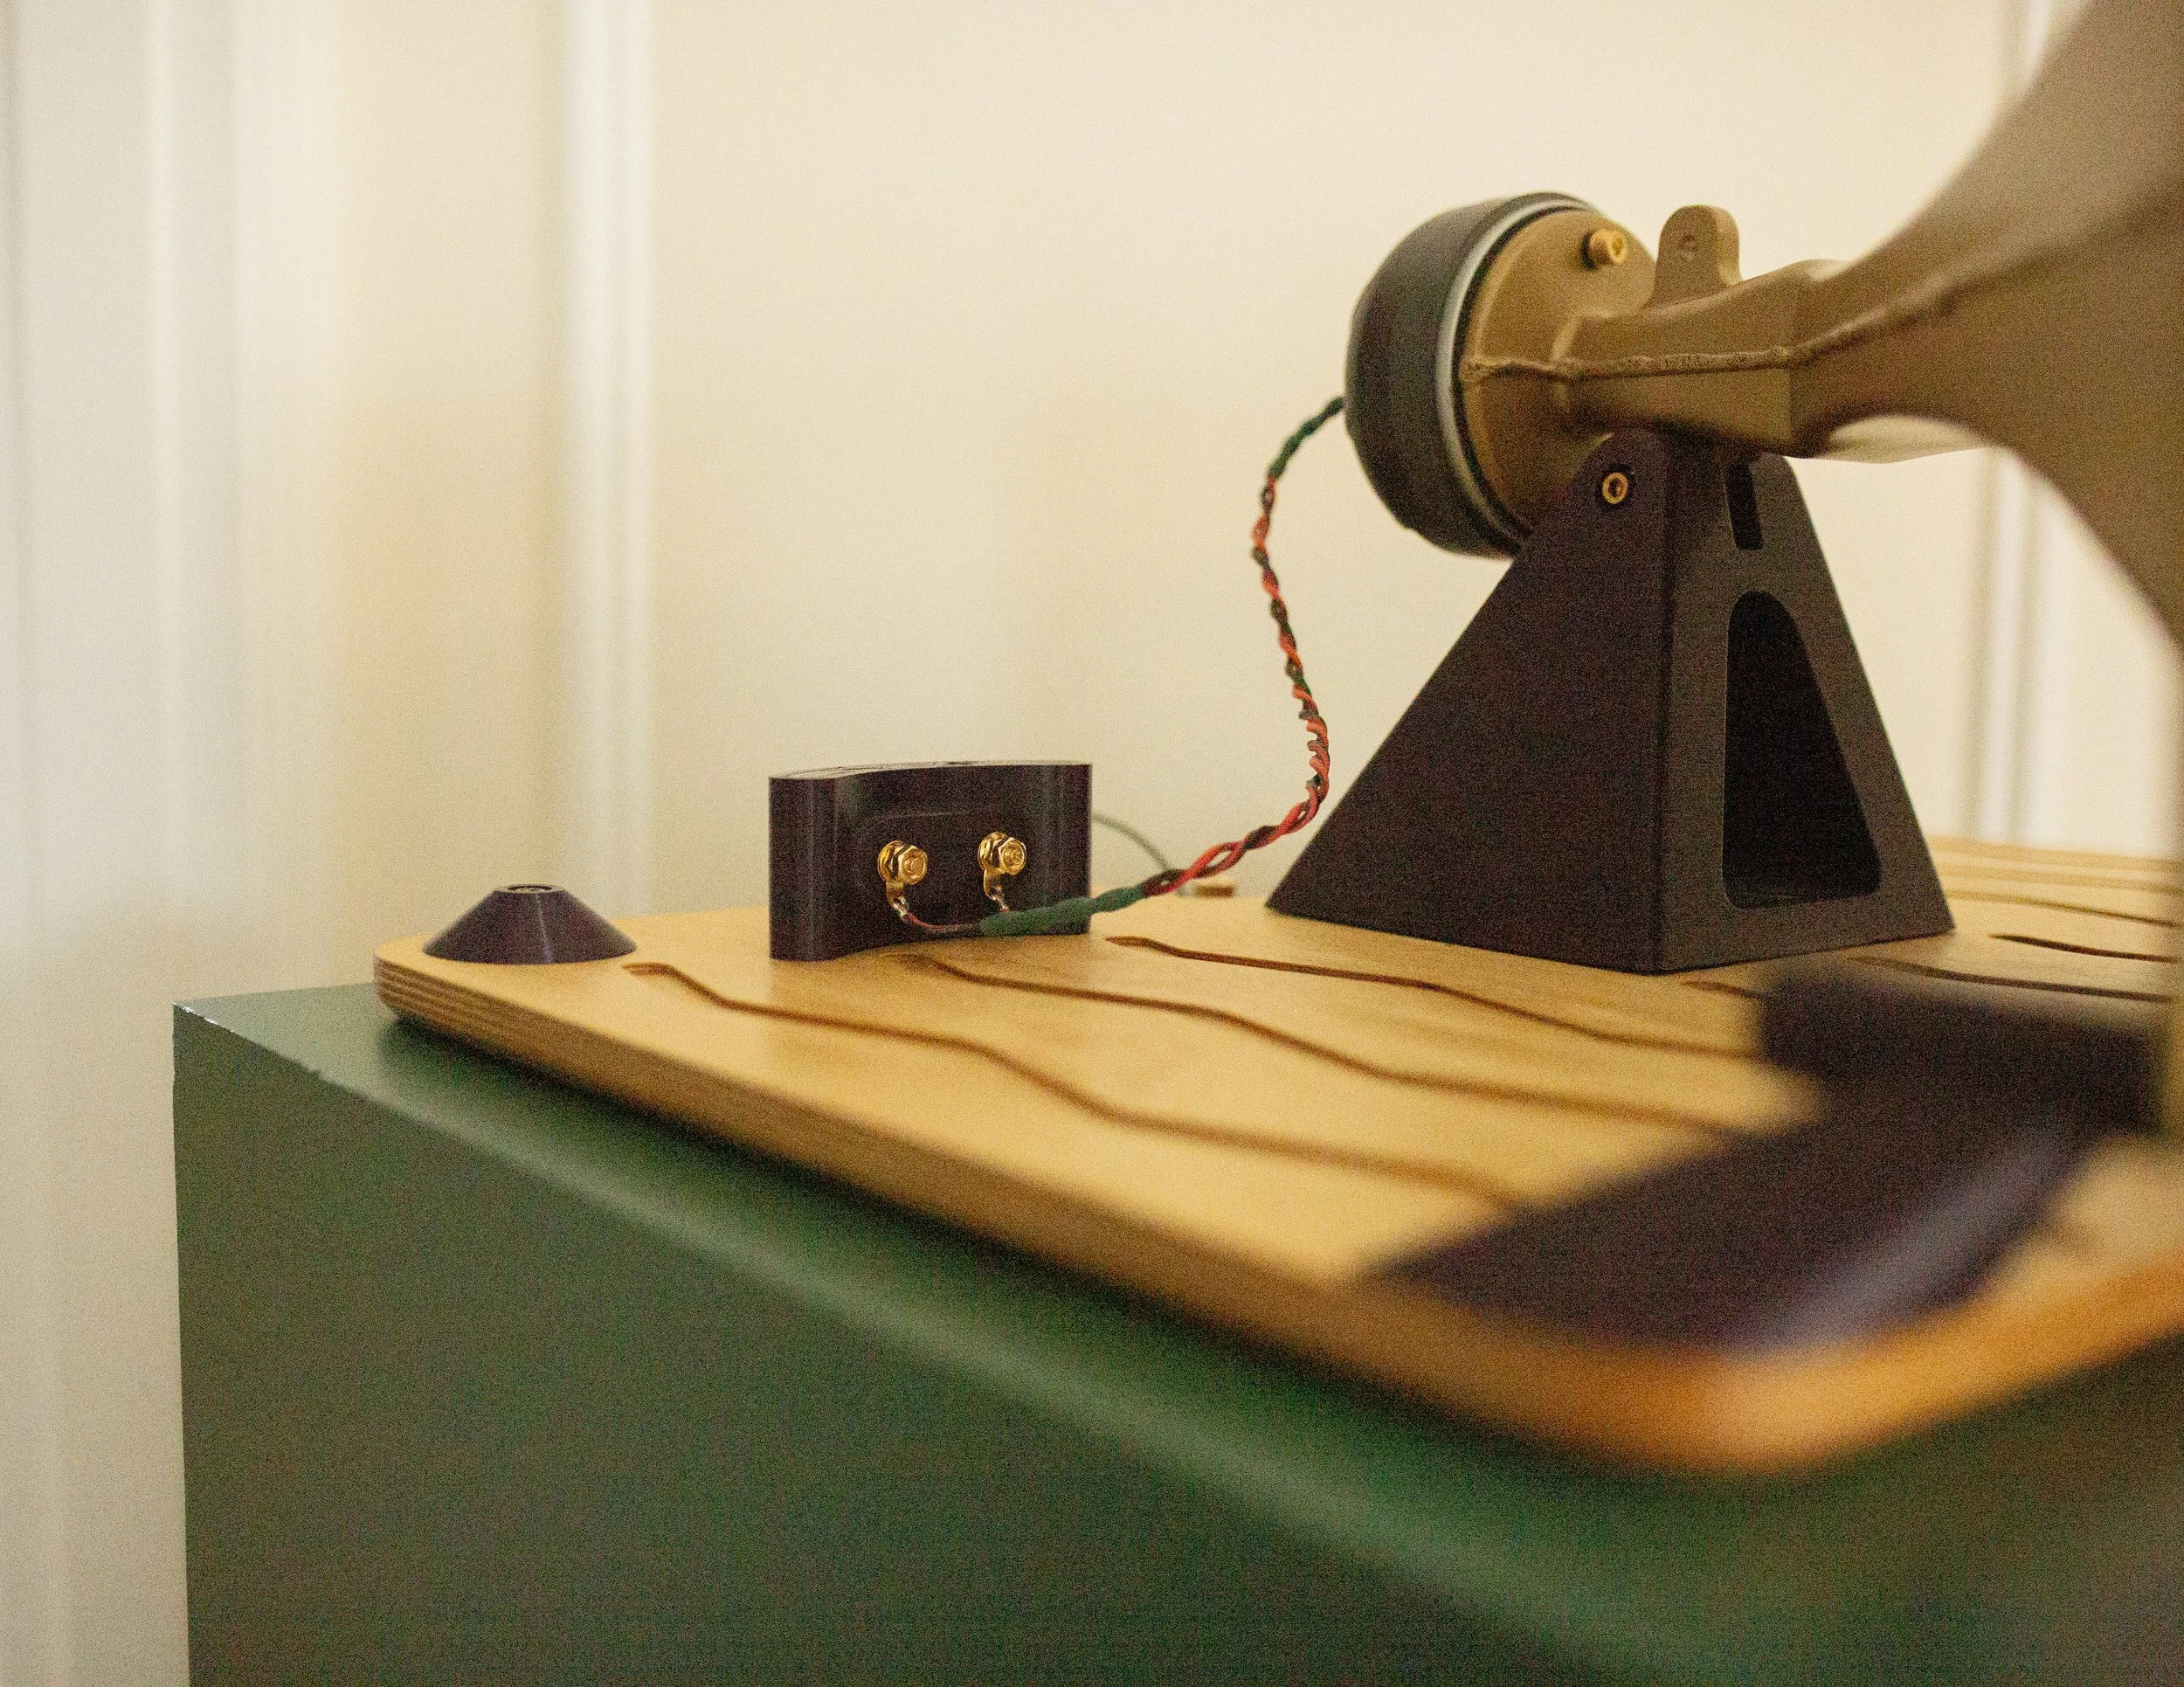
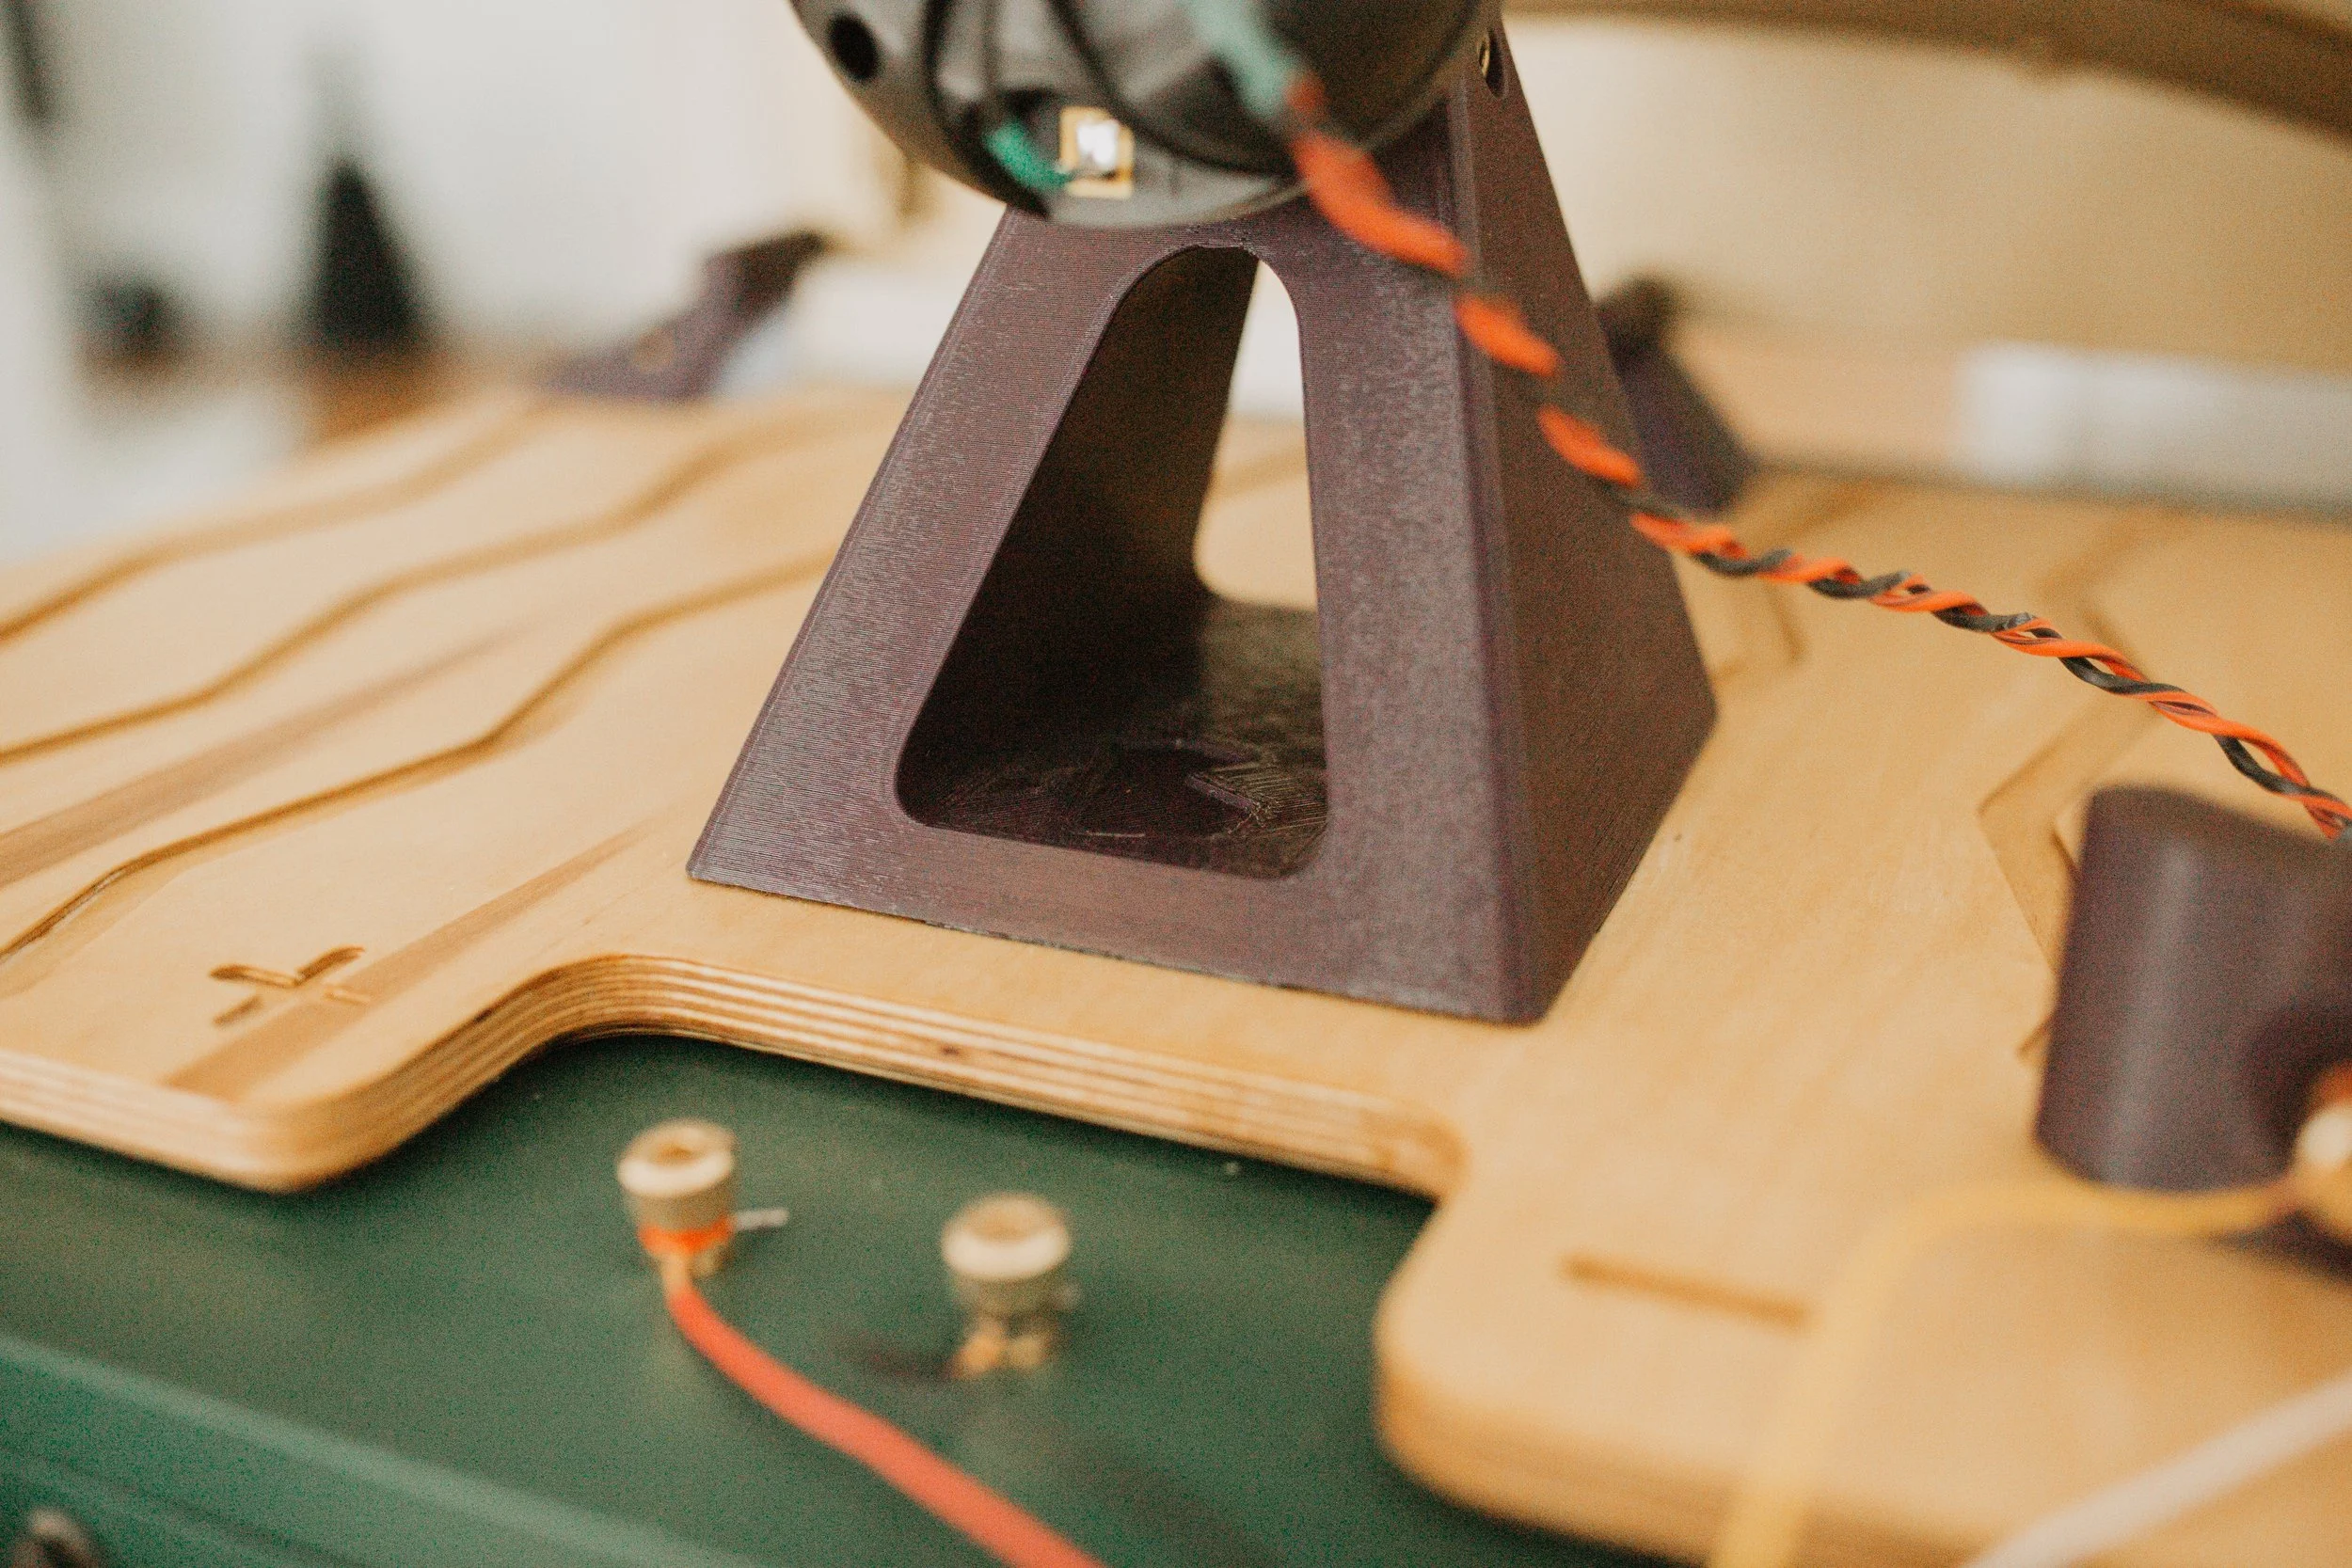
The main reason why this was such a huge lift was to retain the modularity I had already baked into the cabinet. The old gray pedestals could bolt/unbolt from the bass bin and be removed for transport (those JBL 2306 waveguides were MASSIVE) but then resecured etc. I really loved this idea of being able to elegantly remove the top half in case it needed to move, go in a small car etc. I ended up designing a plywood plinth to hold the entire HF section with its own terminal block etc.
This redesign also landed on a bold, gold color decision for the horns. Those would eventually be powder coated and support by some deep purple color mounts. I wanted the parts to obviously have function but also serve as some interesting eye candy. It was really fun filling in the details and trying to interpret my favorite design movement (Memphis design) and imagine how that style could be applied here.
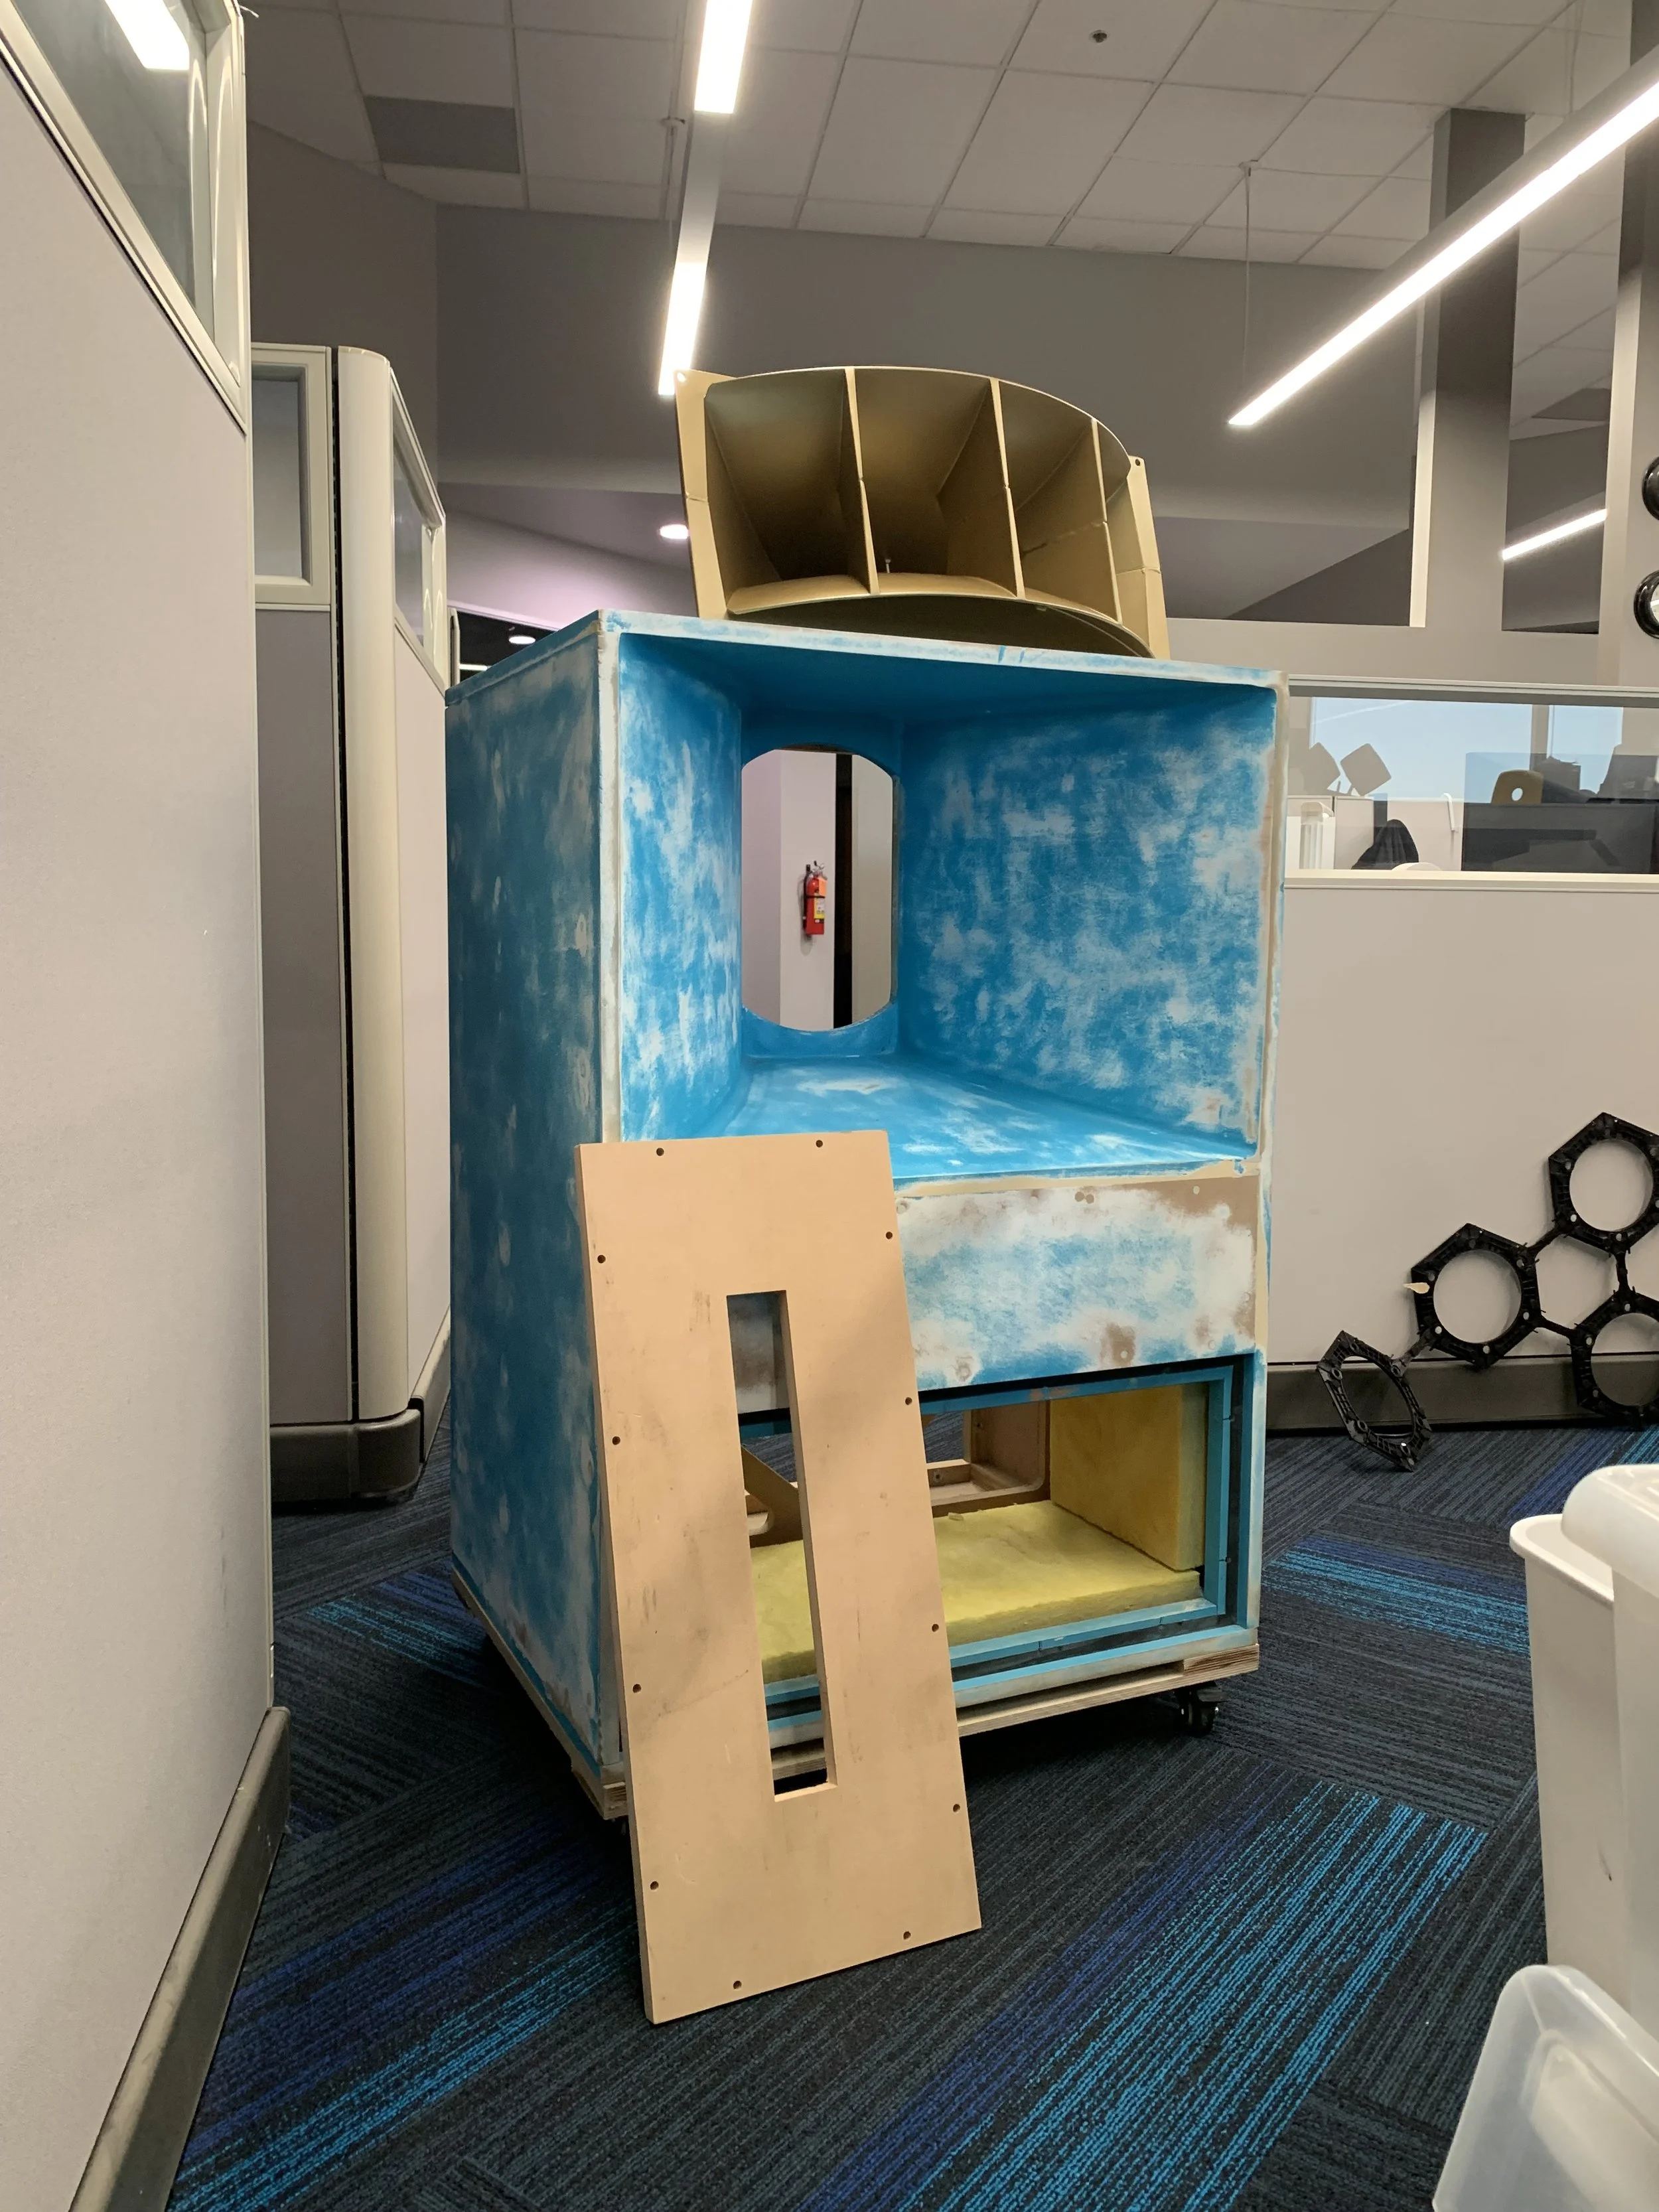
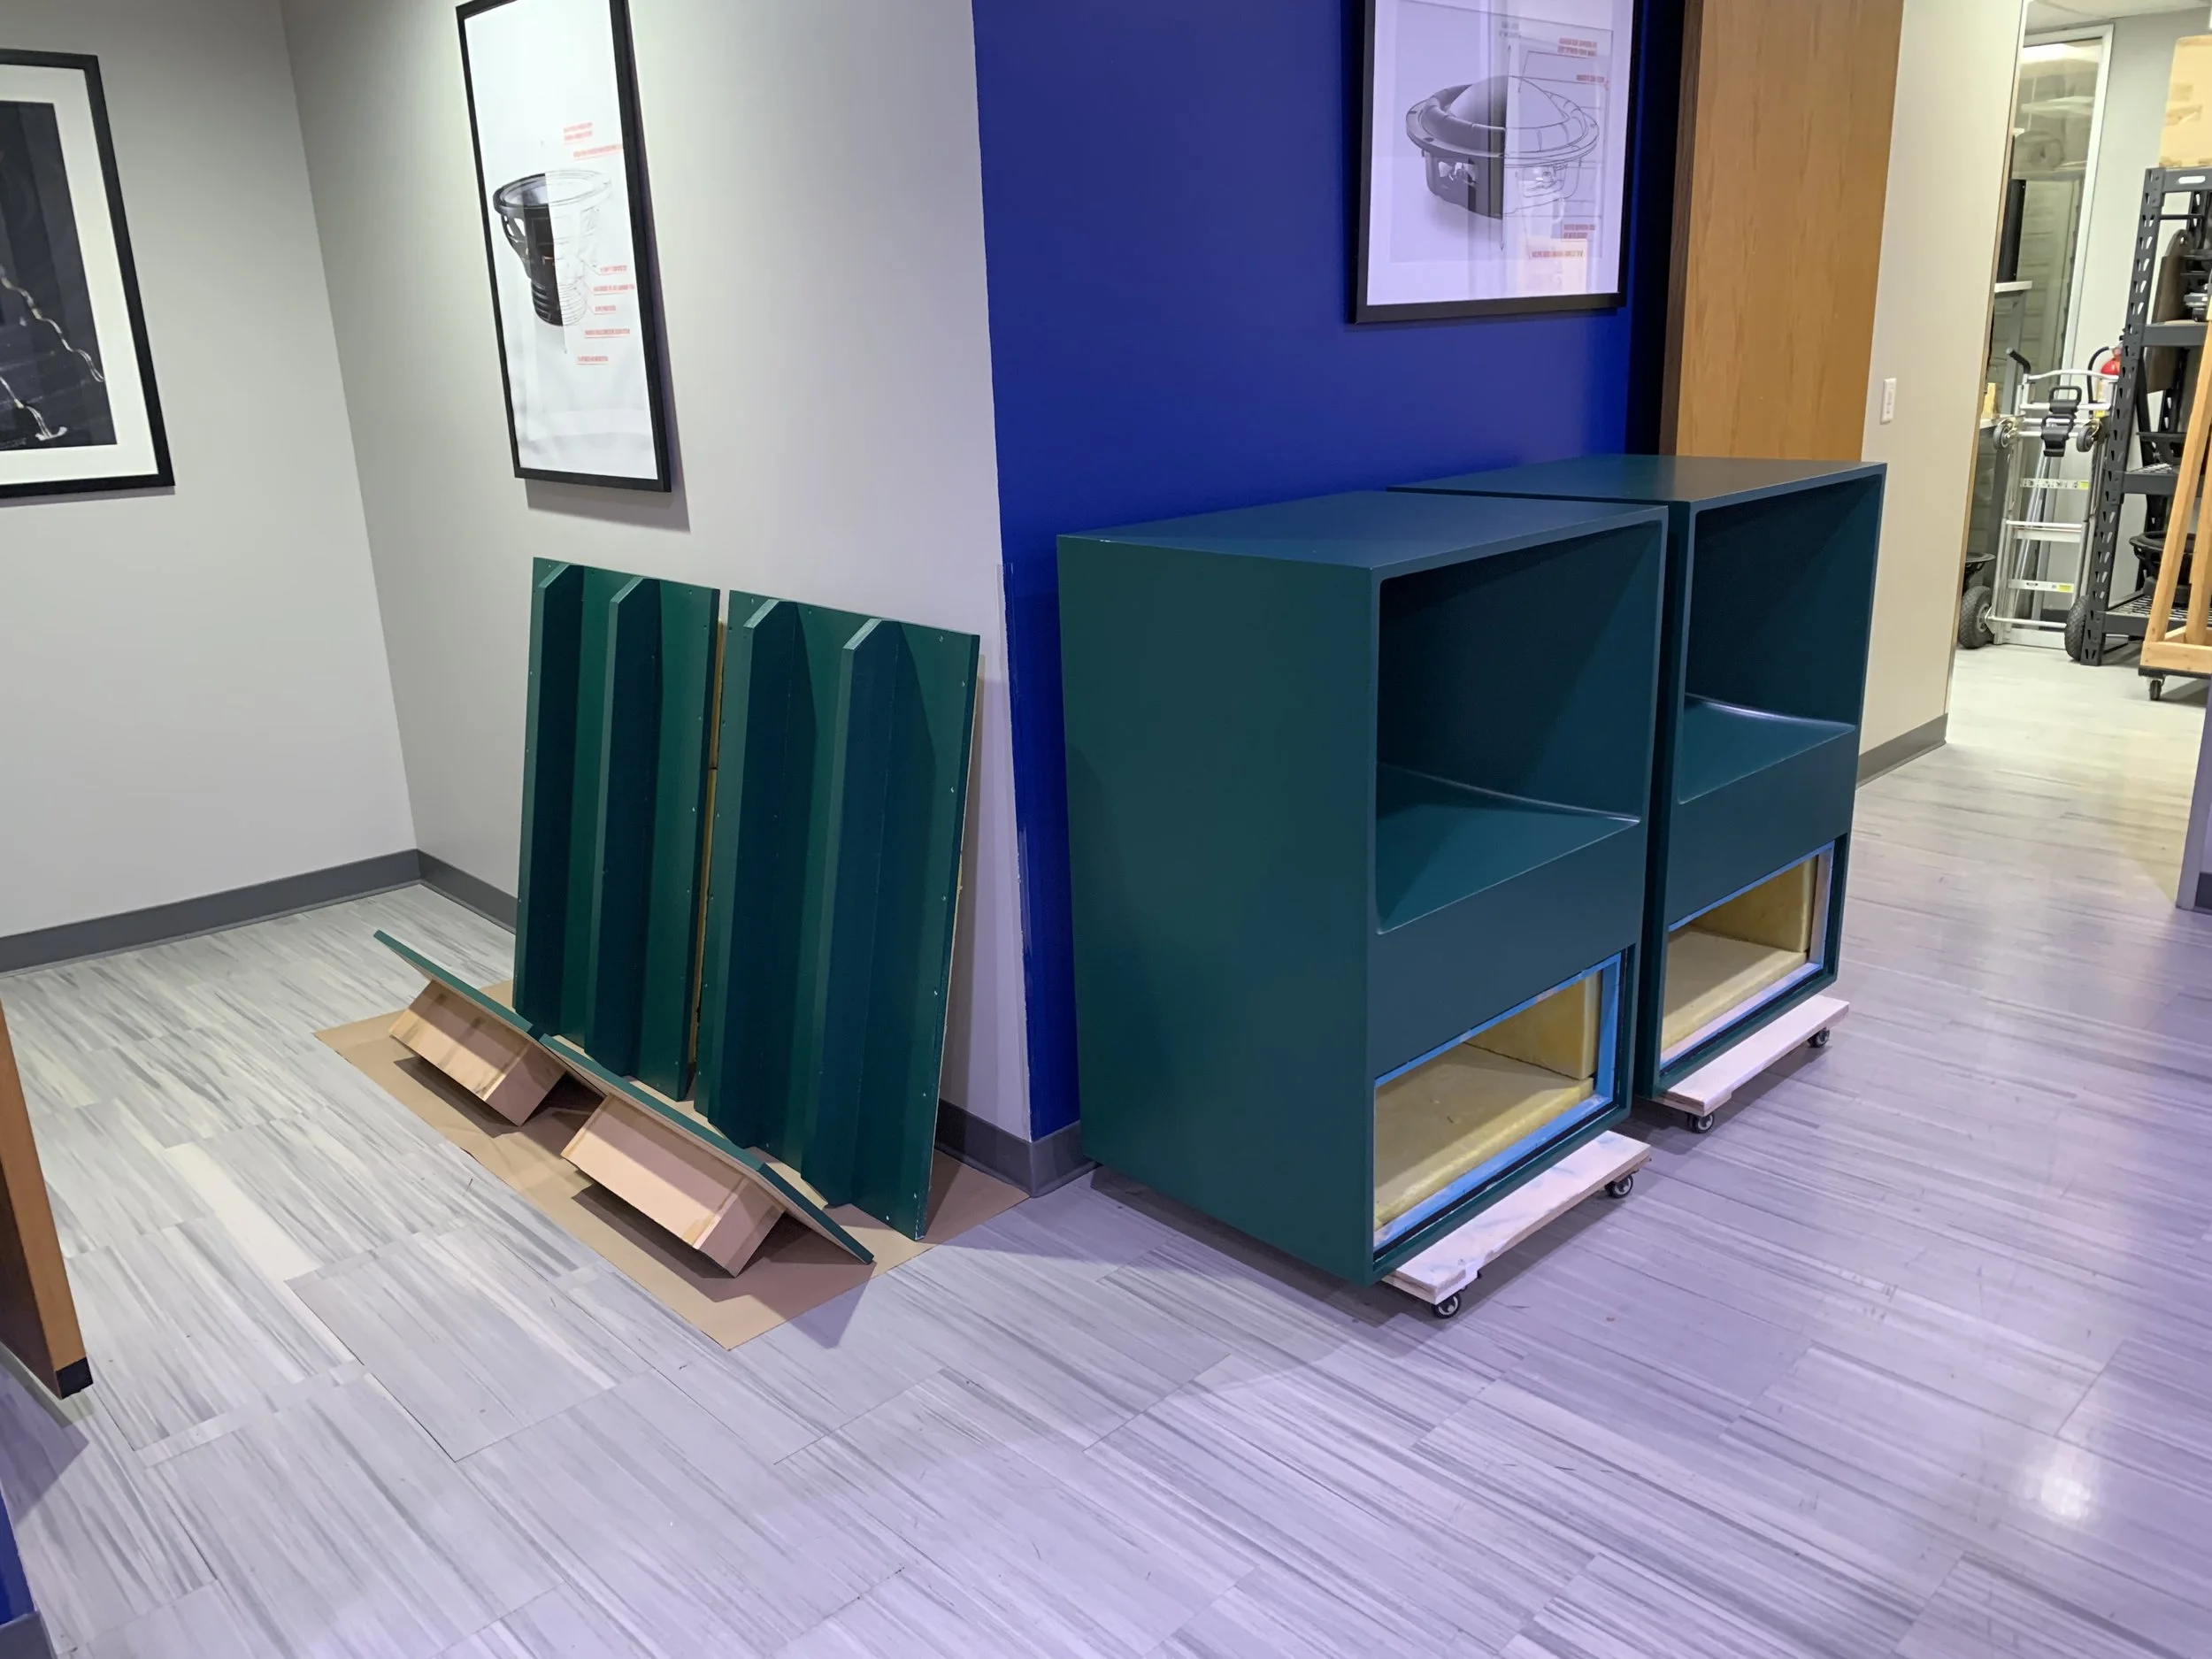
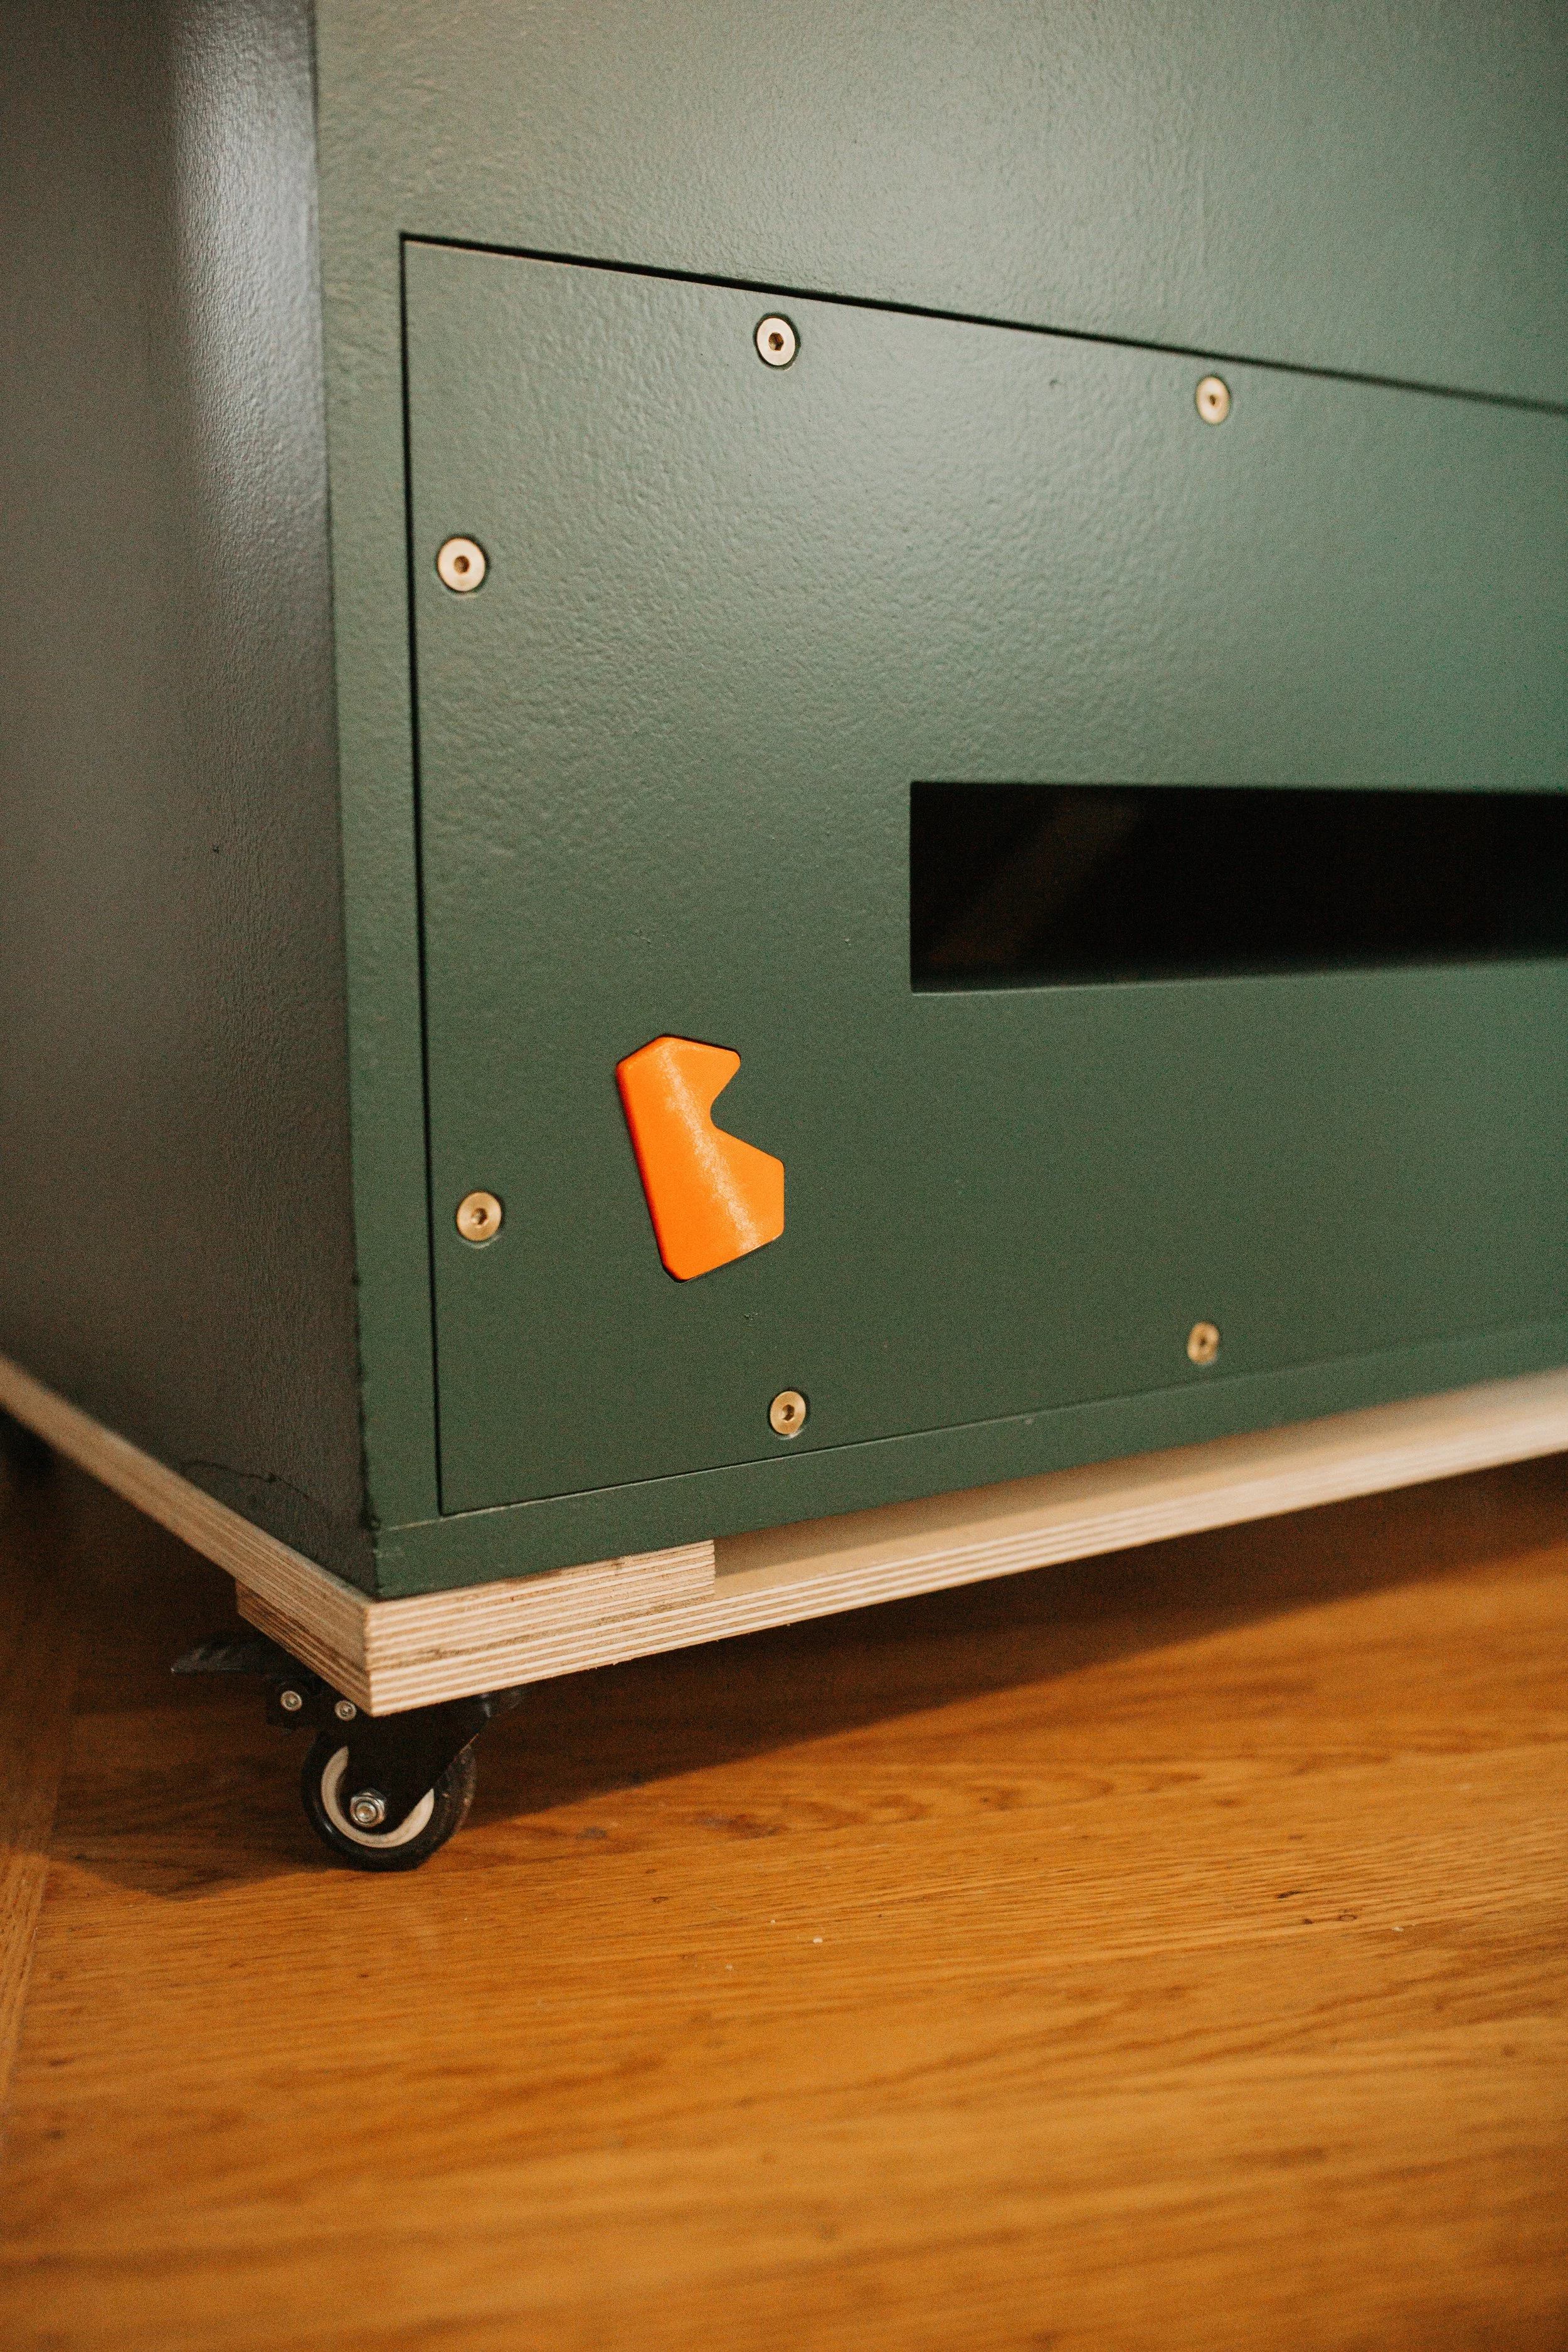
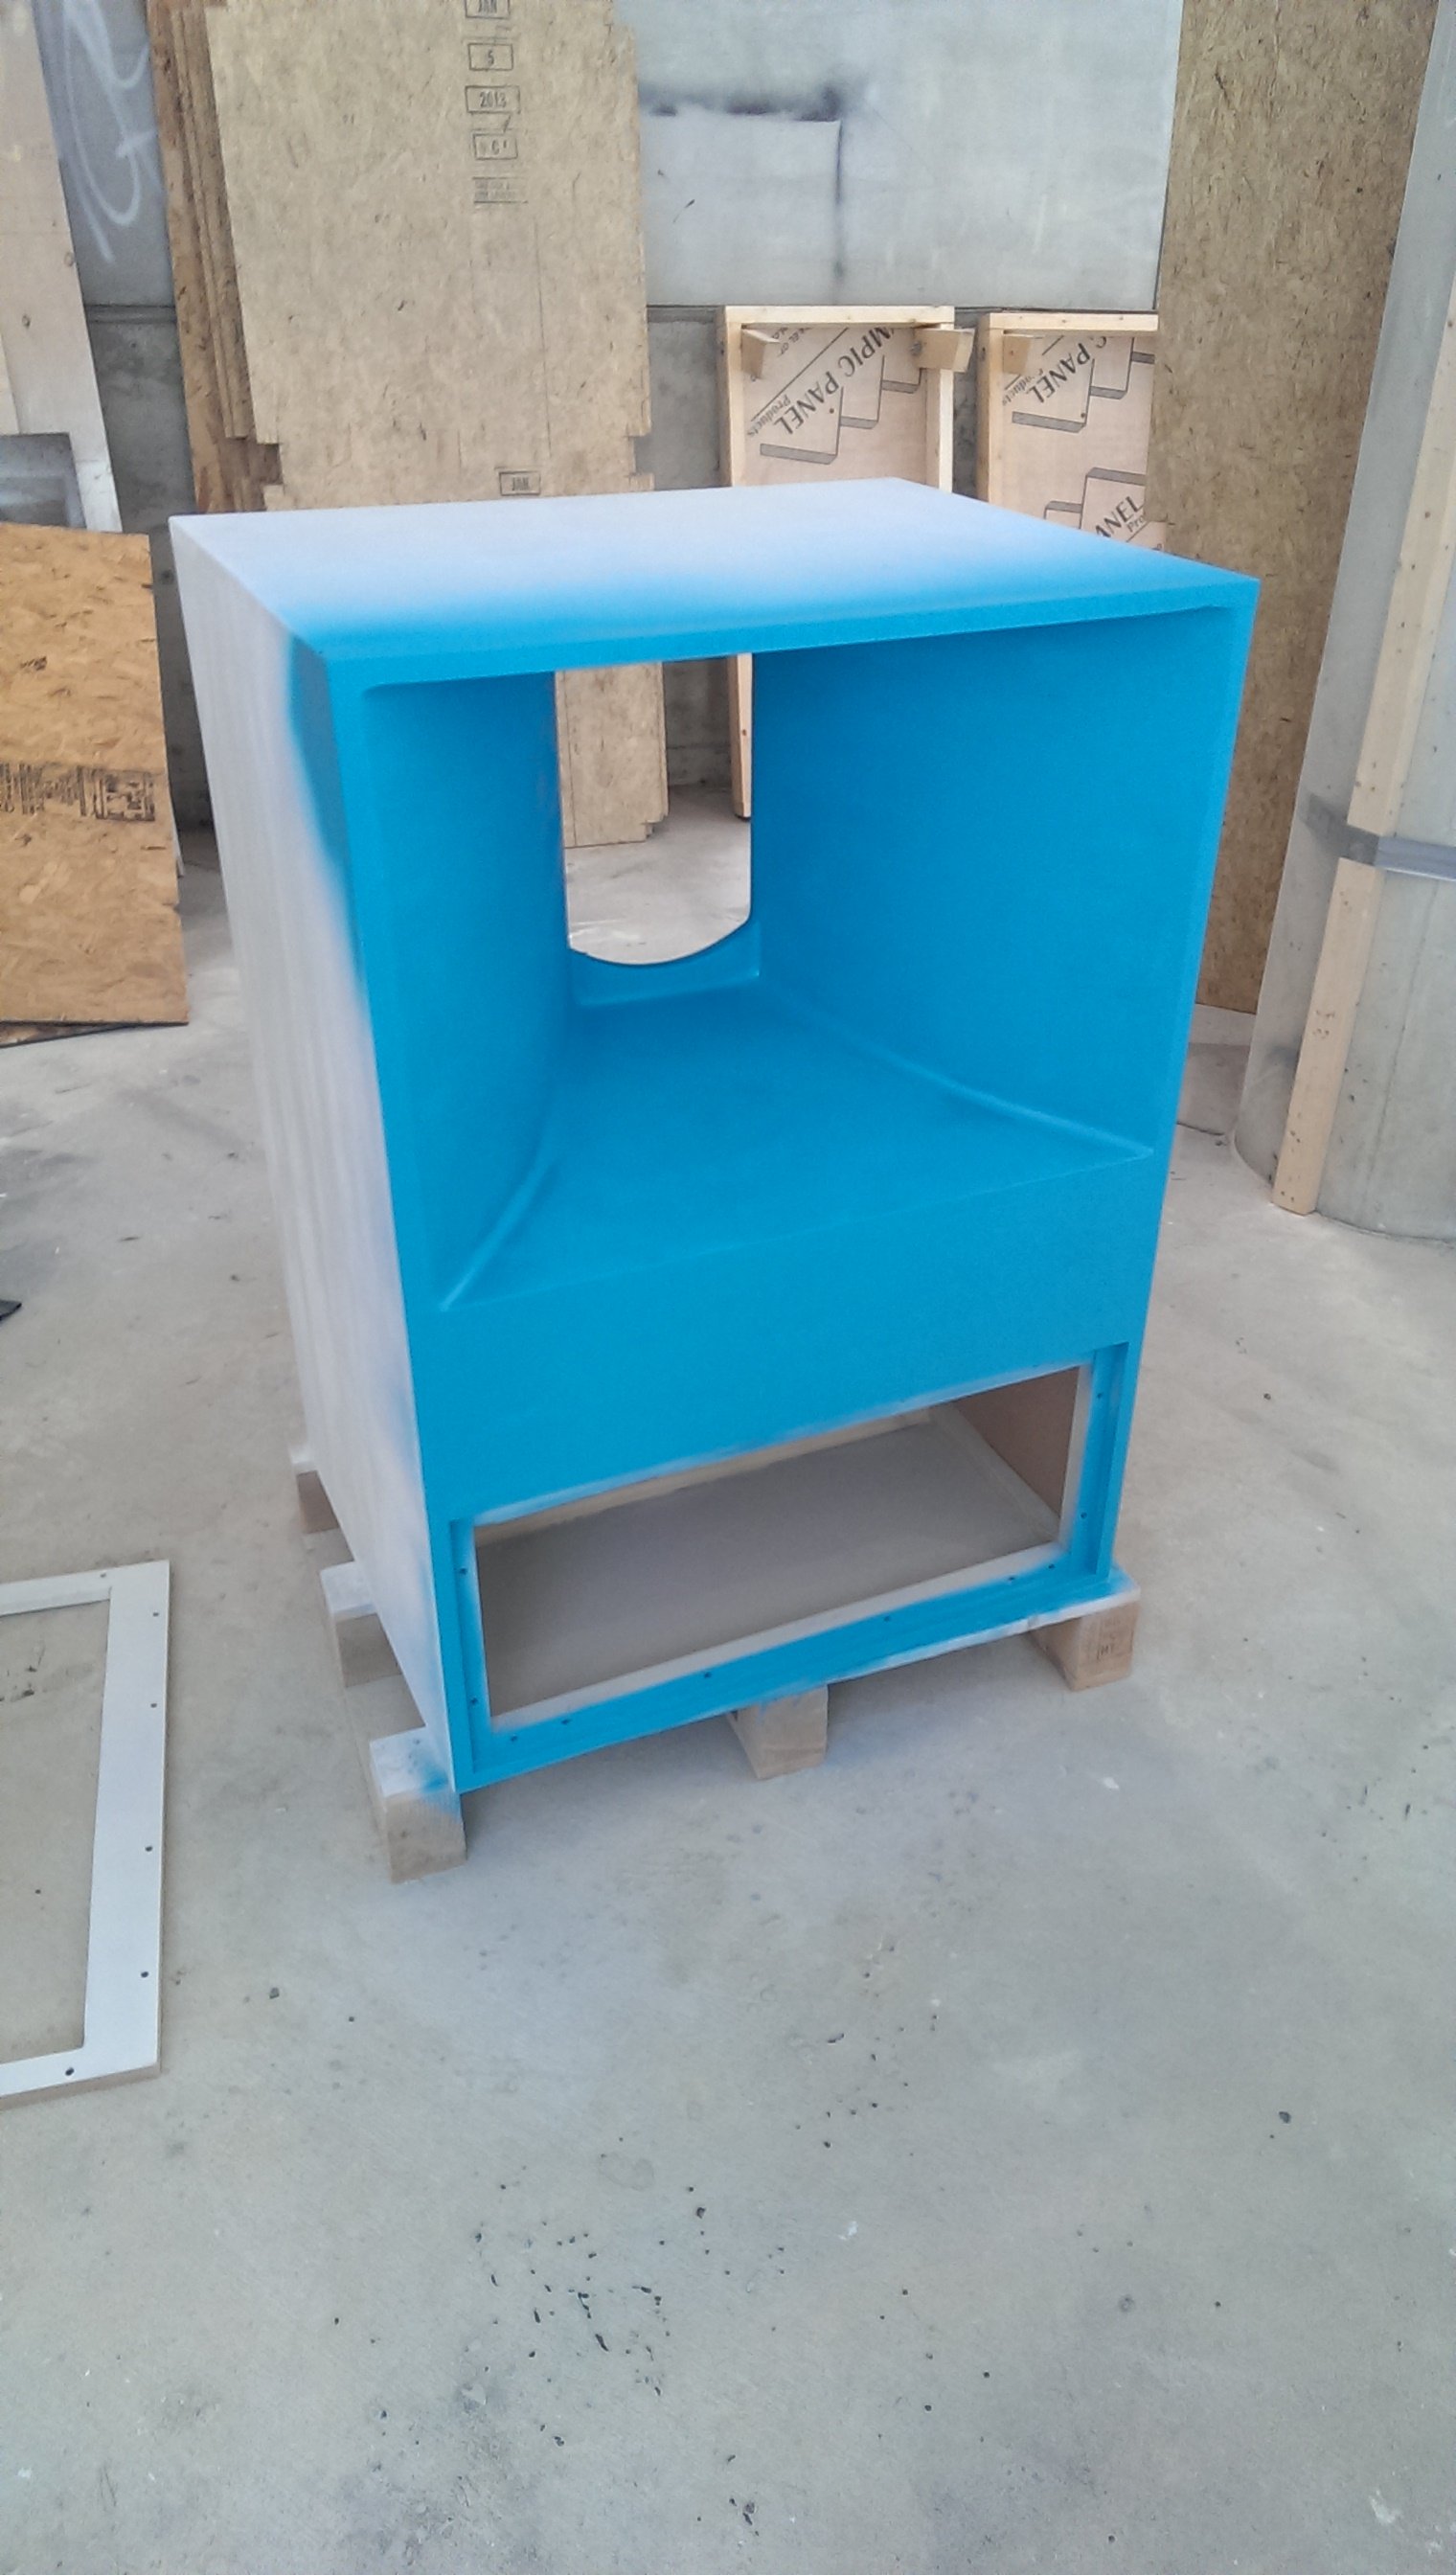
What a colossal pain in the ass it was to refinish these things. Sand, fill, sand, fill, sand, fill, prime, sand, prime, sand and on and on. This was the worst part of the entire project. Trying to do away with or otherwise cover up the hideous pure cyan paint I had put on. So many sanding discs were consumed during this part of the project. Also, a lot of filler was used to repair all of the dings and blemishes these cabinets had accumulated over the years. Taking them in and out of the building was such a pain but it needed to be done and luckily I had made some trollies to move them around more easily months prior.
I persevered, though. Luckily my very supportive partner made space and time for this project and even helped(!) from time to time. Boys and girls, find yourself a partner who motivates you and embraces your hobbies. This was a vital ingredient to these speakers even reaching the finish line.
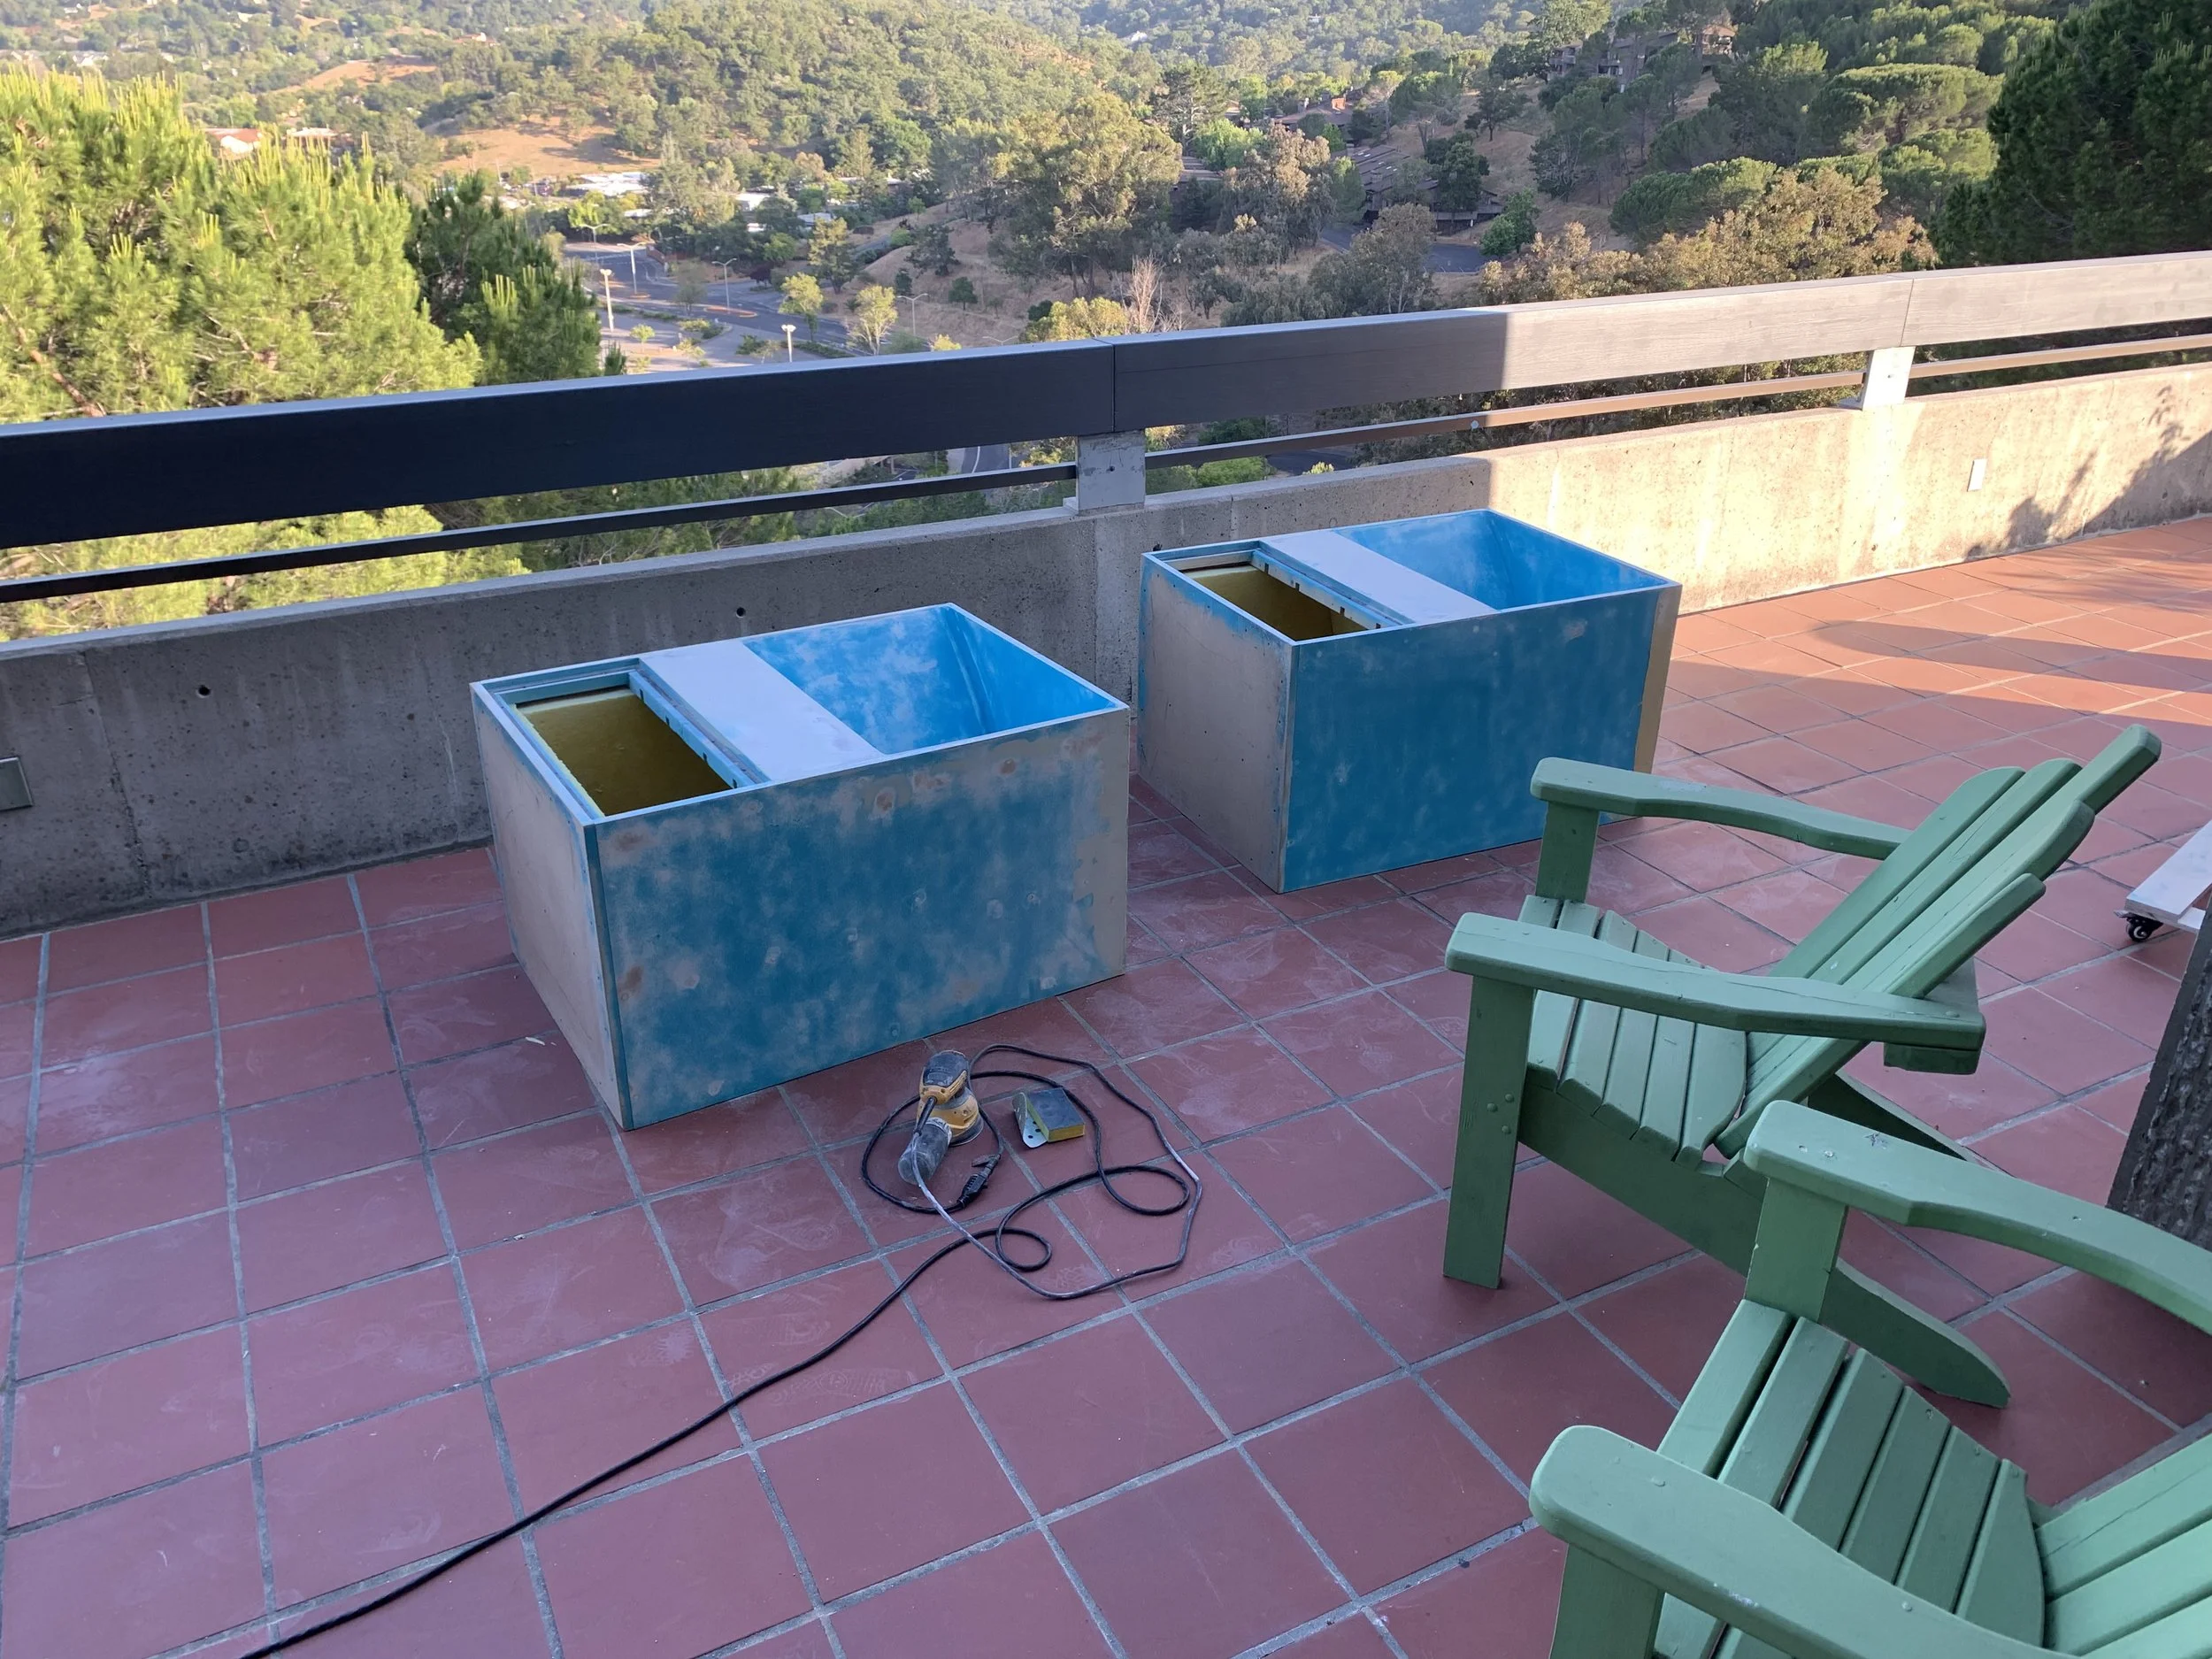
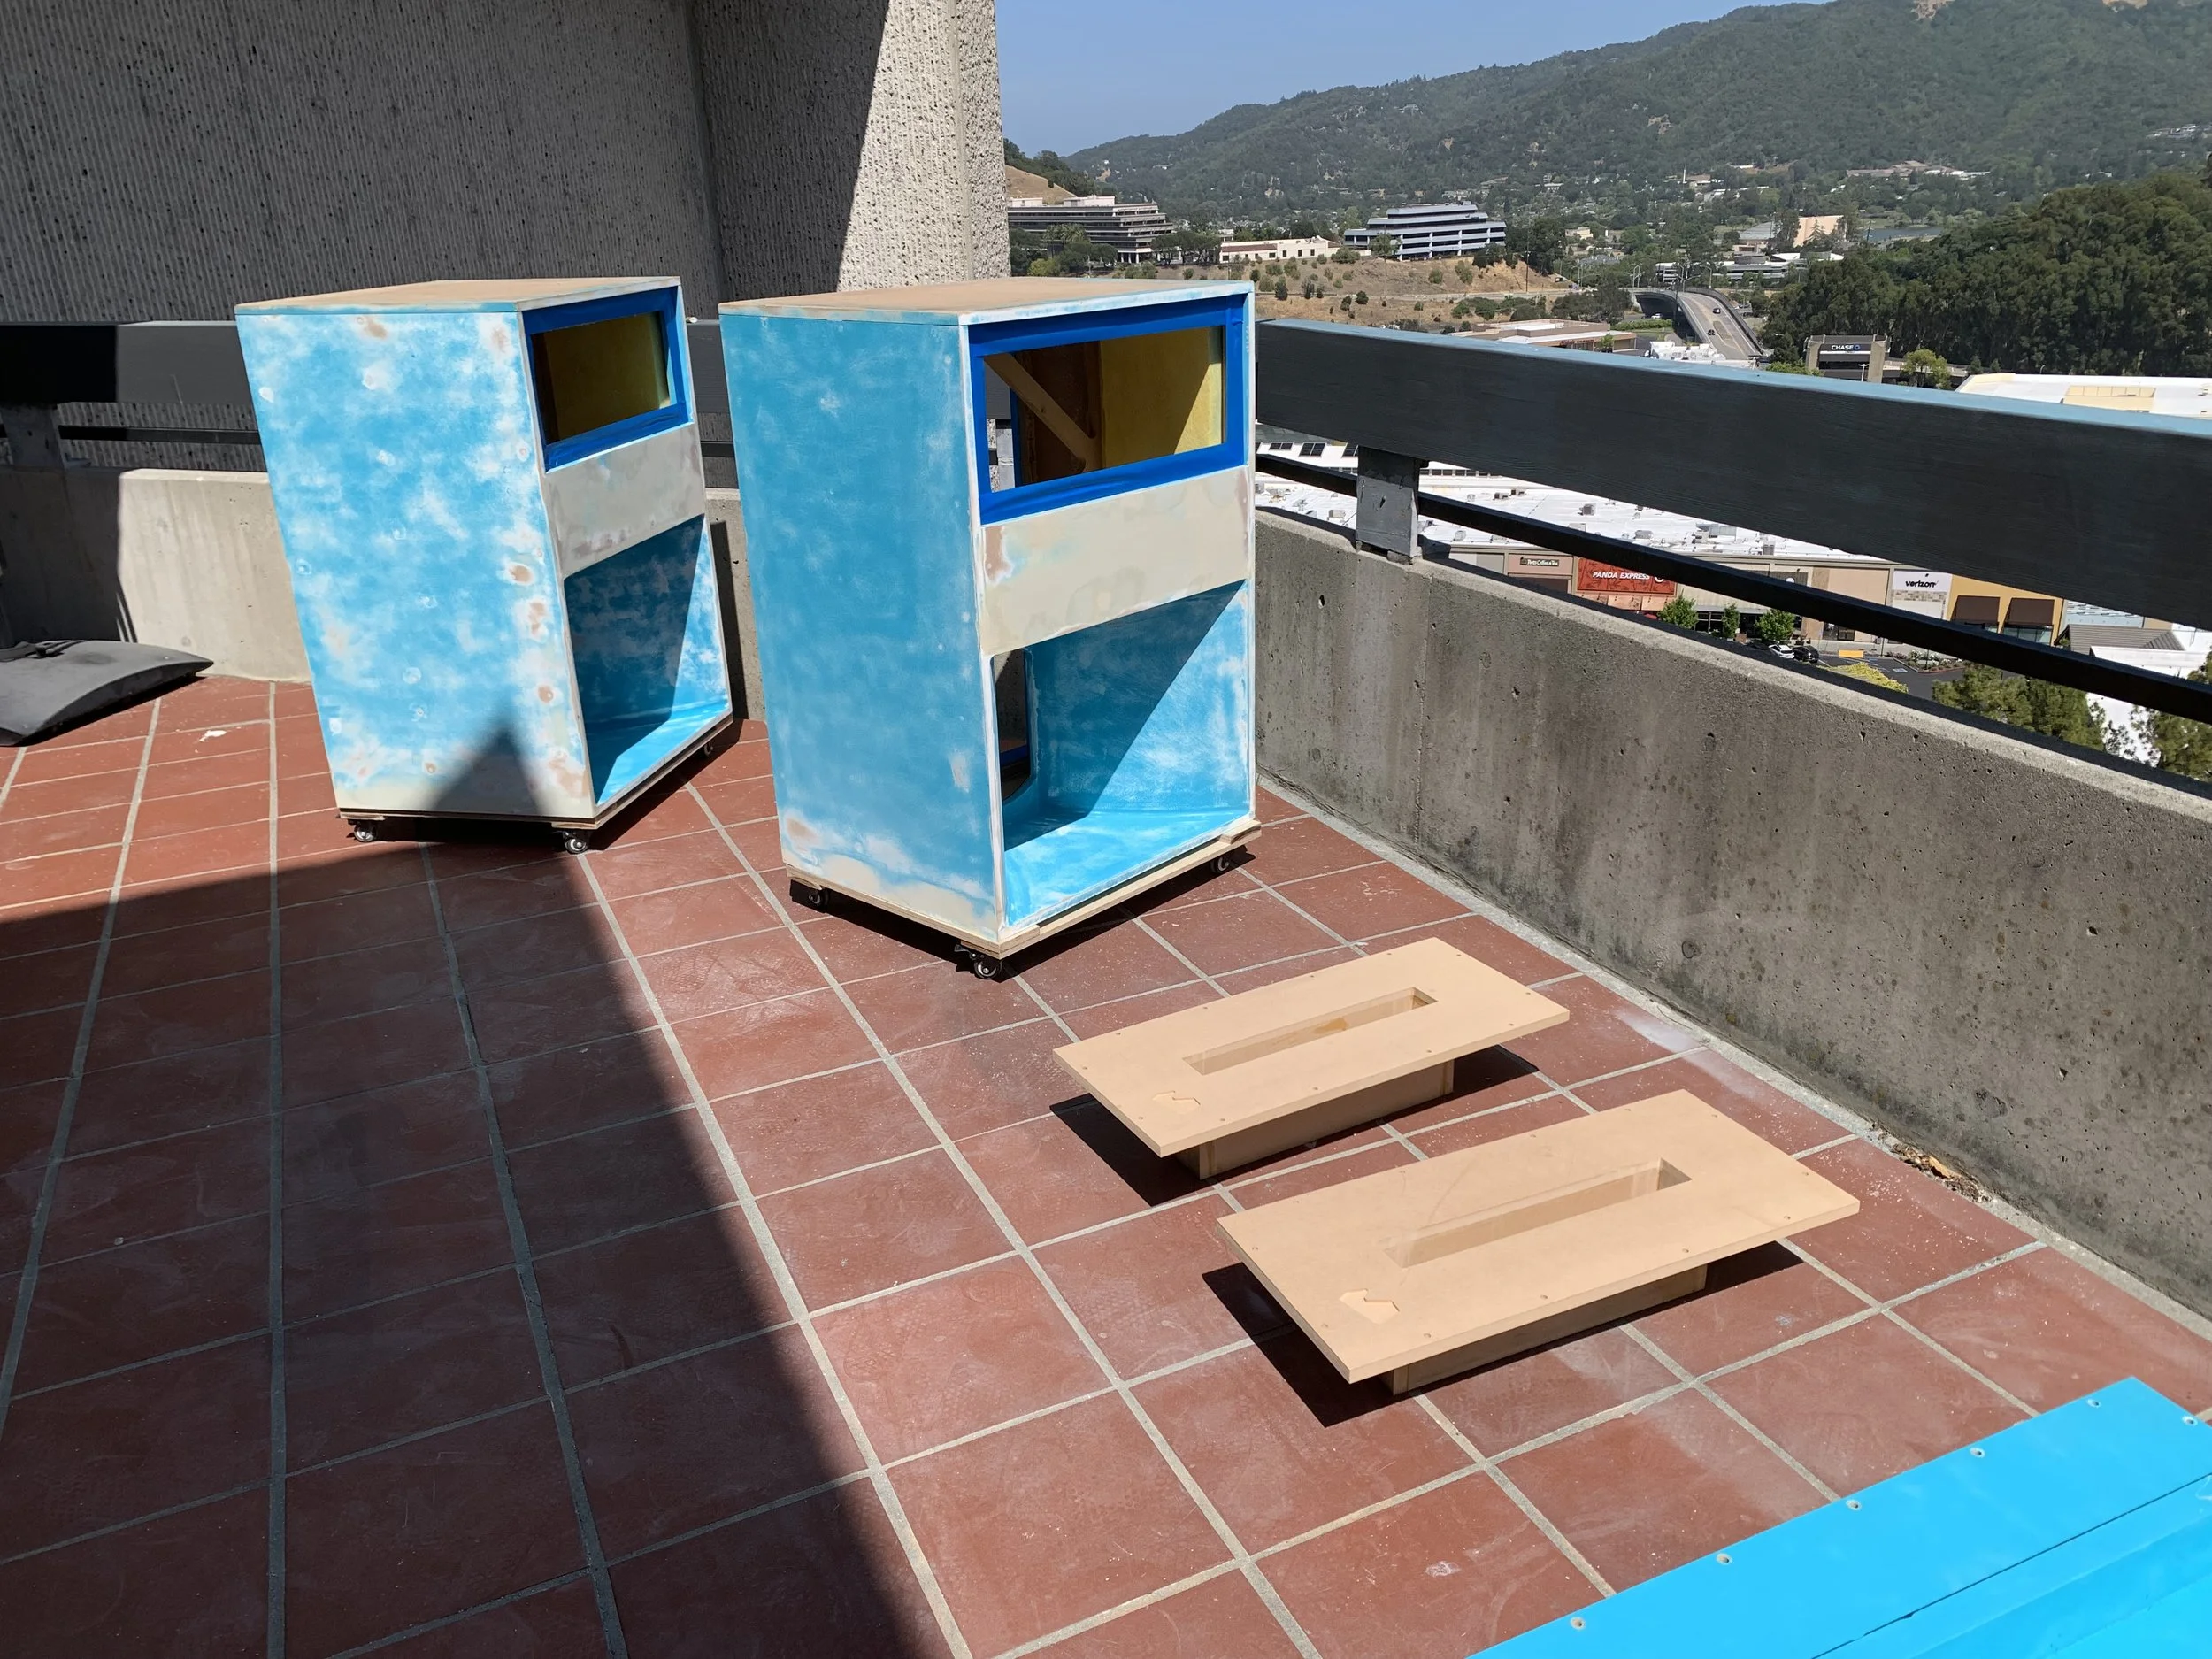
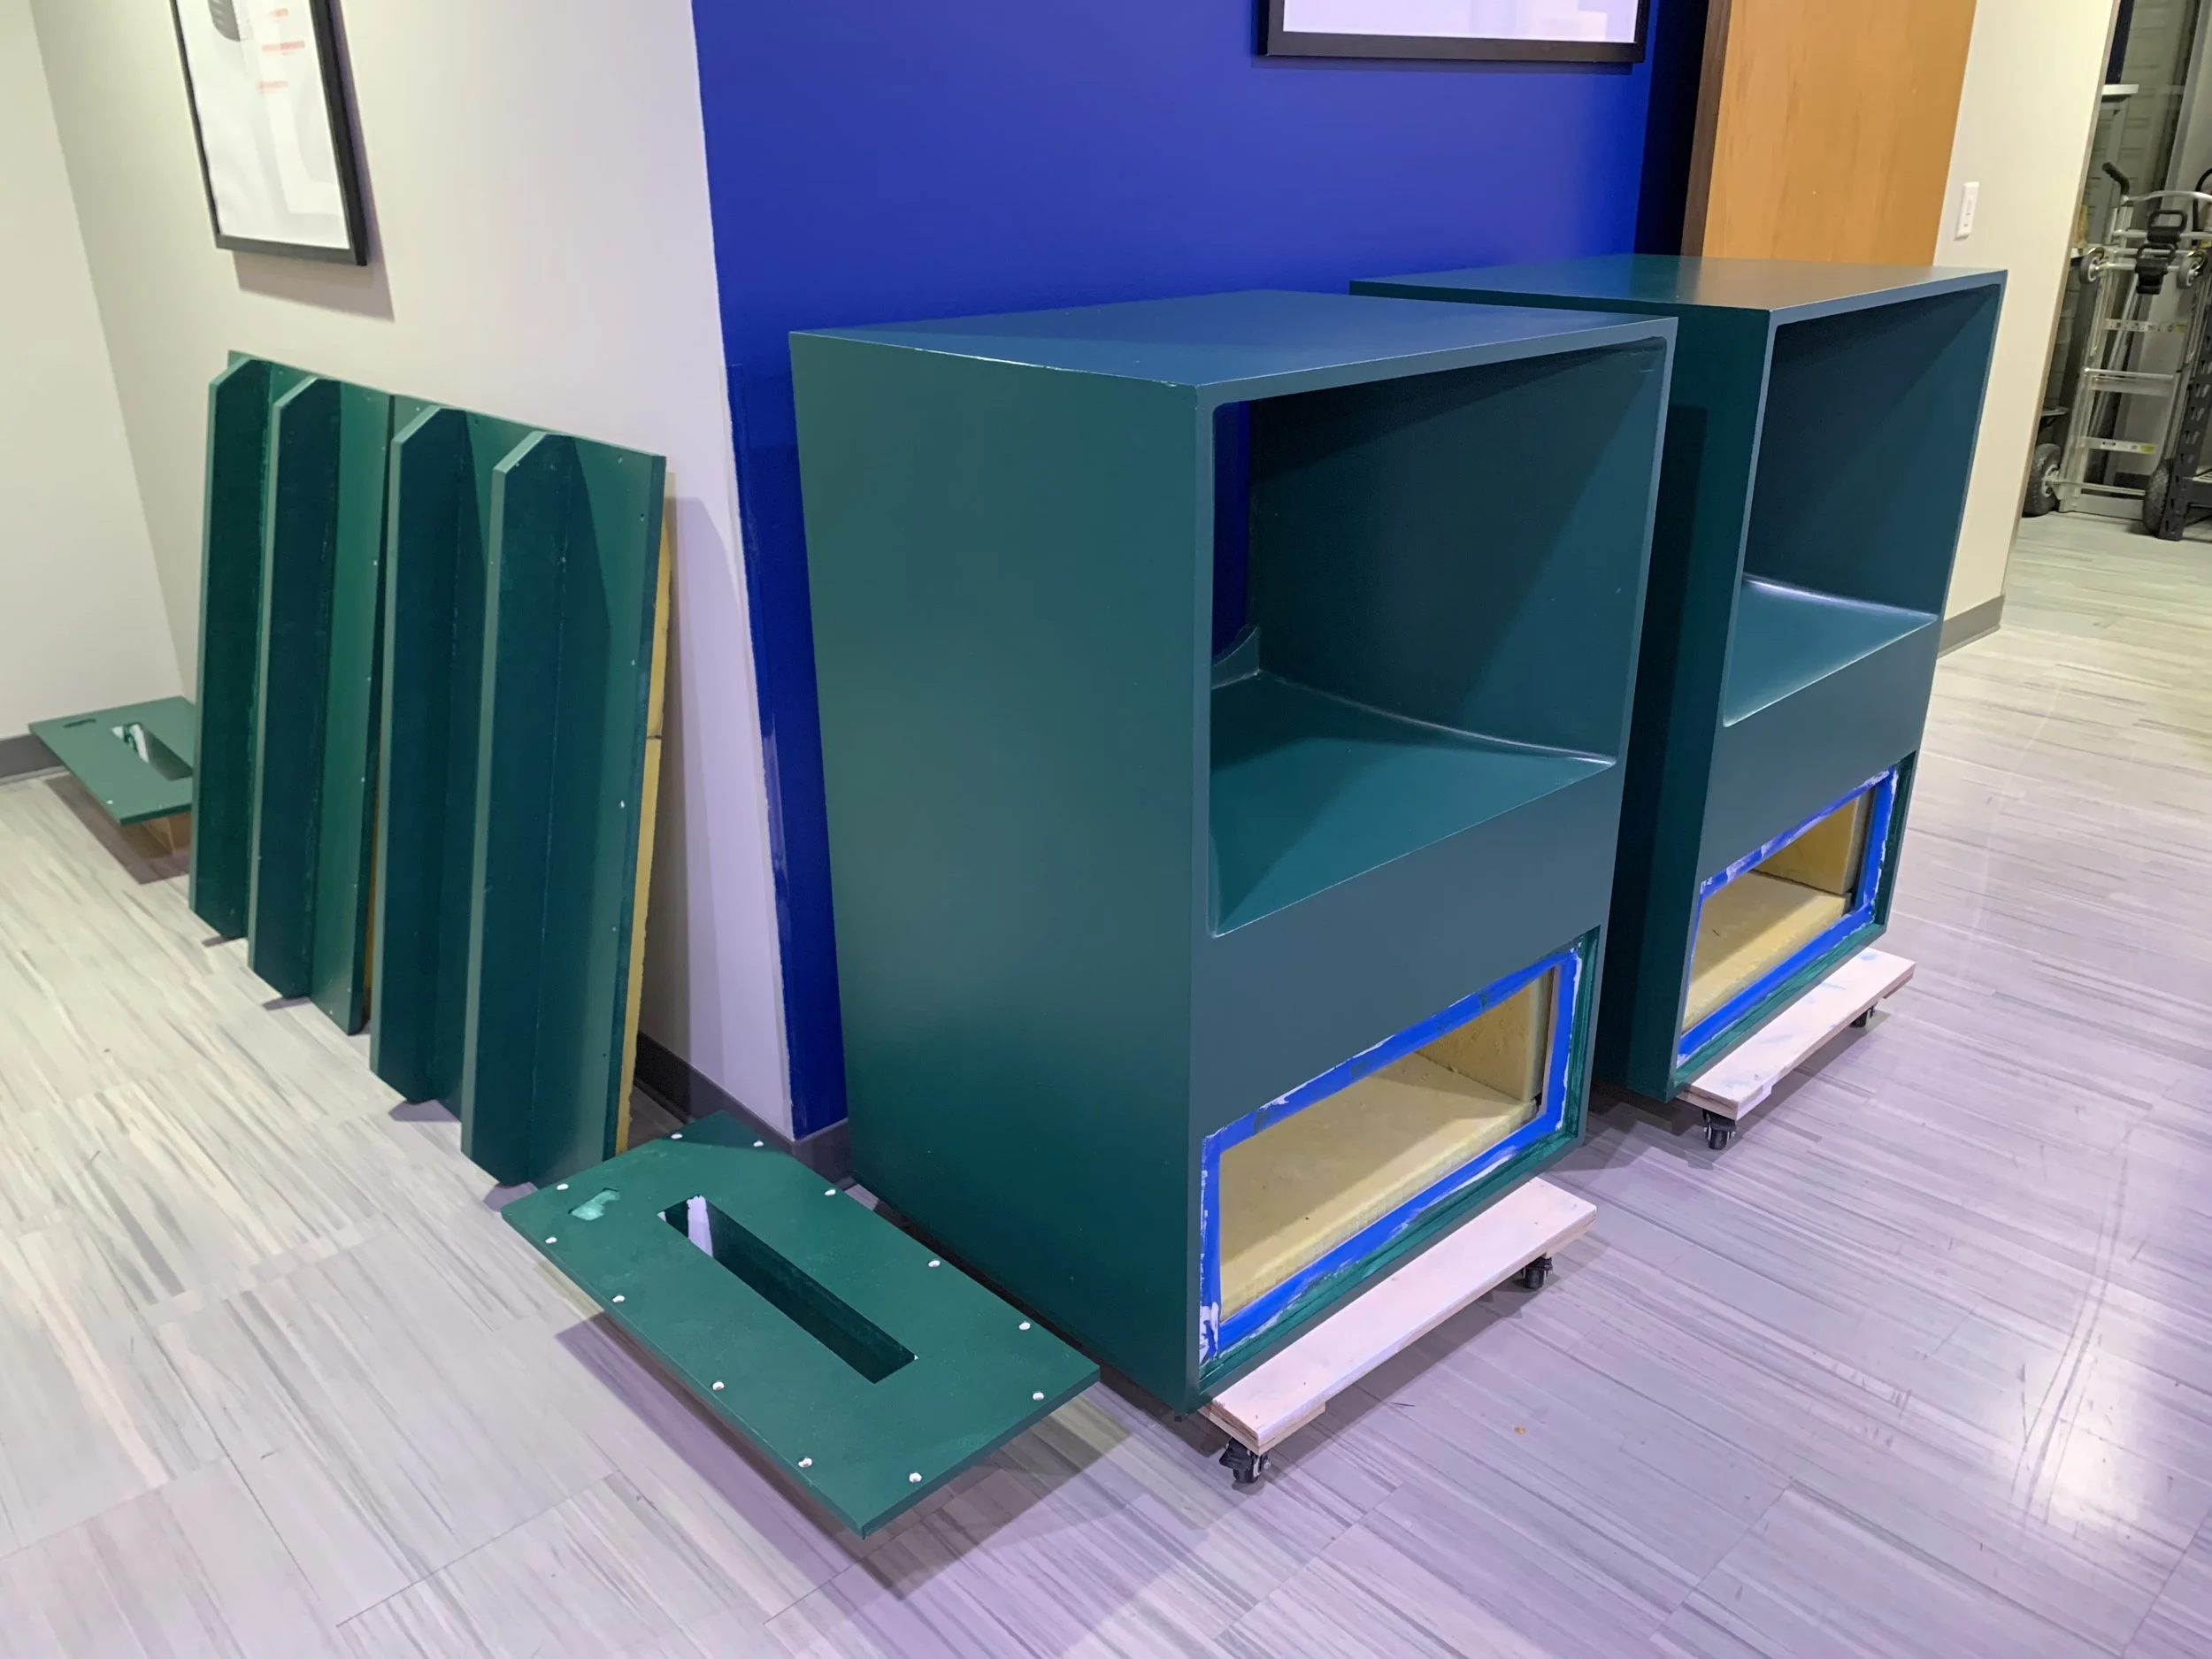
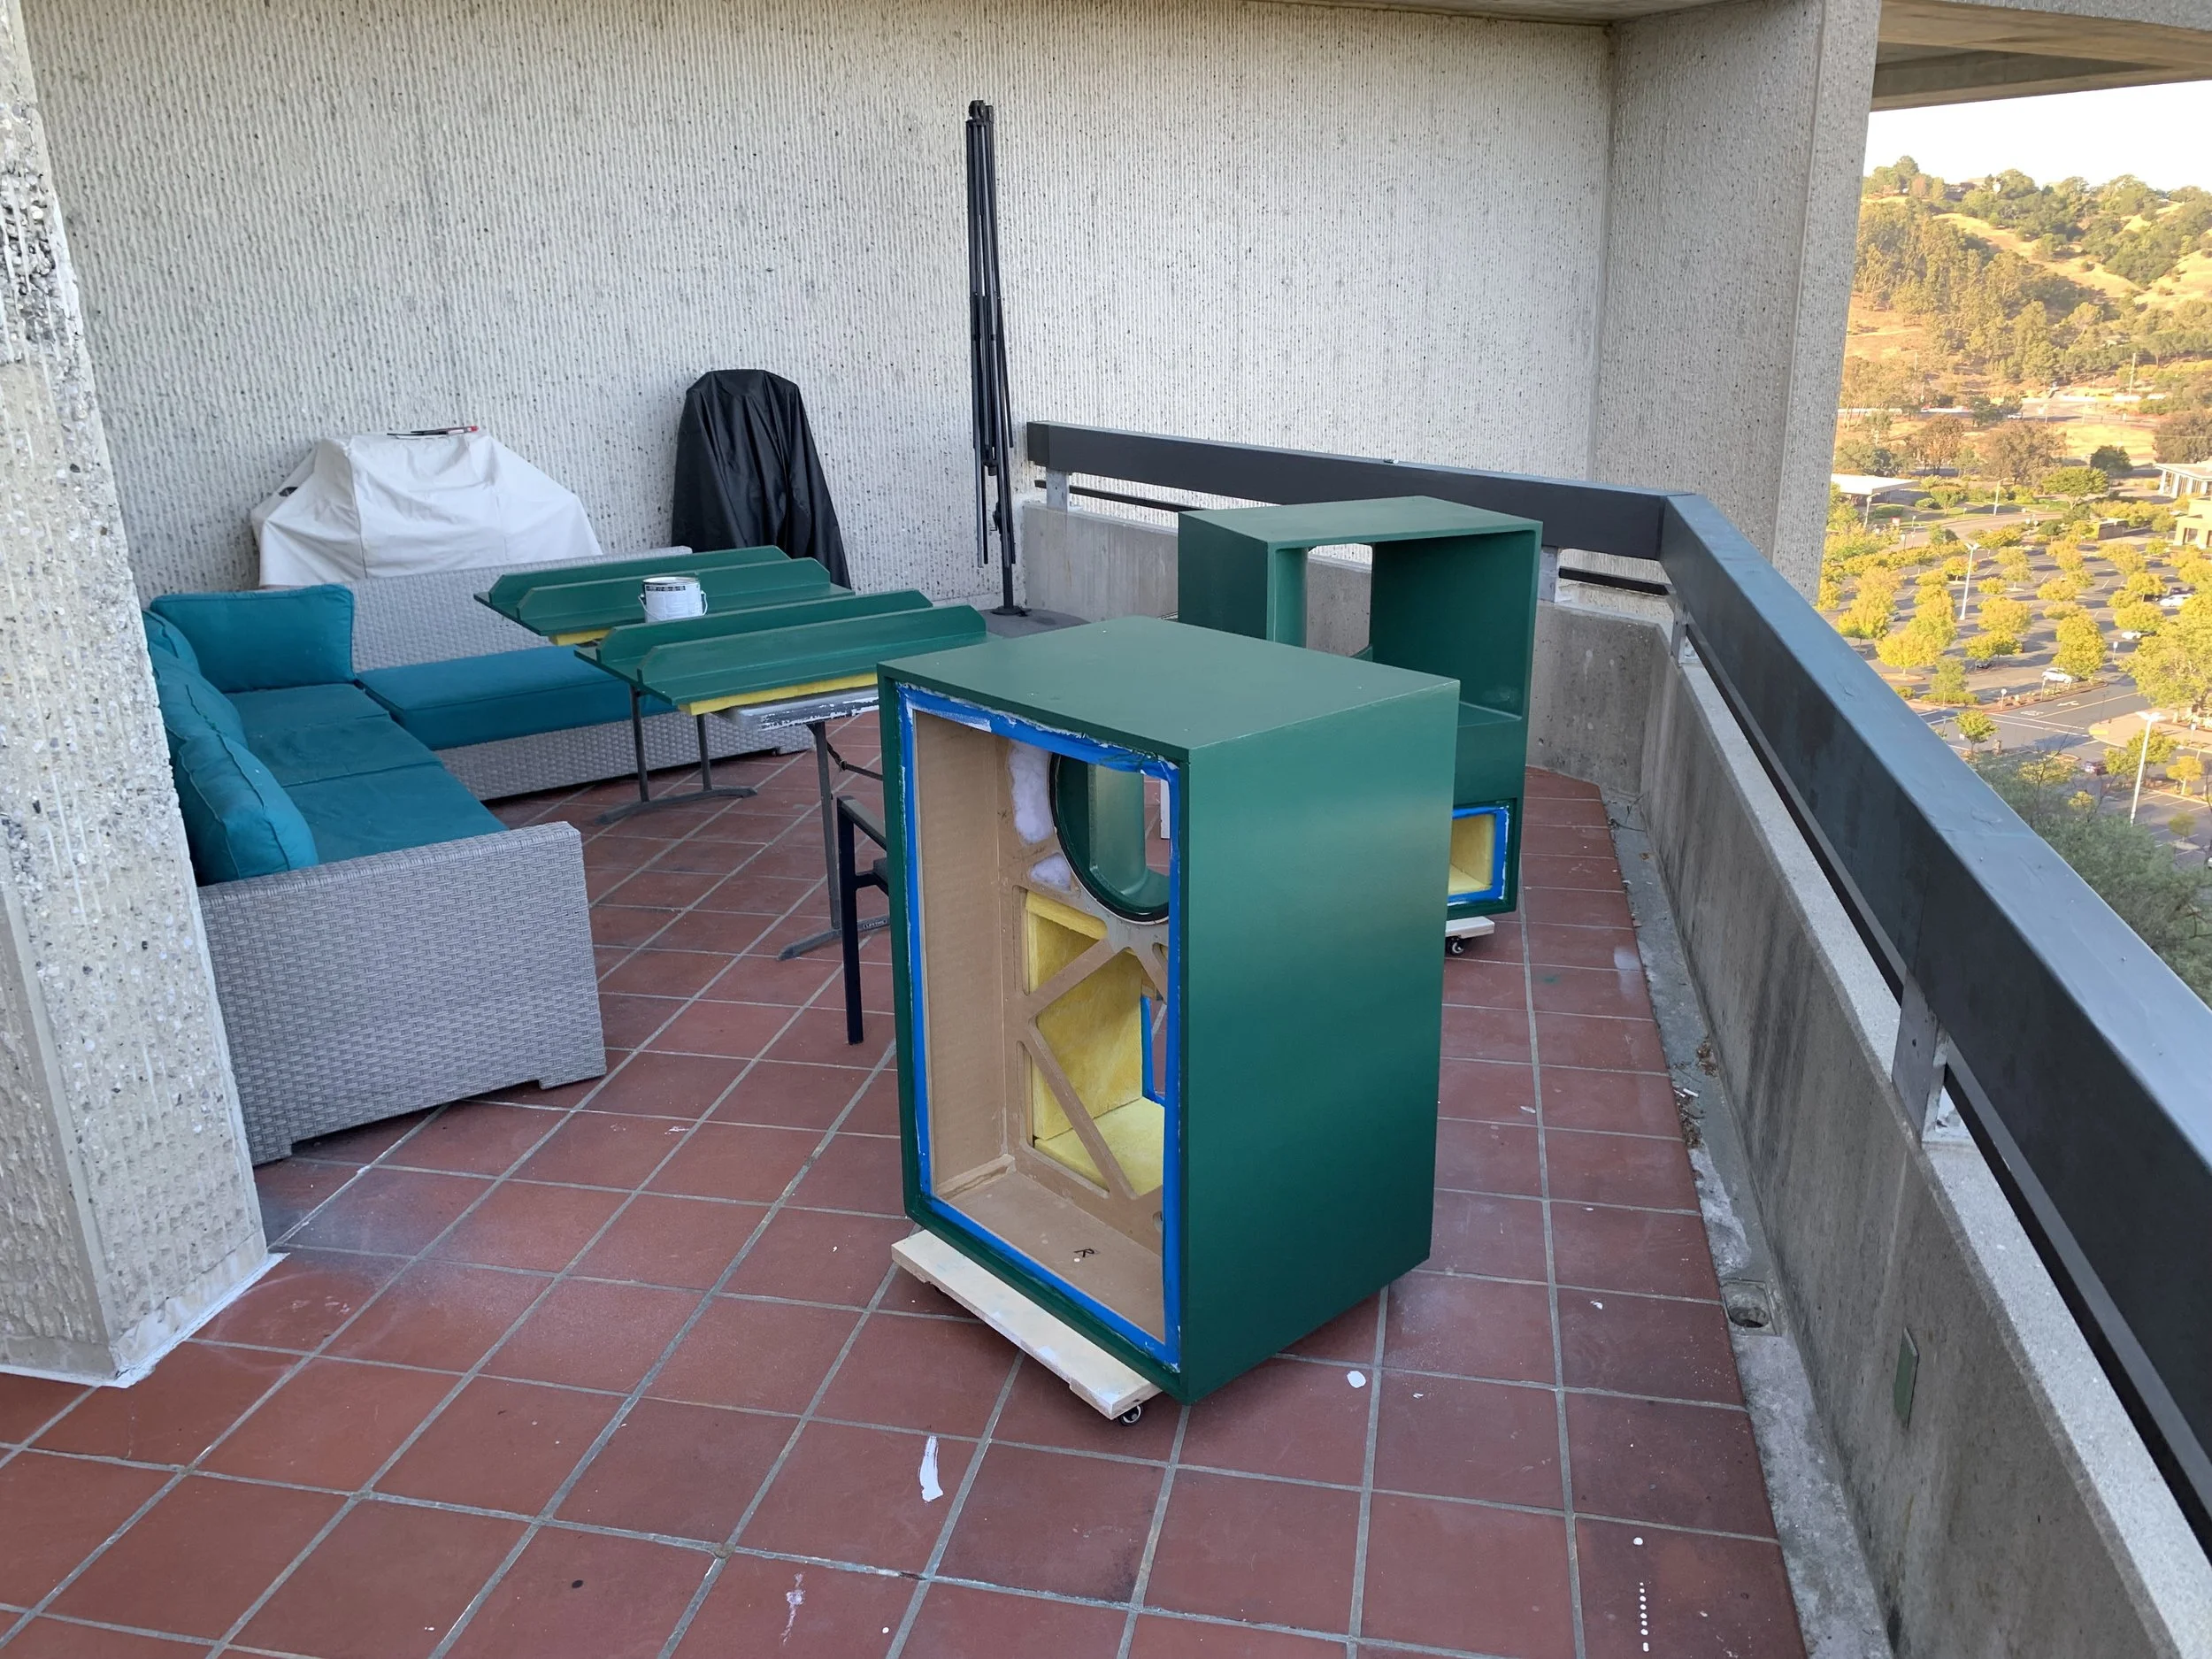
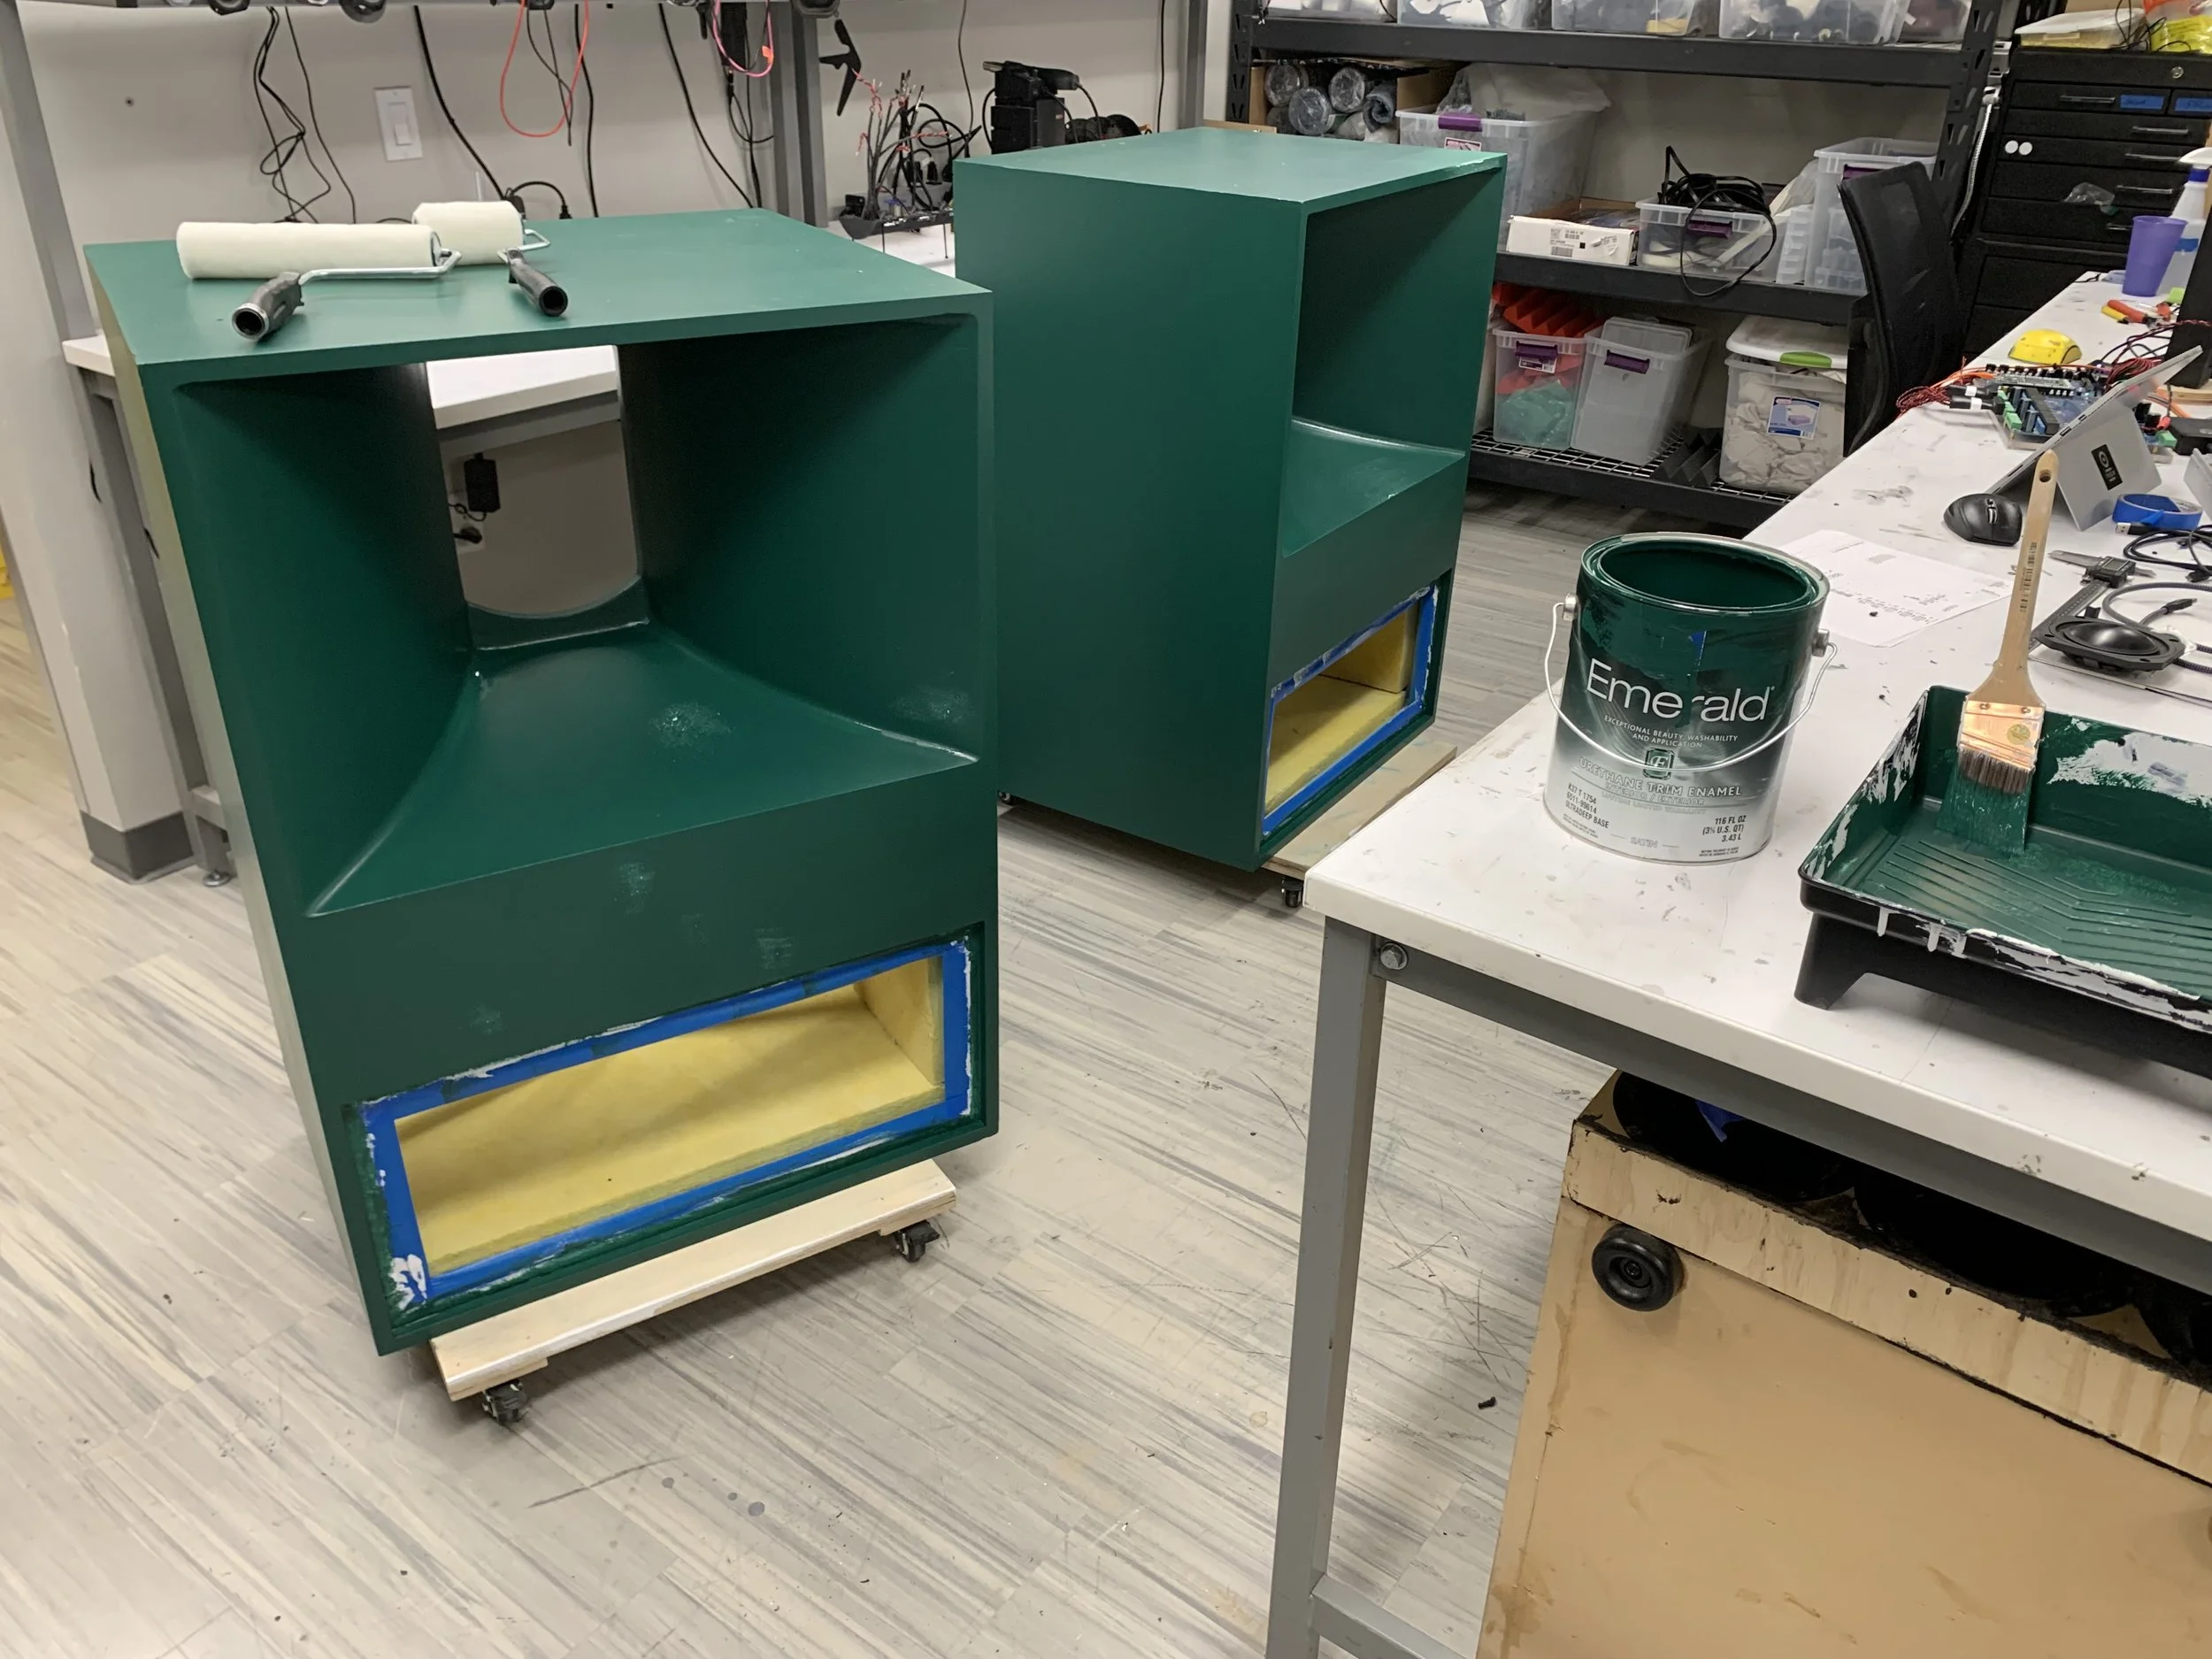
Painting them took ages as well. As satisfying as it was to see the new color go on and see these speakers literally mature into something far more serious than they were before, it took so many hours to work out blemishes, repairs along the way and more. Again perseverance and motivation were key factors. These things used almost a gallon of paint. in the end.
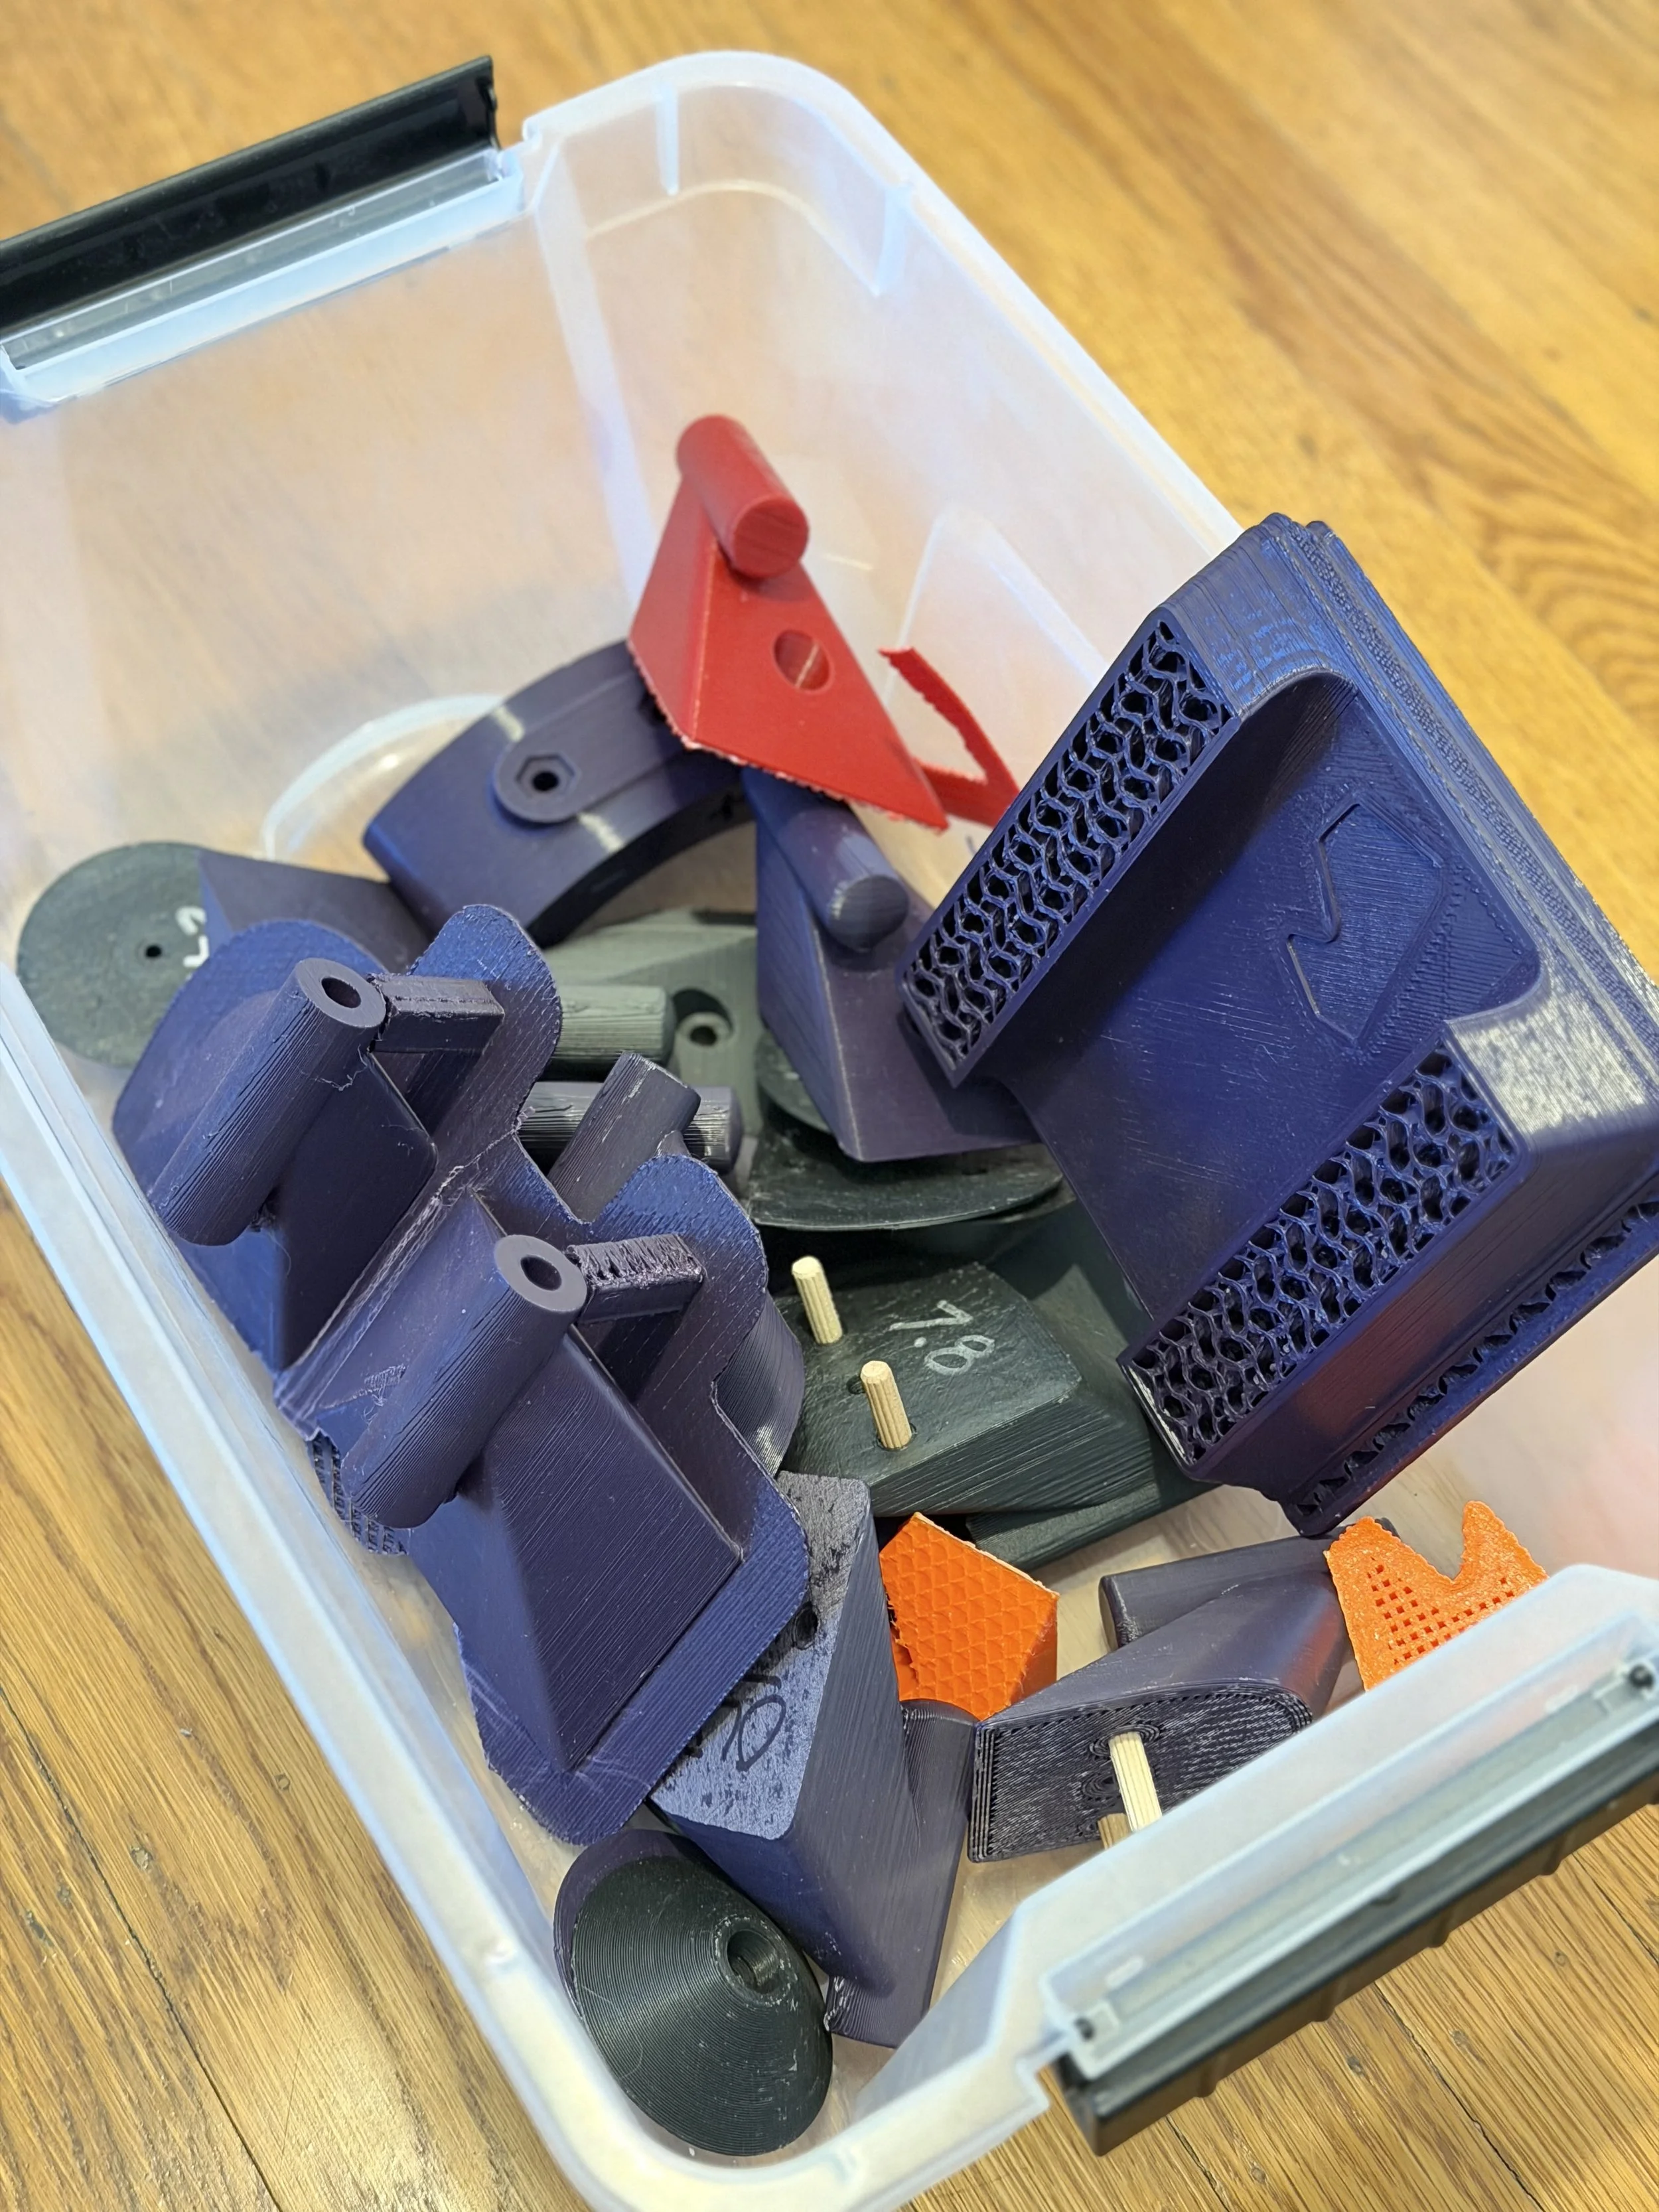
Over my ~10+ year career in design engineering, I have picked up and mastered FDM-style 3D printing. However, this part of the project that I expected to run the smoothest still managed to throw me some curve balls.
Tons of fit tests, style mockups and failed prints led to tons hours printing and reprinting parts for the top half of the speaker. Here is a bucket I kept that holds all of the extra prints (good/bad/failed). In other words, normal product design is what happened!
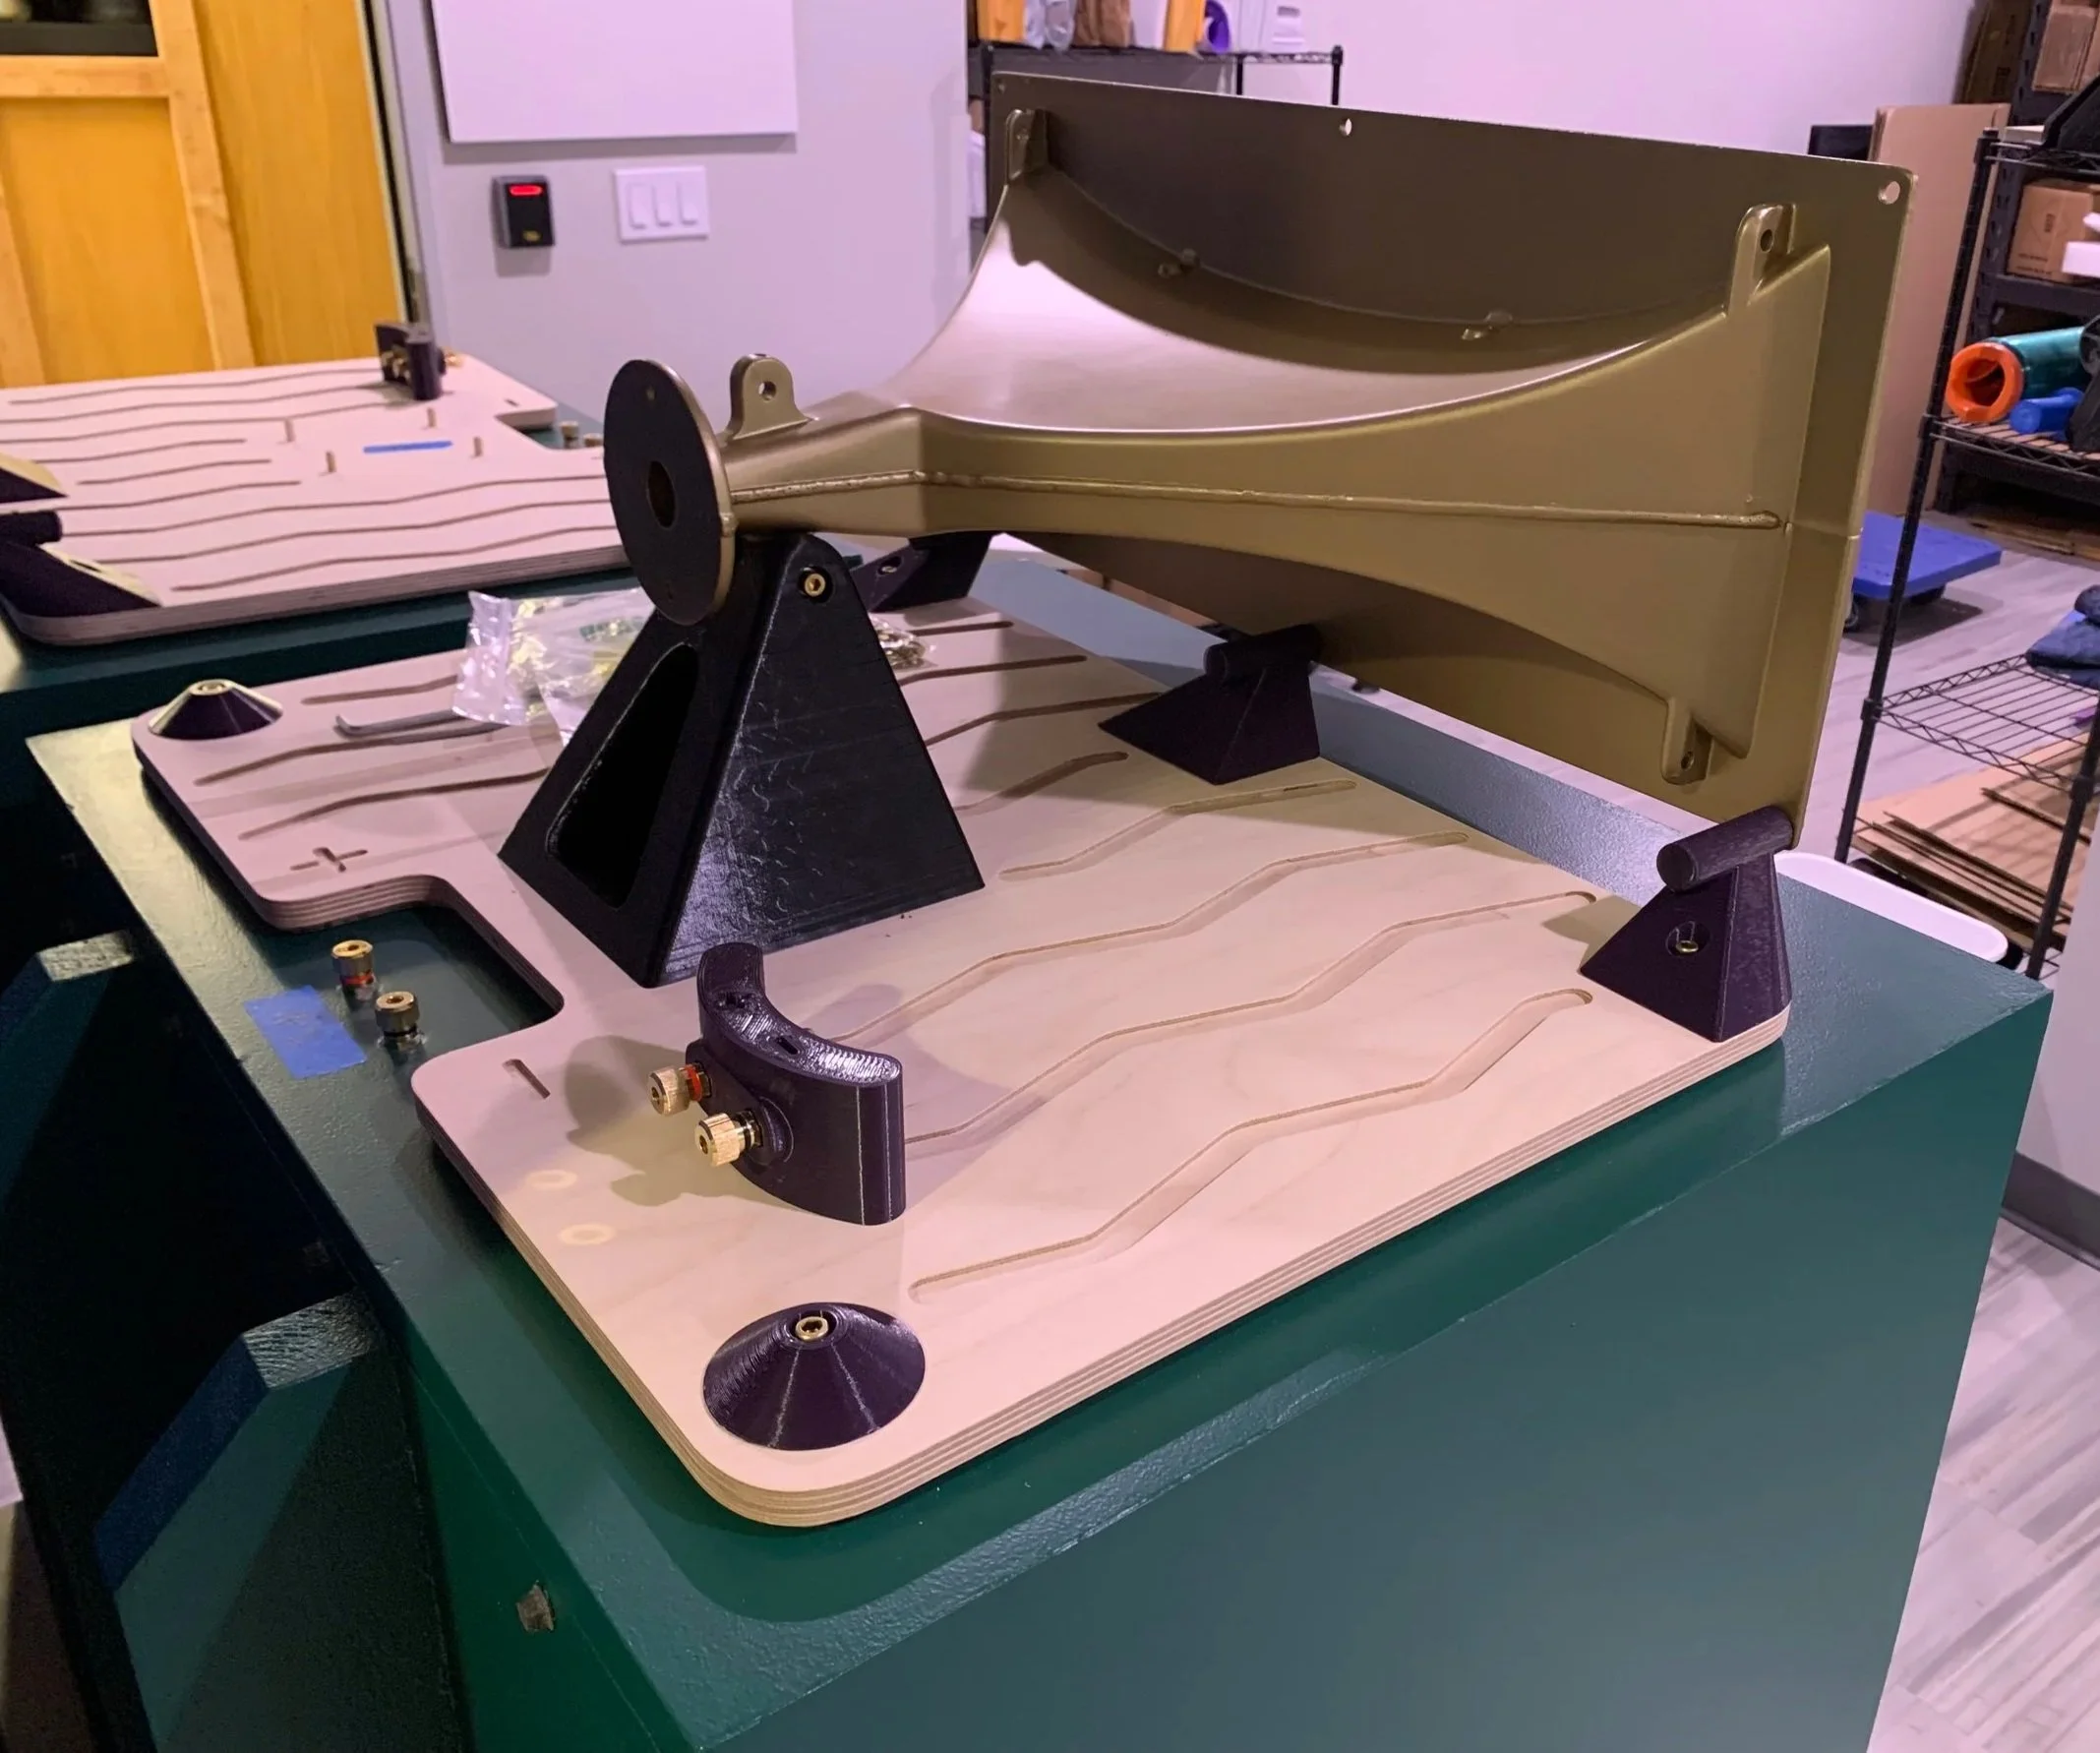
The printed parts combined with the cnc-routed wood plinth was great fun to design and build. The details did take quite a long time to resolve and integrate into a functional design but it all came together. I wrestled with the idea of a few different colors for the plinth but decided the natural wood tone was the best after a few color studies in CAD.
It was also interesting to assemble some of the special brass fasteners and gold binding posts I chased down for this. Details details details.
The result is an interesting combo of whimsical and technical and maybe even pure. Those who know me know that I lean into a playful design direction pretty regularly, something I wish more audio hardware companies would do.
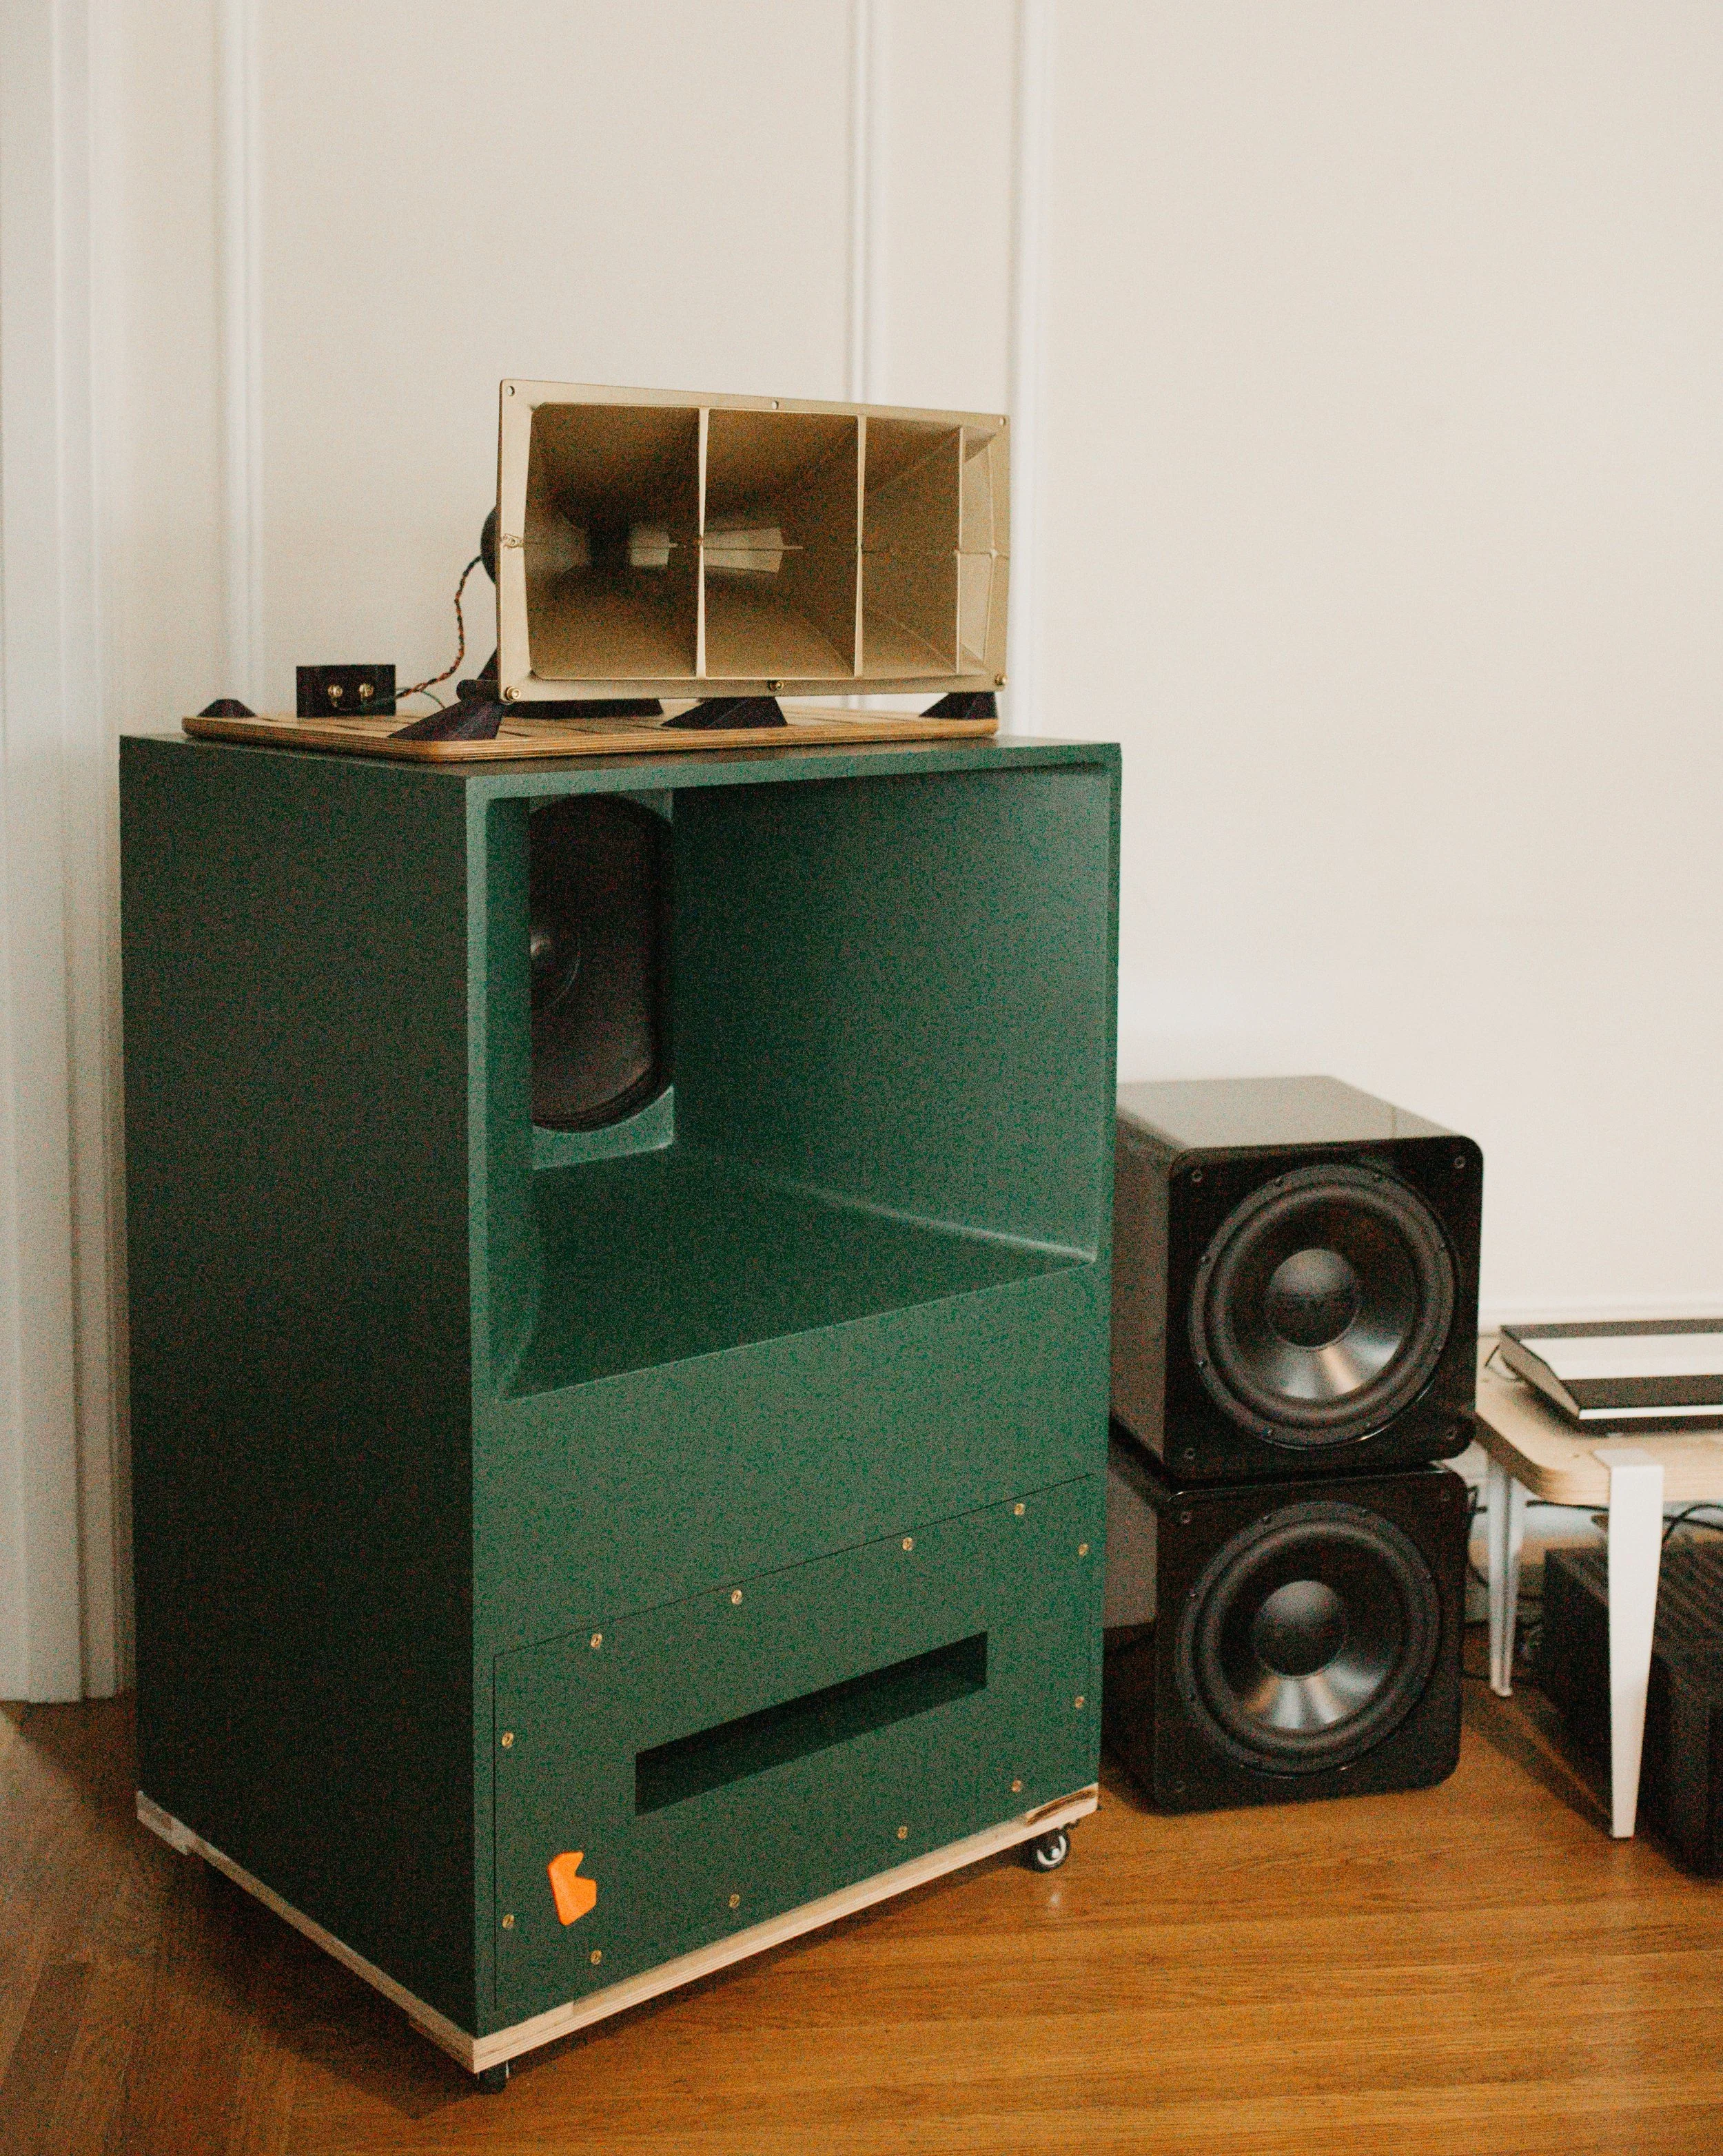
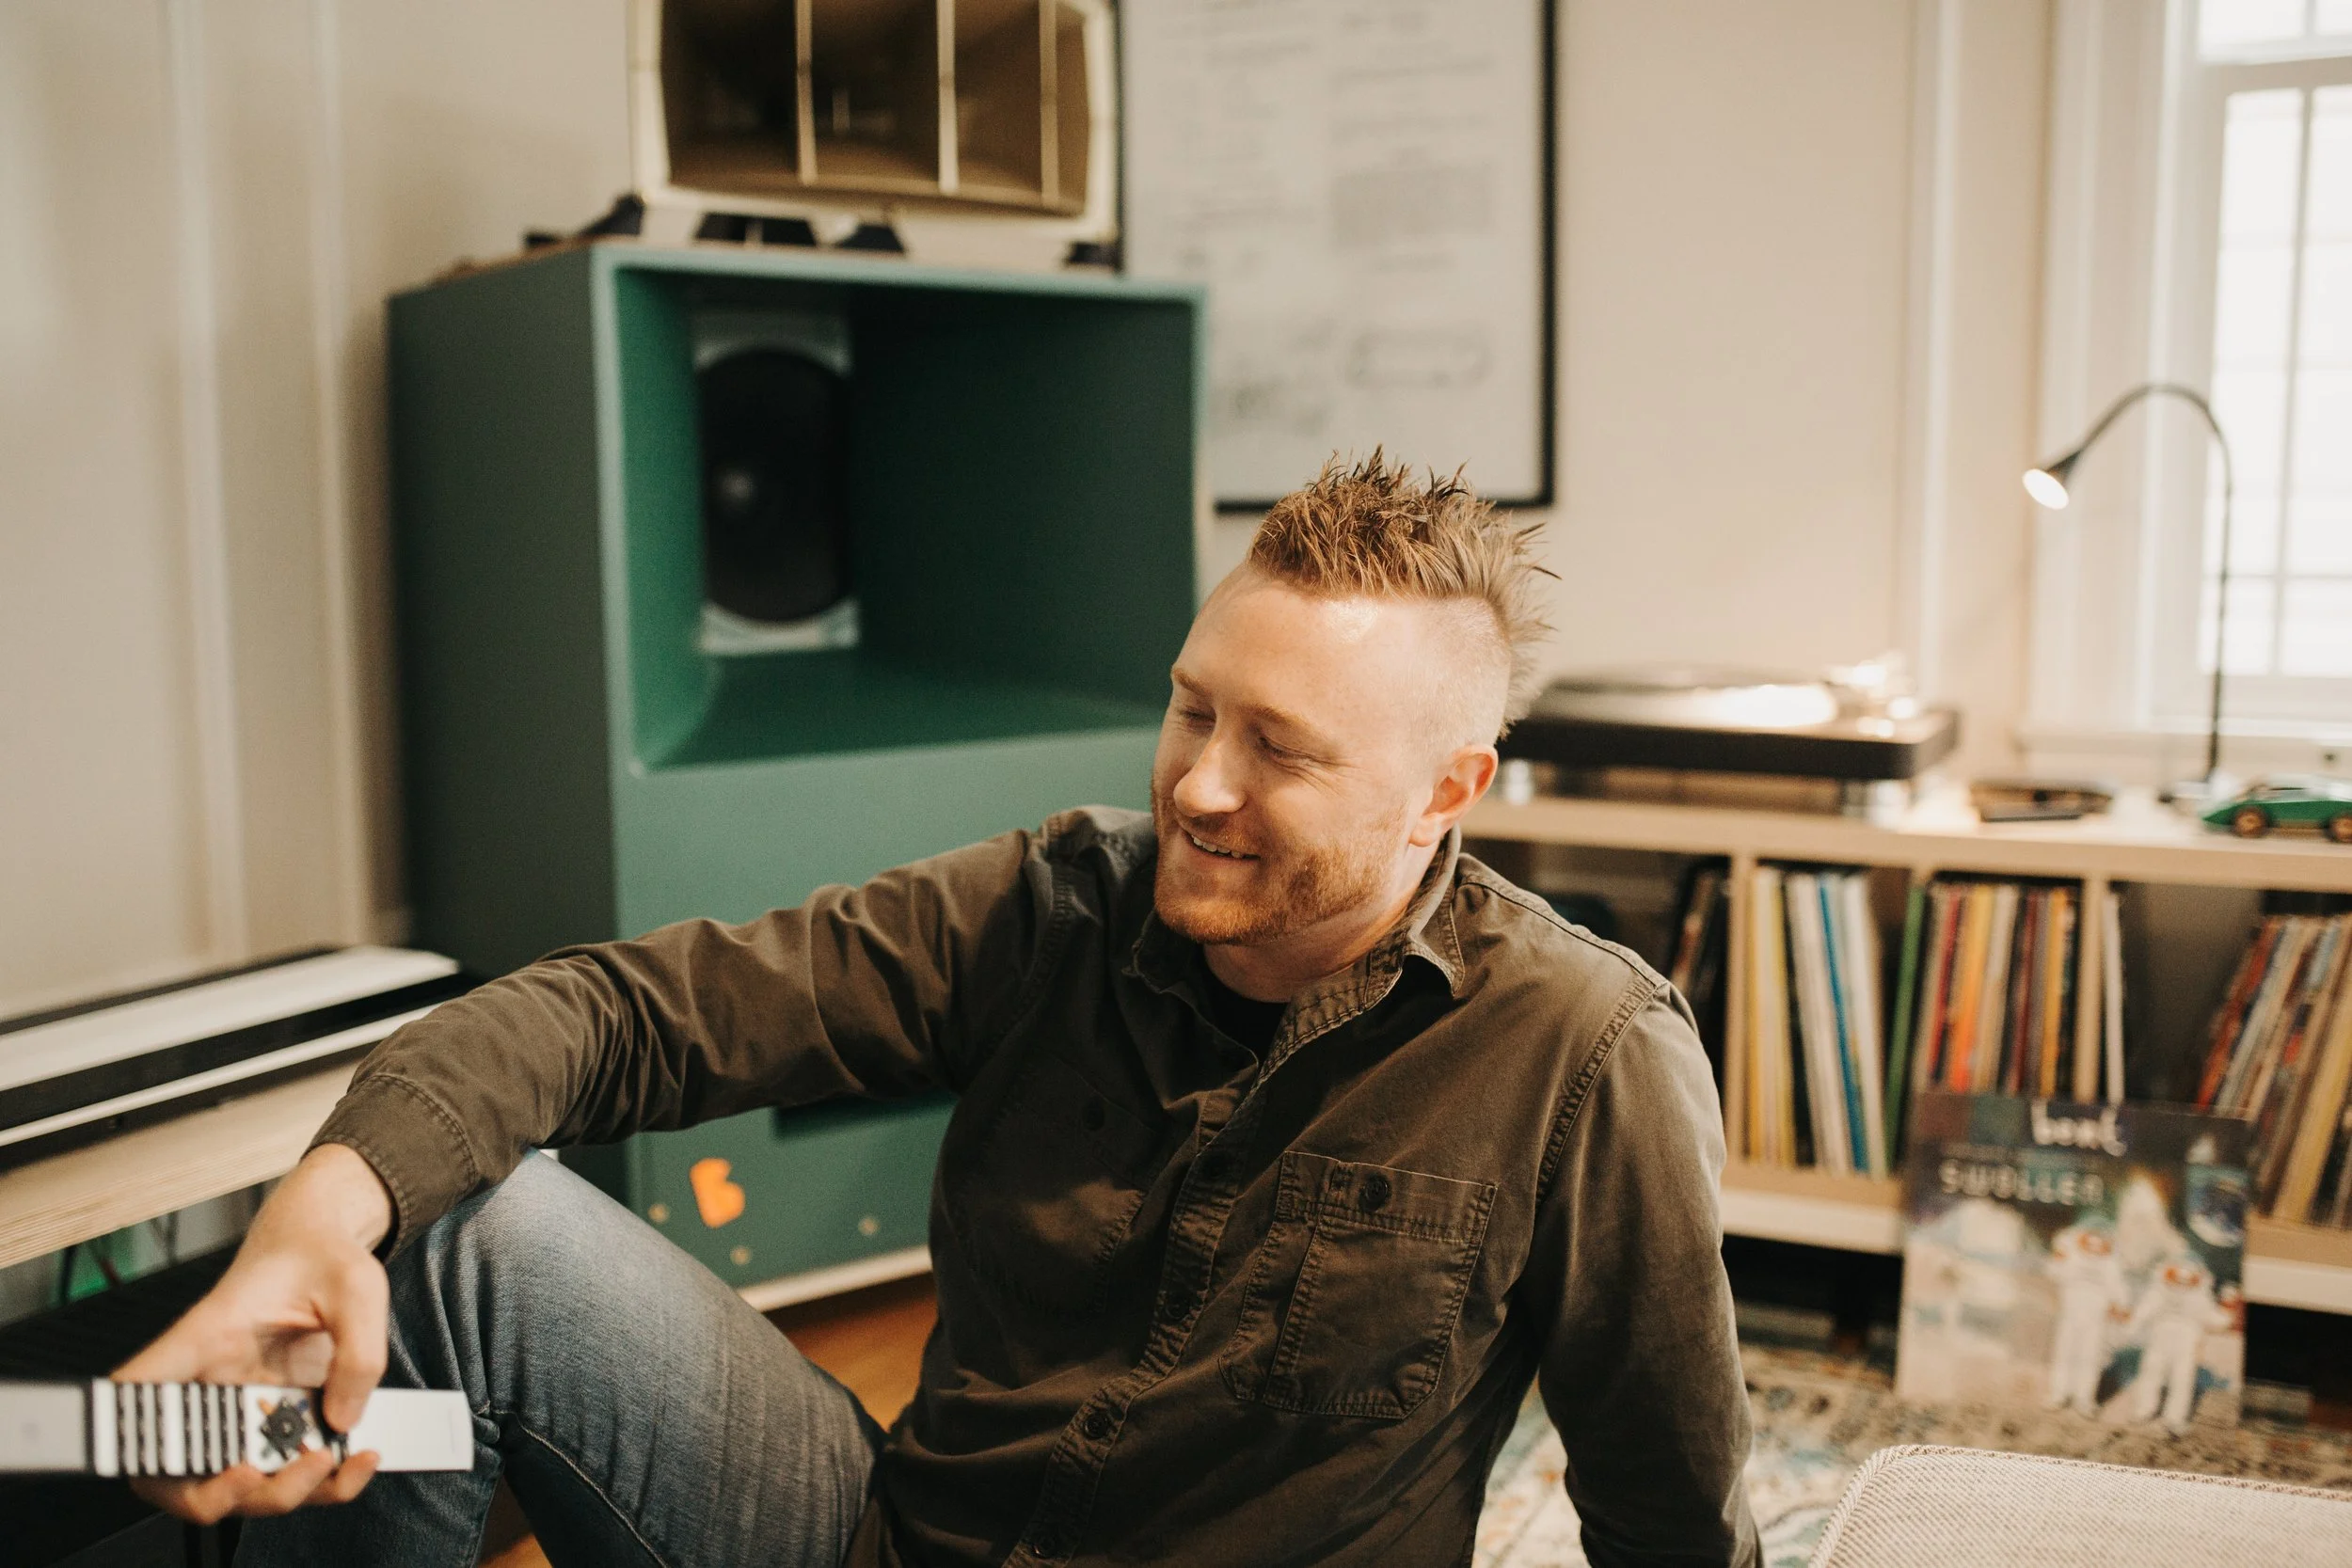
After moving the newly finished A7s into my music room, my partner and I decided to celebrate with a proper photoshoot. This was an insane amount of work to get them here so it only felt right to really recognize the achievement. The final result is amazing and listening to them at home again is a massive privilege.
There is still some work to do. They were originally running off of a dsp-amplifier eval board, and now I am migrating to the more intentional and permanent set of period-correct class A/B amps from Bang & Olufsen driven by a standalone sigma DSP. This project is still rolling so come back for more updates on acoustics.
Lastly, the horns also need to be damped still and I plan to do a comparison with measurements on why and how much should be damped. Stay tuned, more to come soon! Thanks for reading.
Evan’s A7 CAD model. Download here >>>
The Basics
-
Based around Altec 825 Plan
After committing to the idea of building something itself, it was time to decide what to build. There are seemingly hundreds of variants of the A7 as well as the many other VOTT models but in the end I settled on the 825 (and a few 828 drawings) to drive the primary design.

-
Translated into CAD
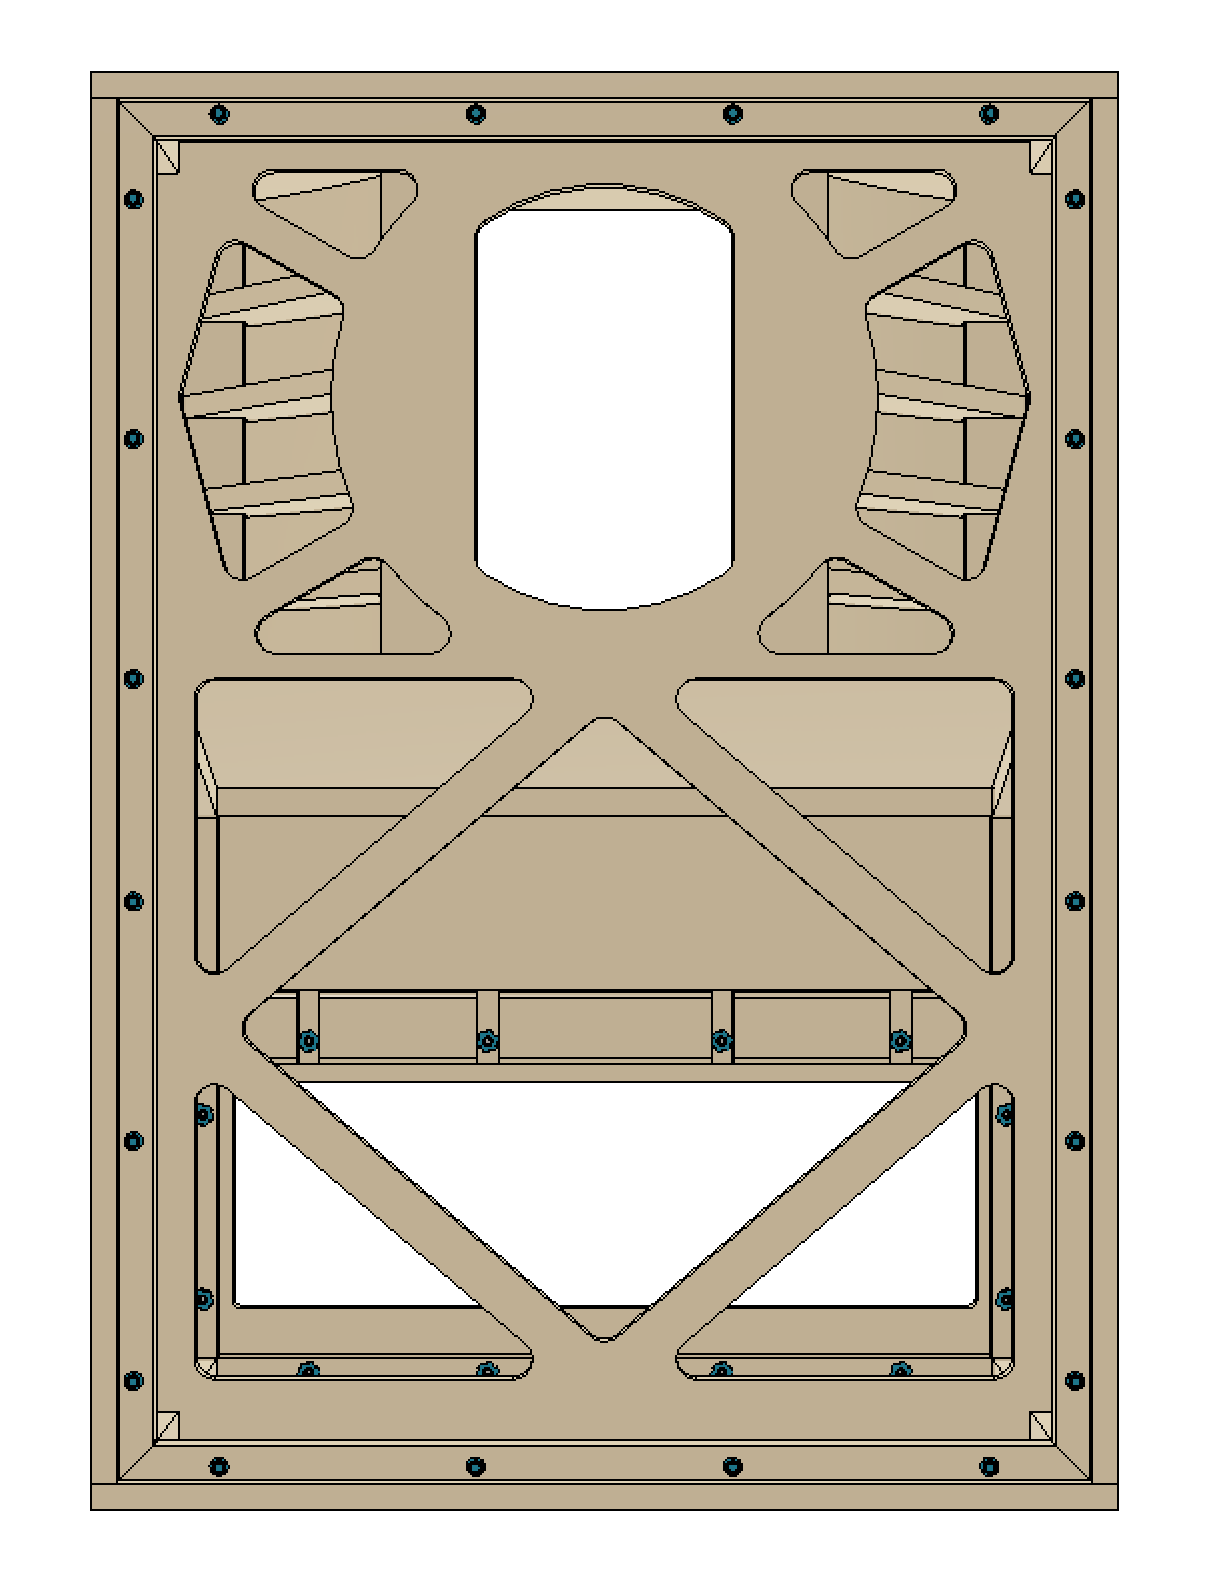
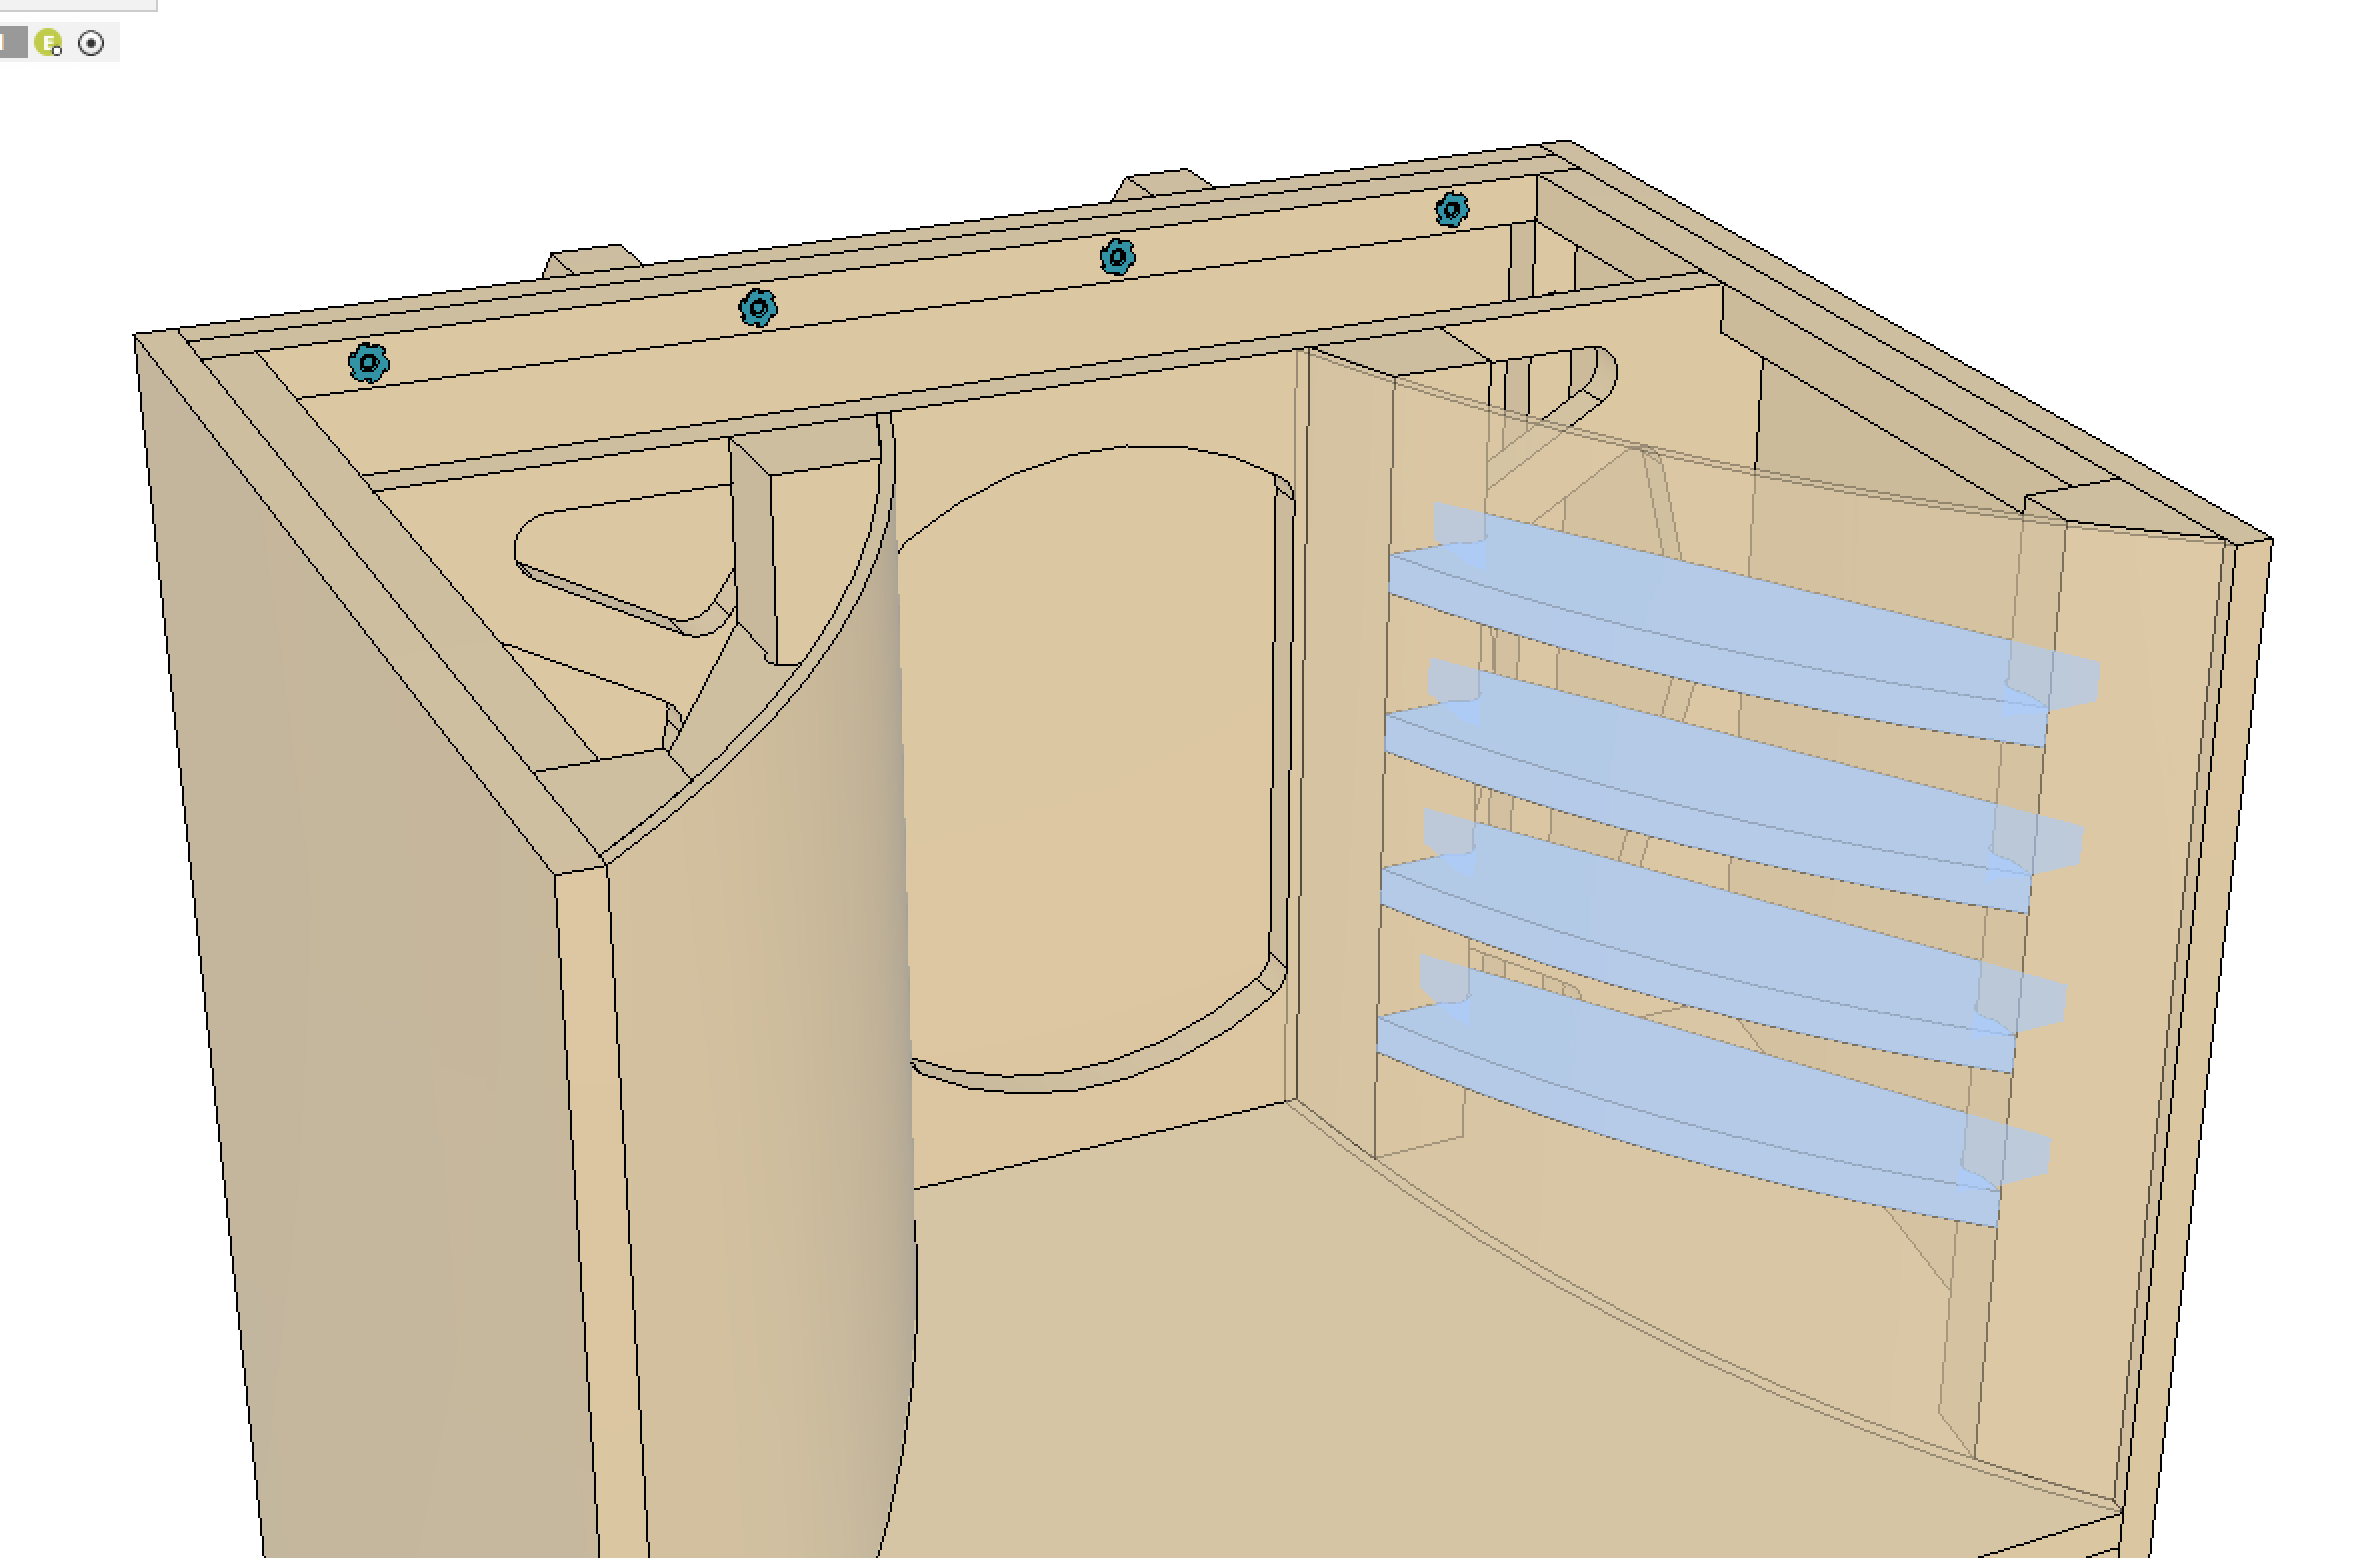
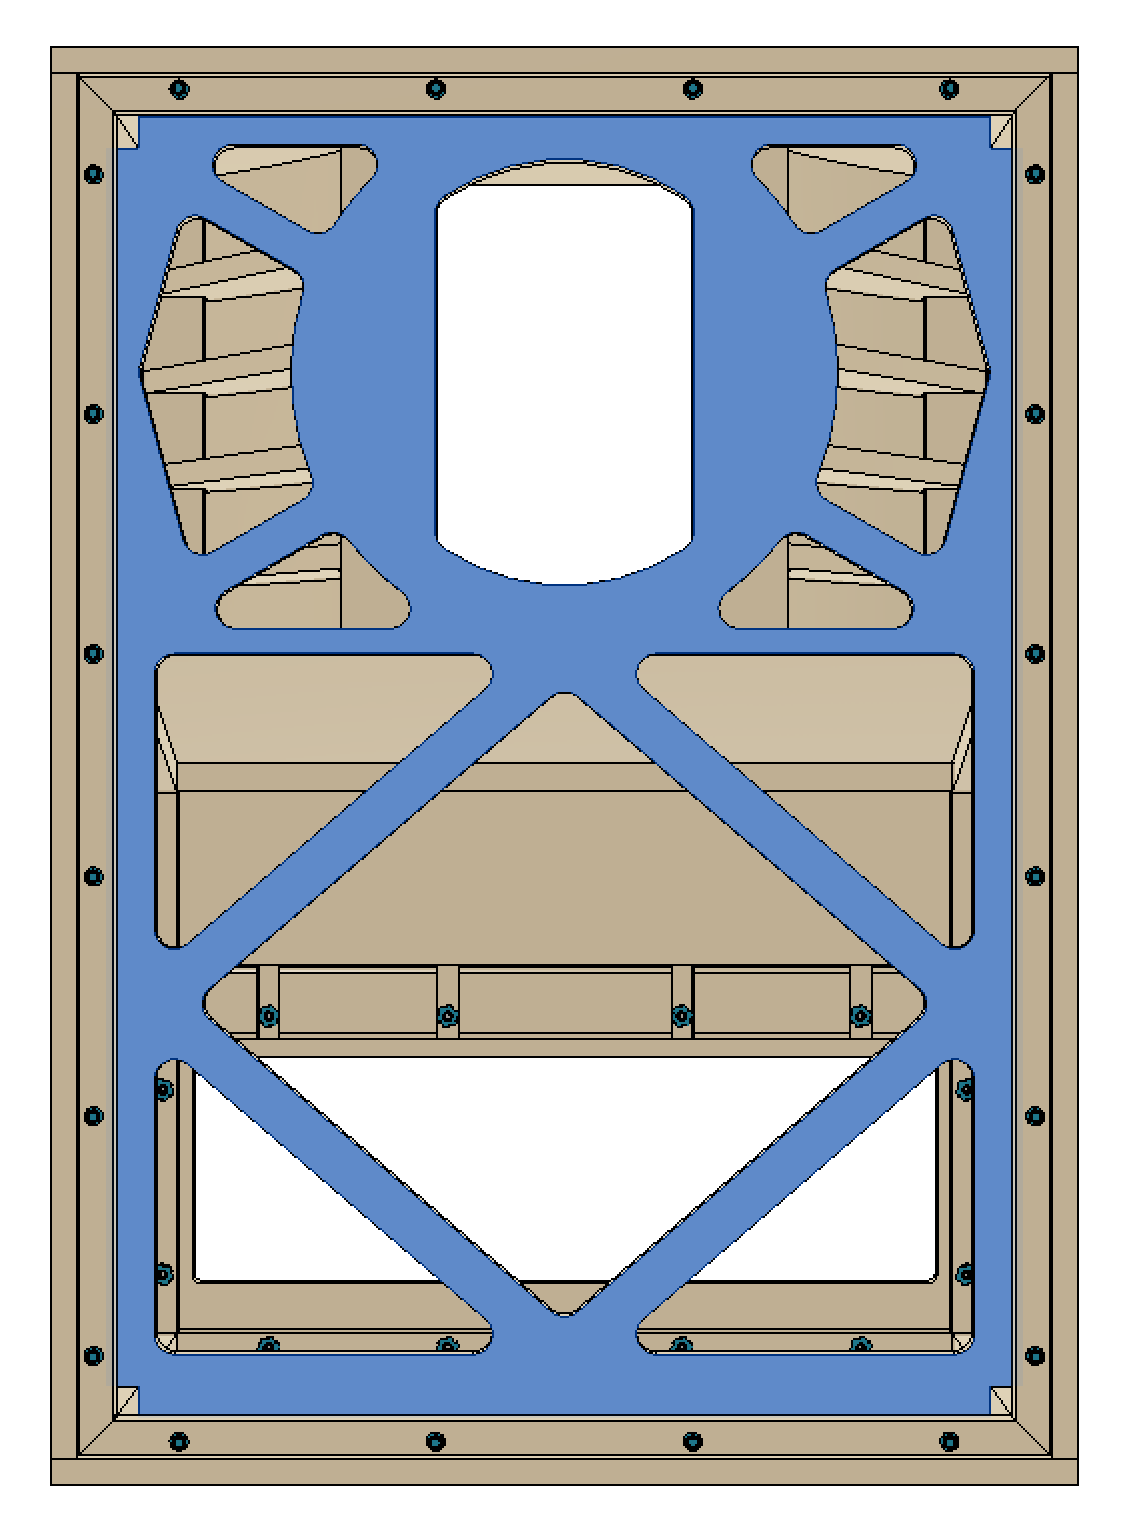
After building the original A7 design in SolidWorks I started to implement my own changes to the design to create my own, improved version. The primary distinctions between the original design and my own are the CNC’d baffle-brace, horn flares and the use of 19mm MDF.

-
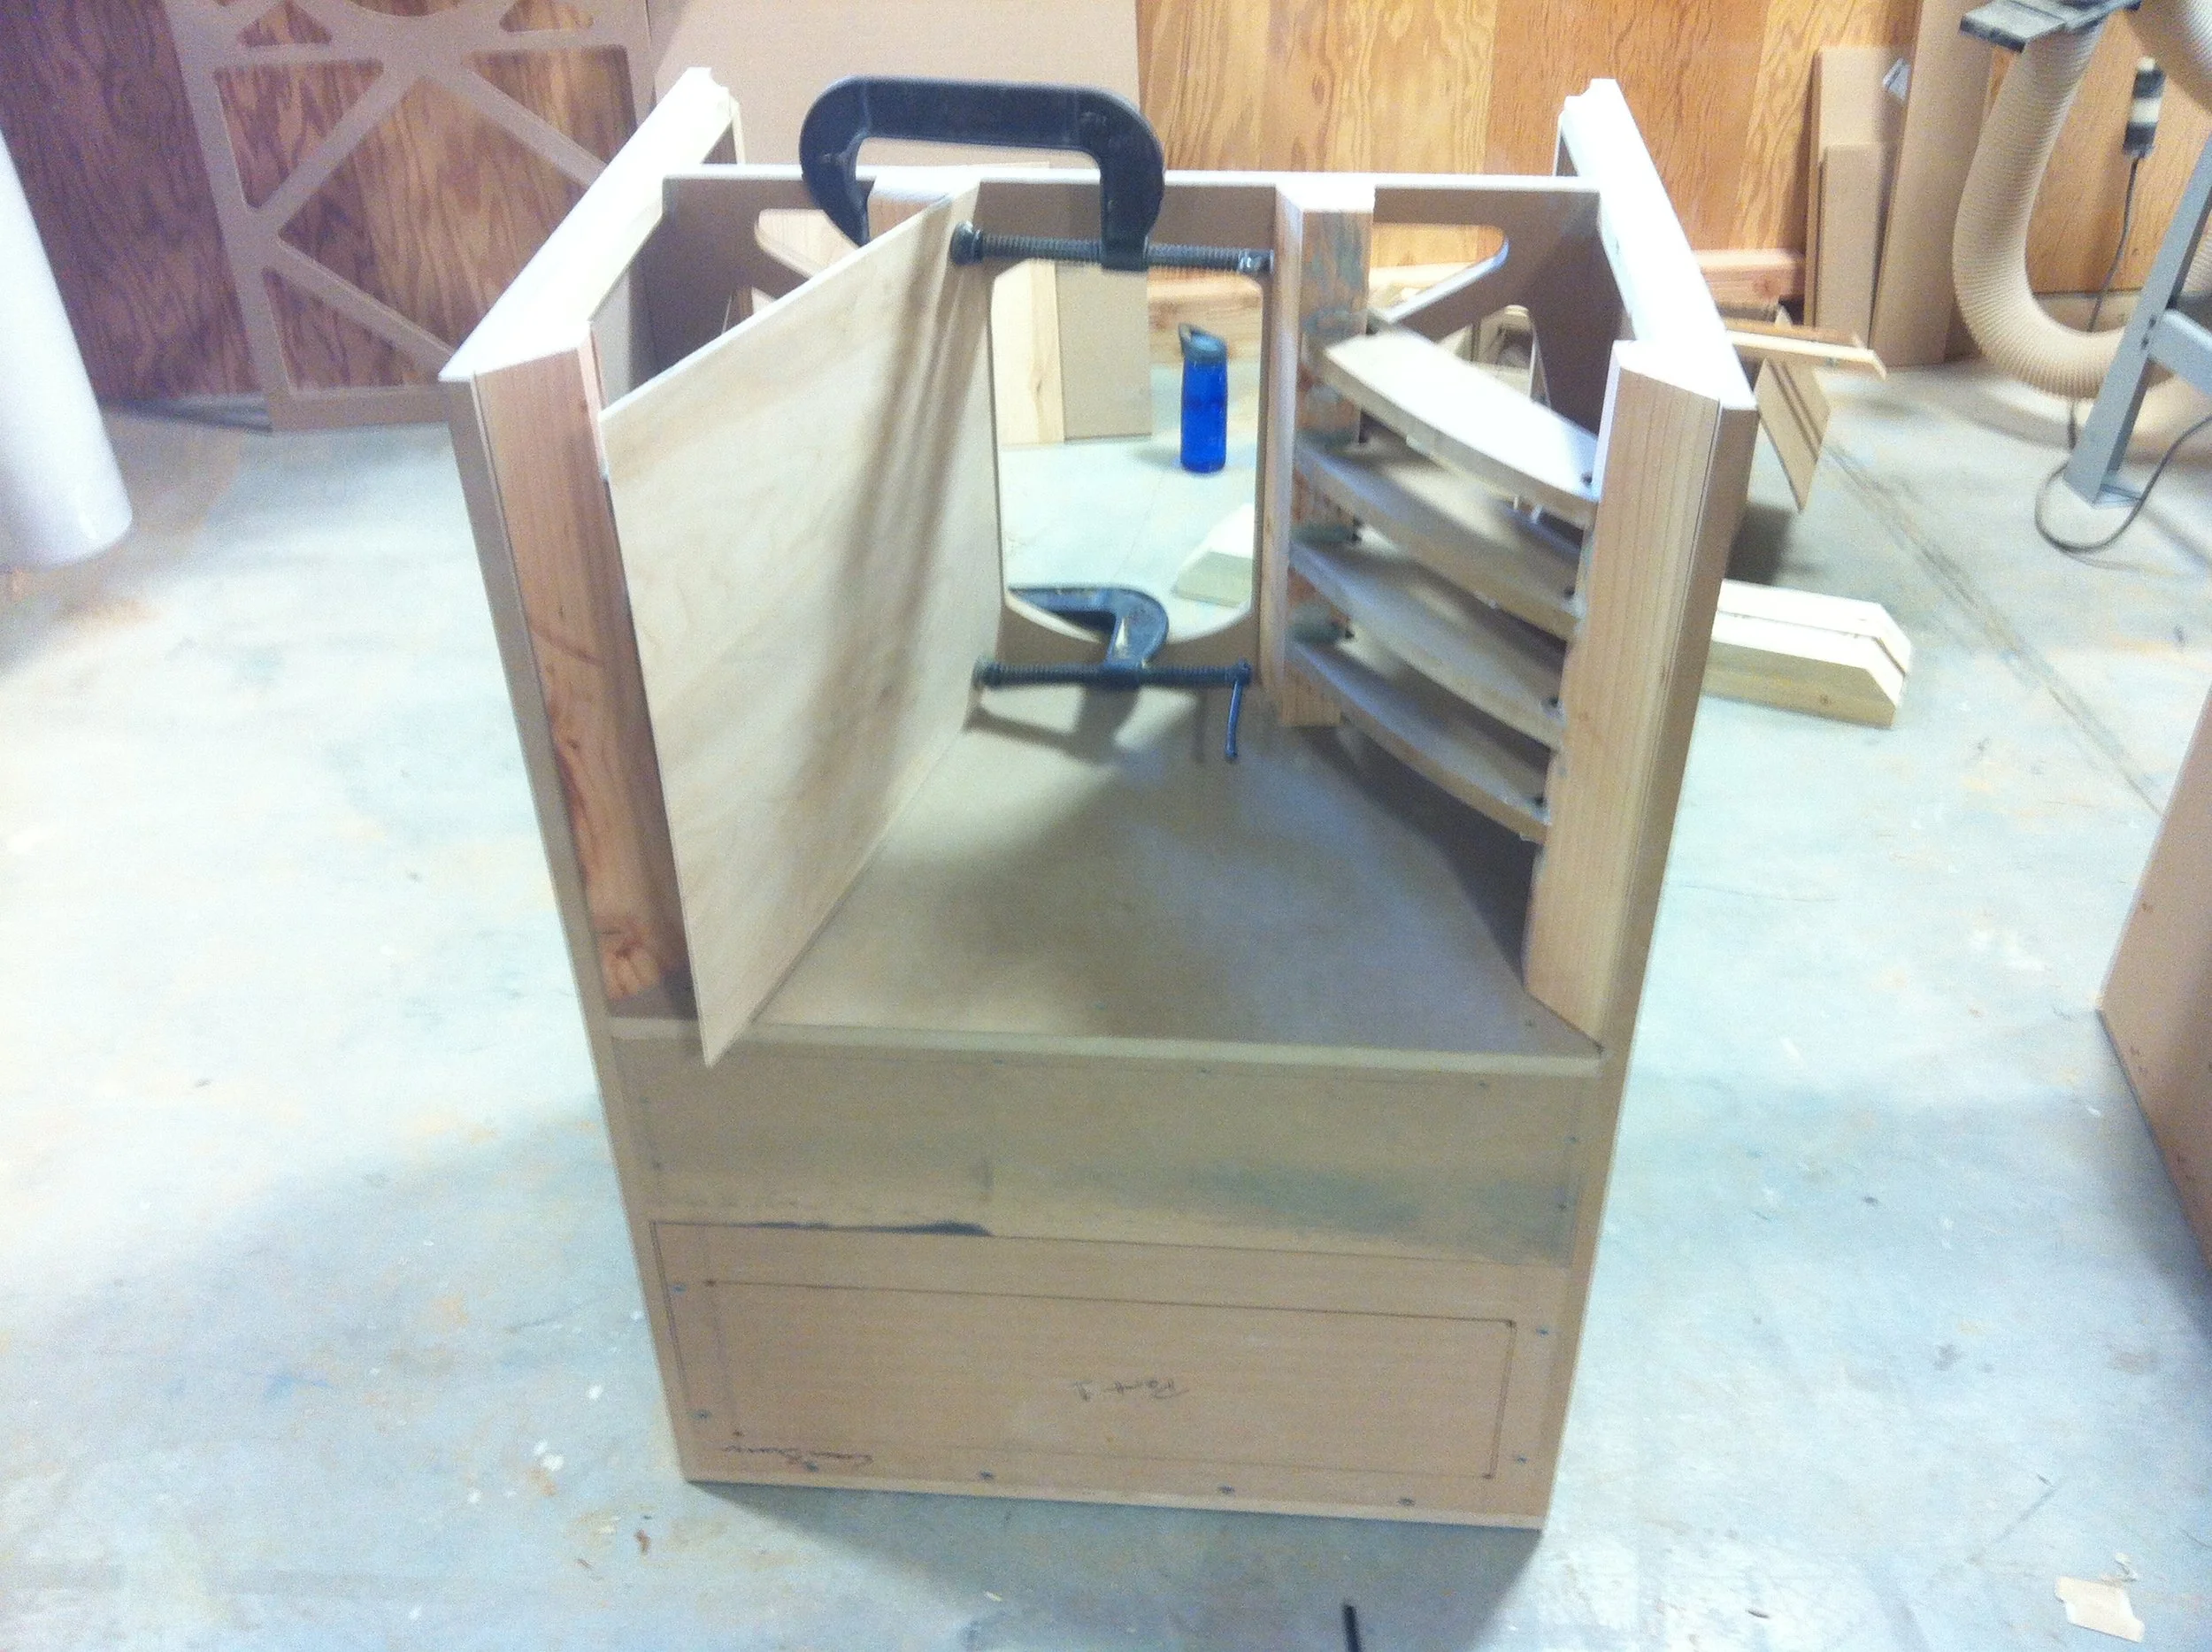
Built by hand ...and CNC
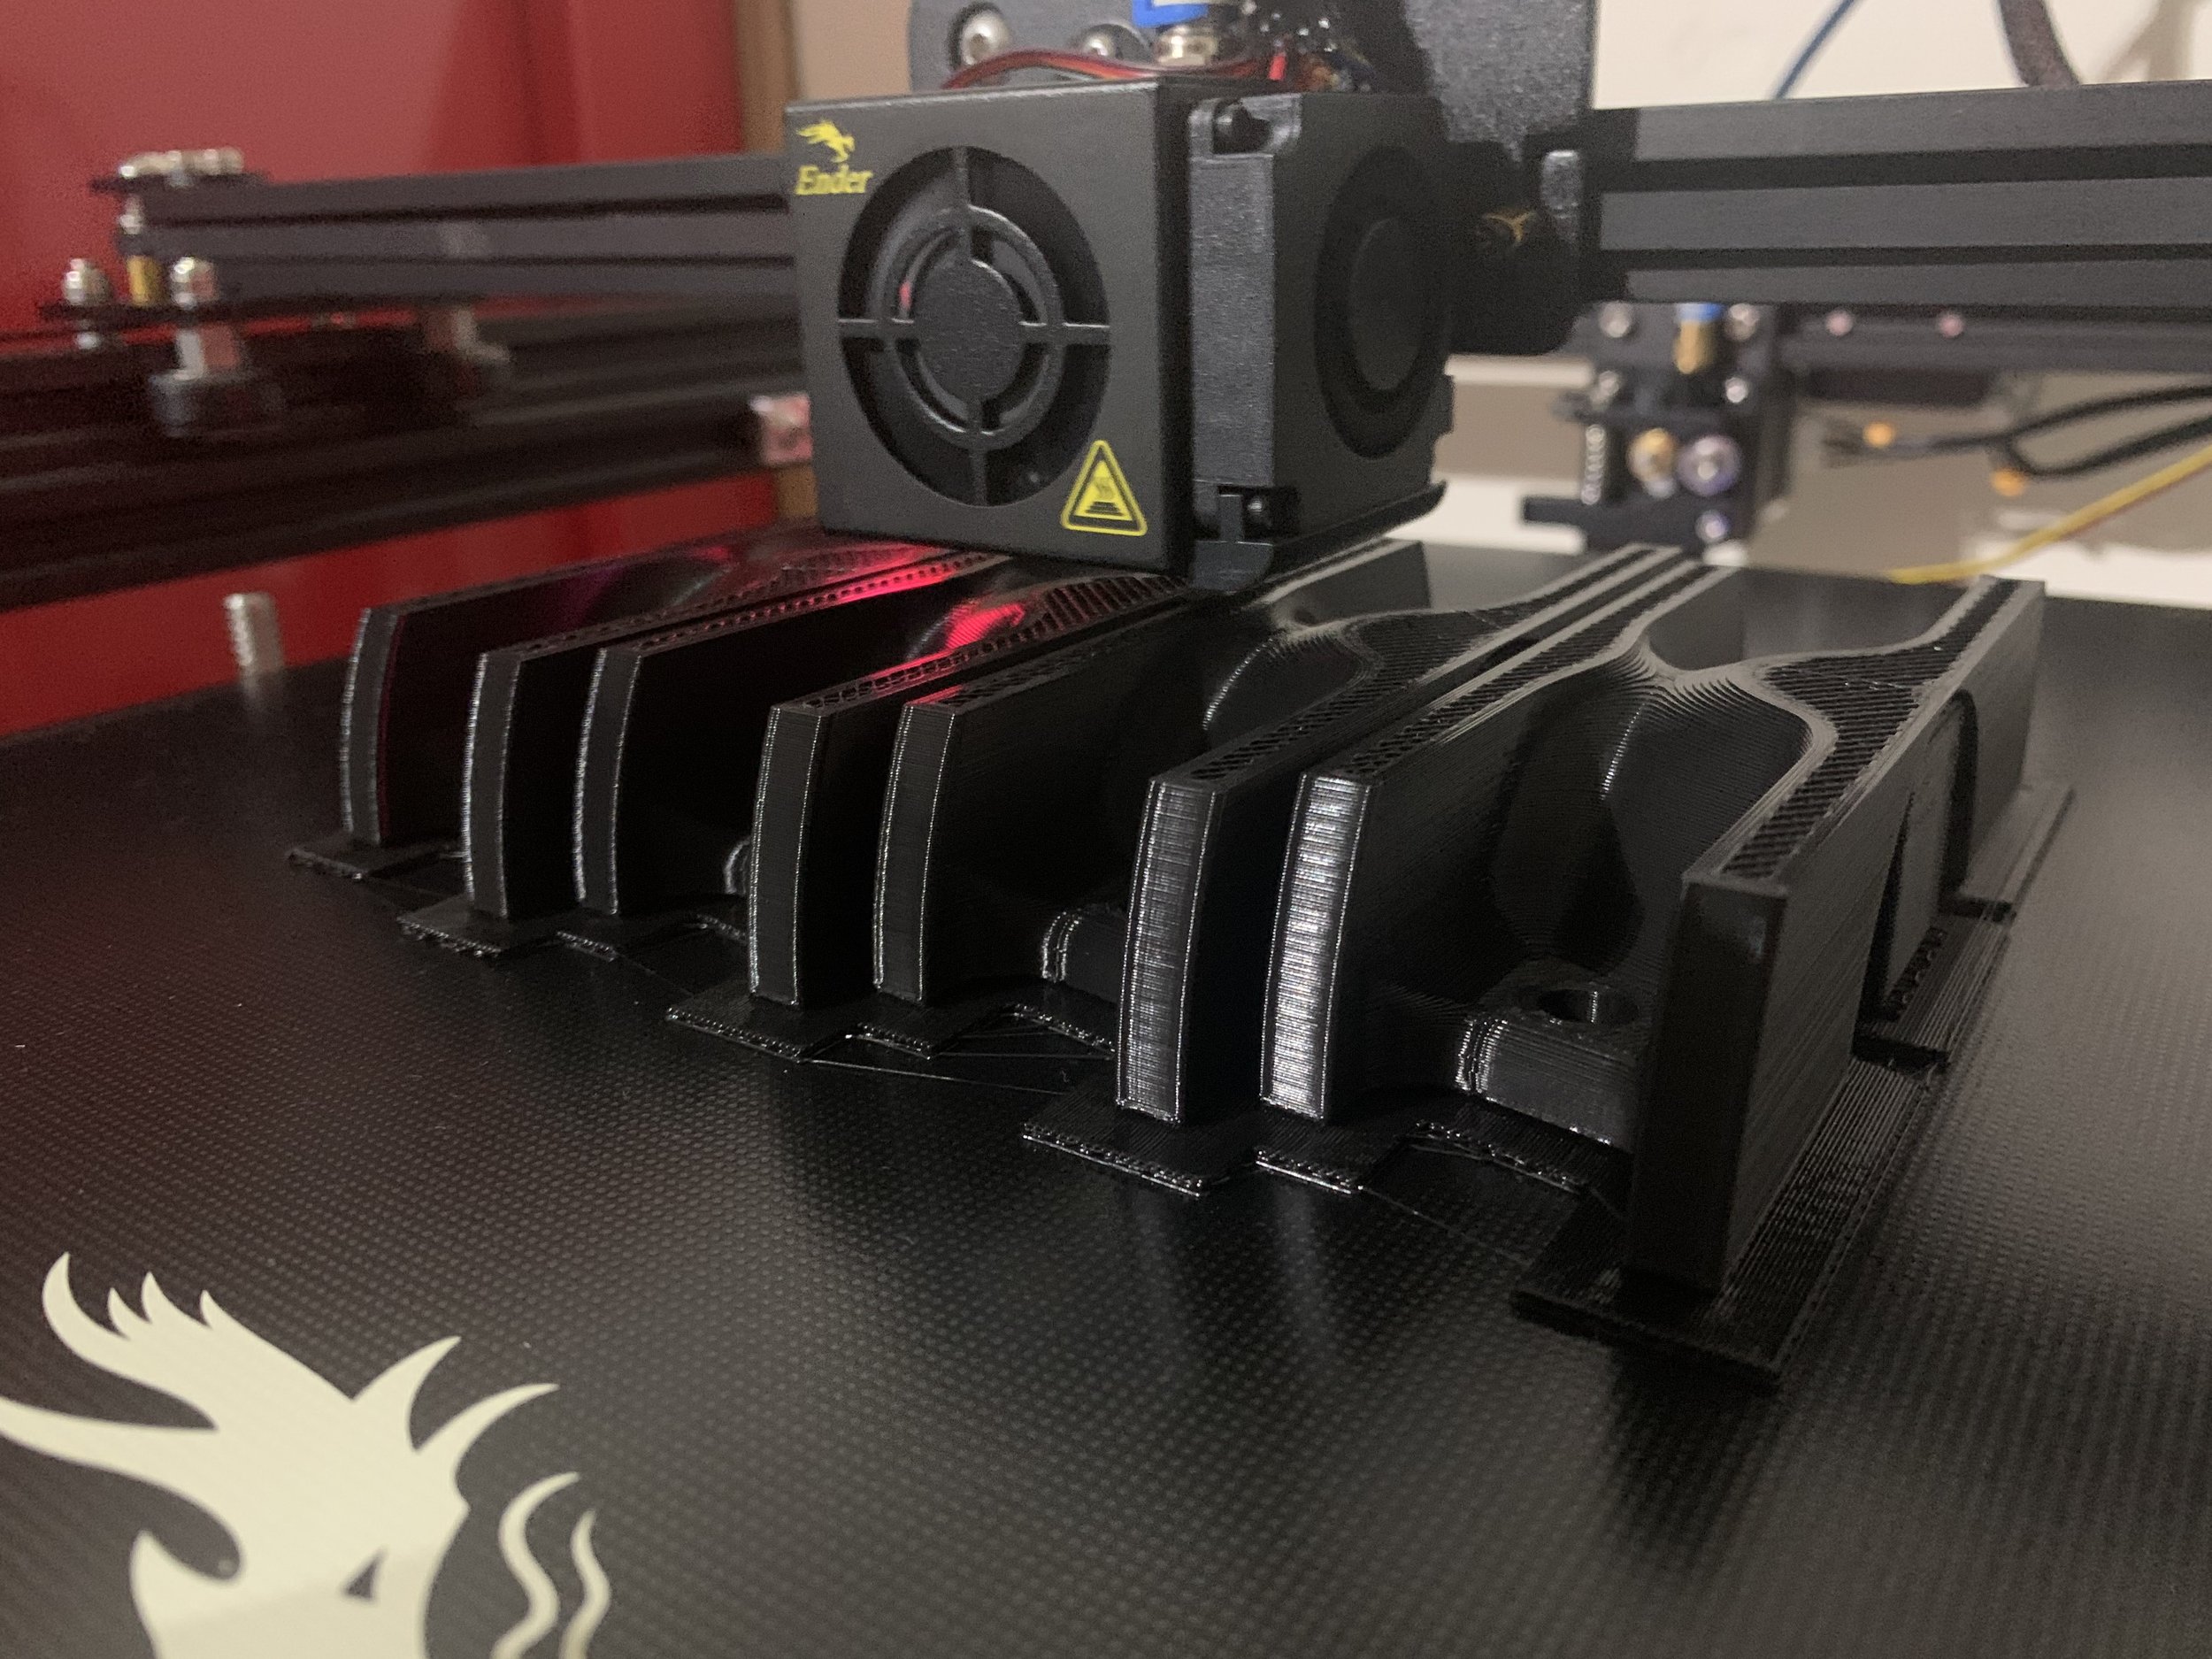
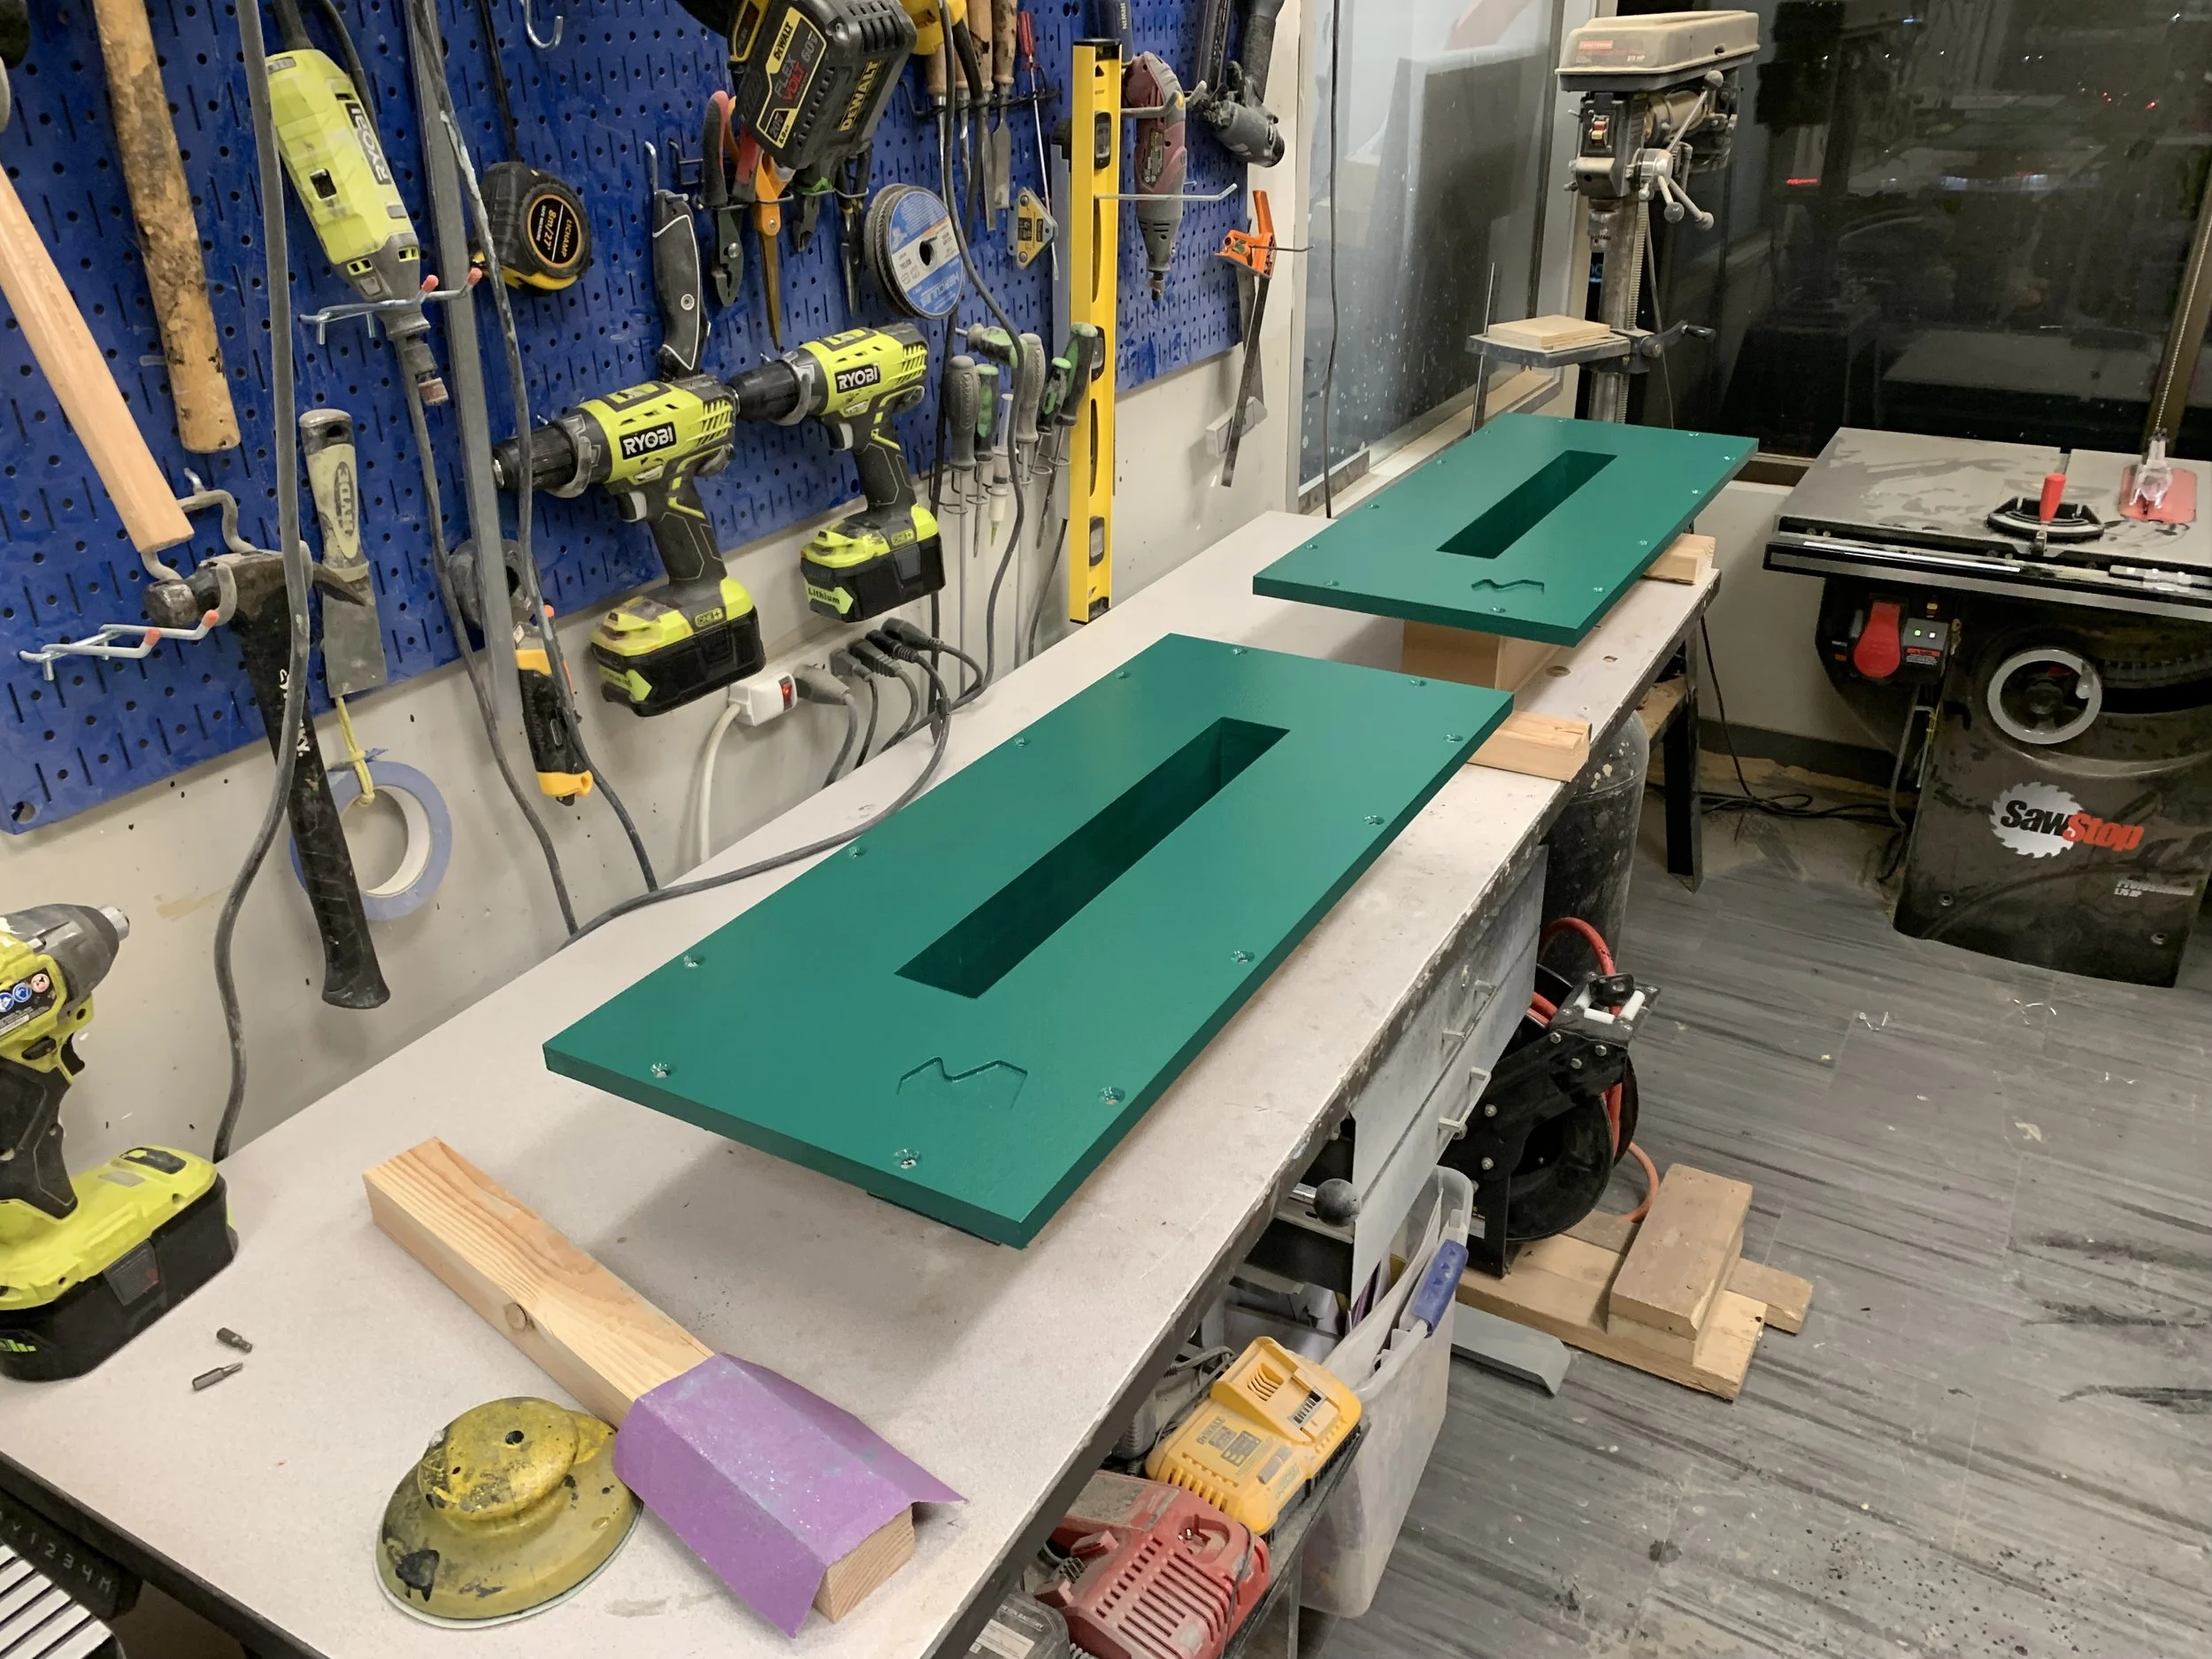
Coming from the CAD domain made the CNC router a natural next step. The baffle-brace and horn flare ribs were made on the CNC router and the rest was glued and screwed to perfection. All joints in the design were made with cleats to fasten the edges of the cabinet since it was made entirely of MDF.


Woodwork


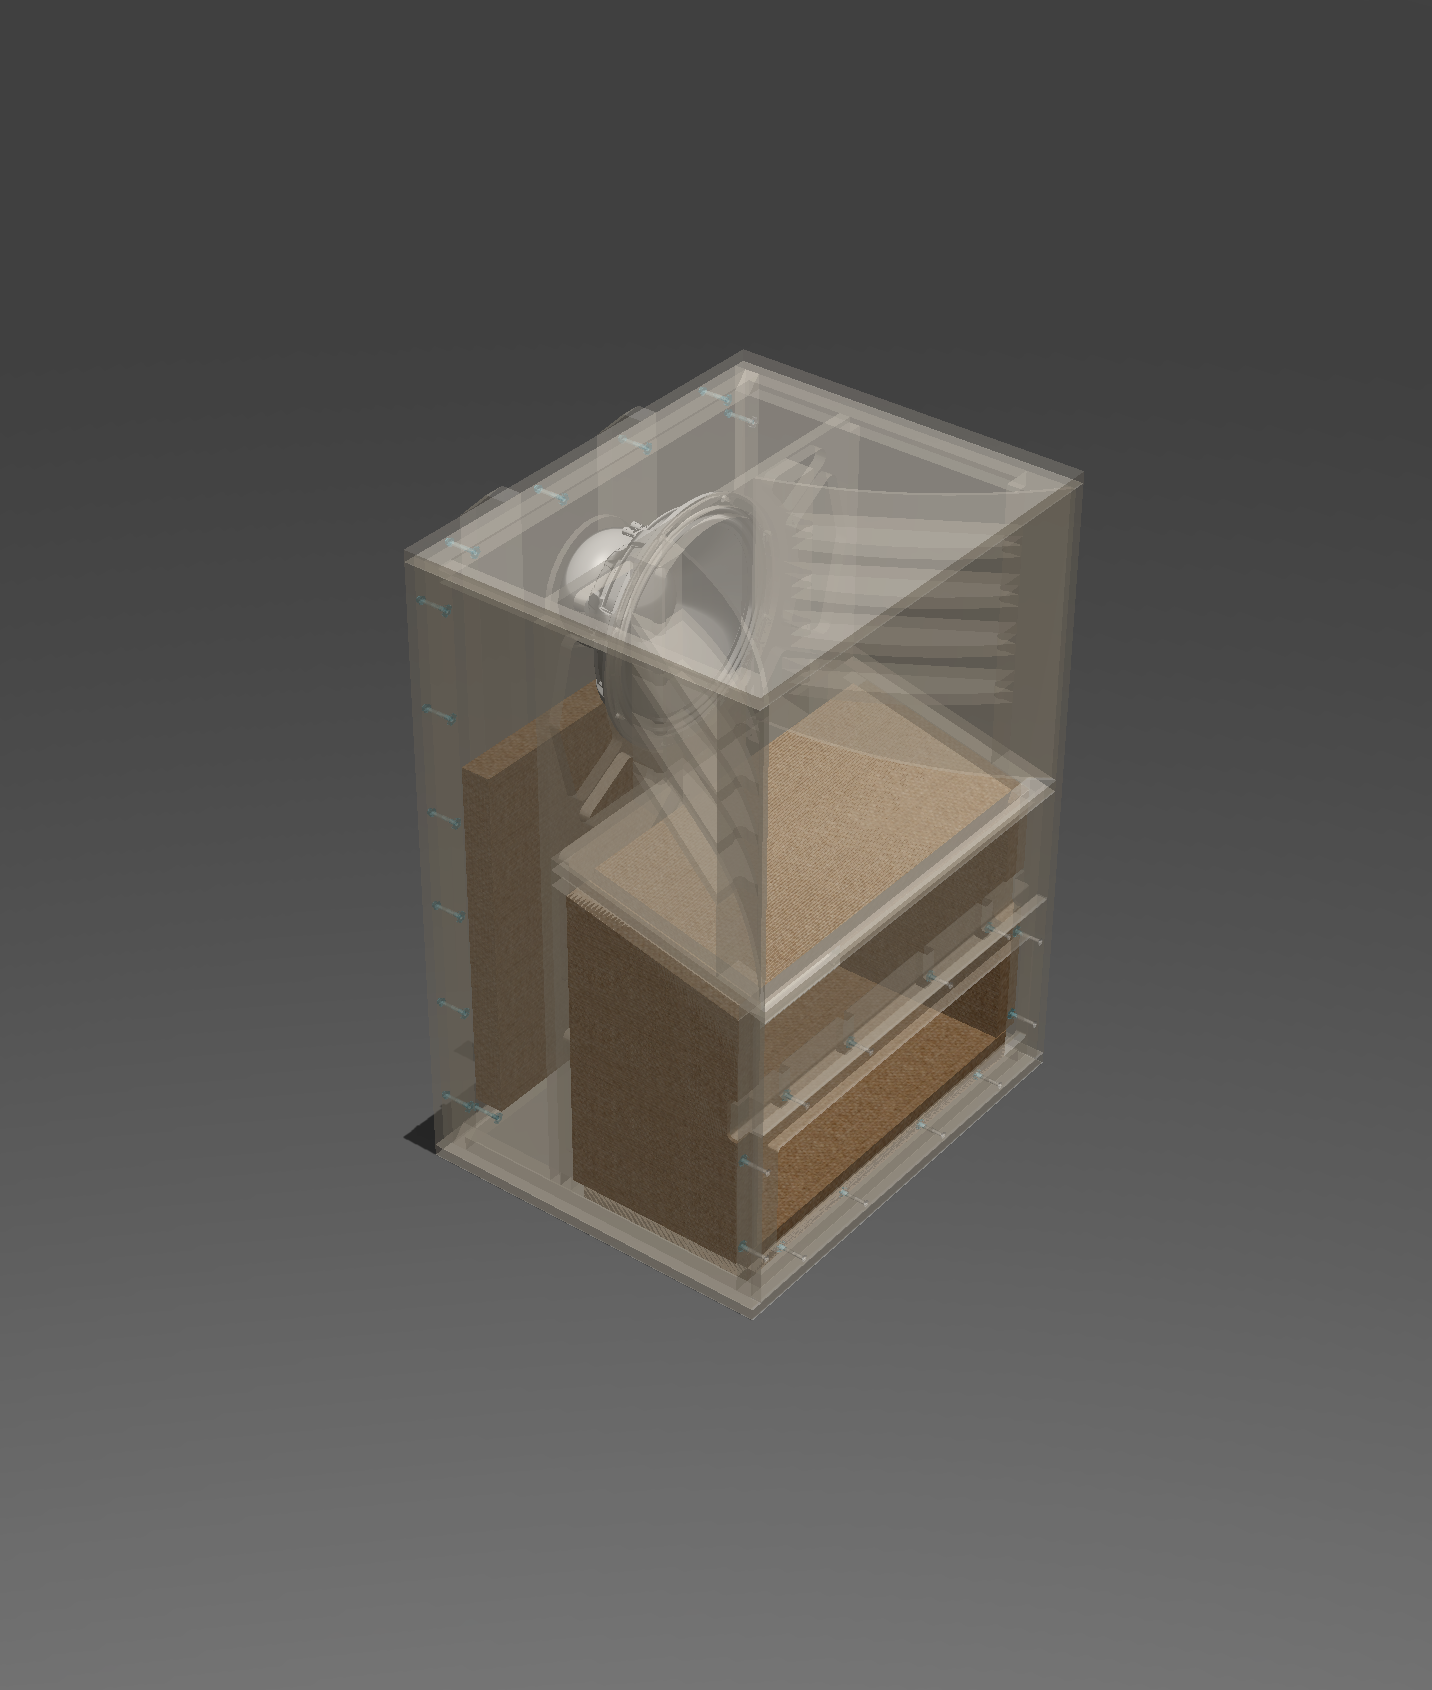
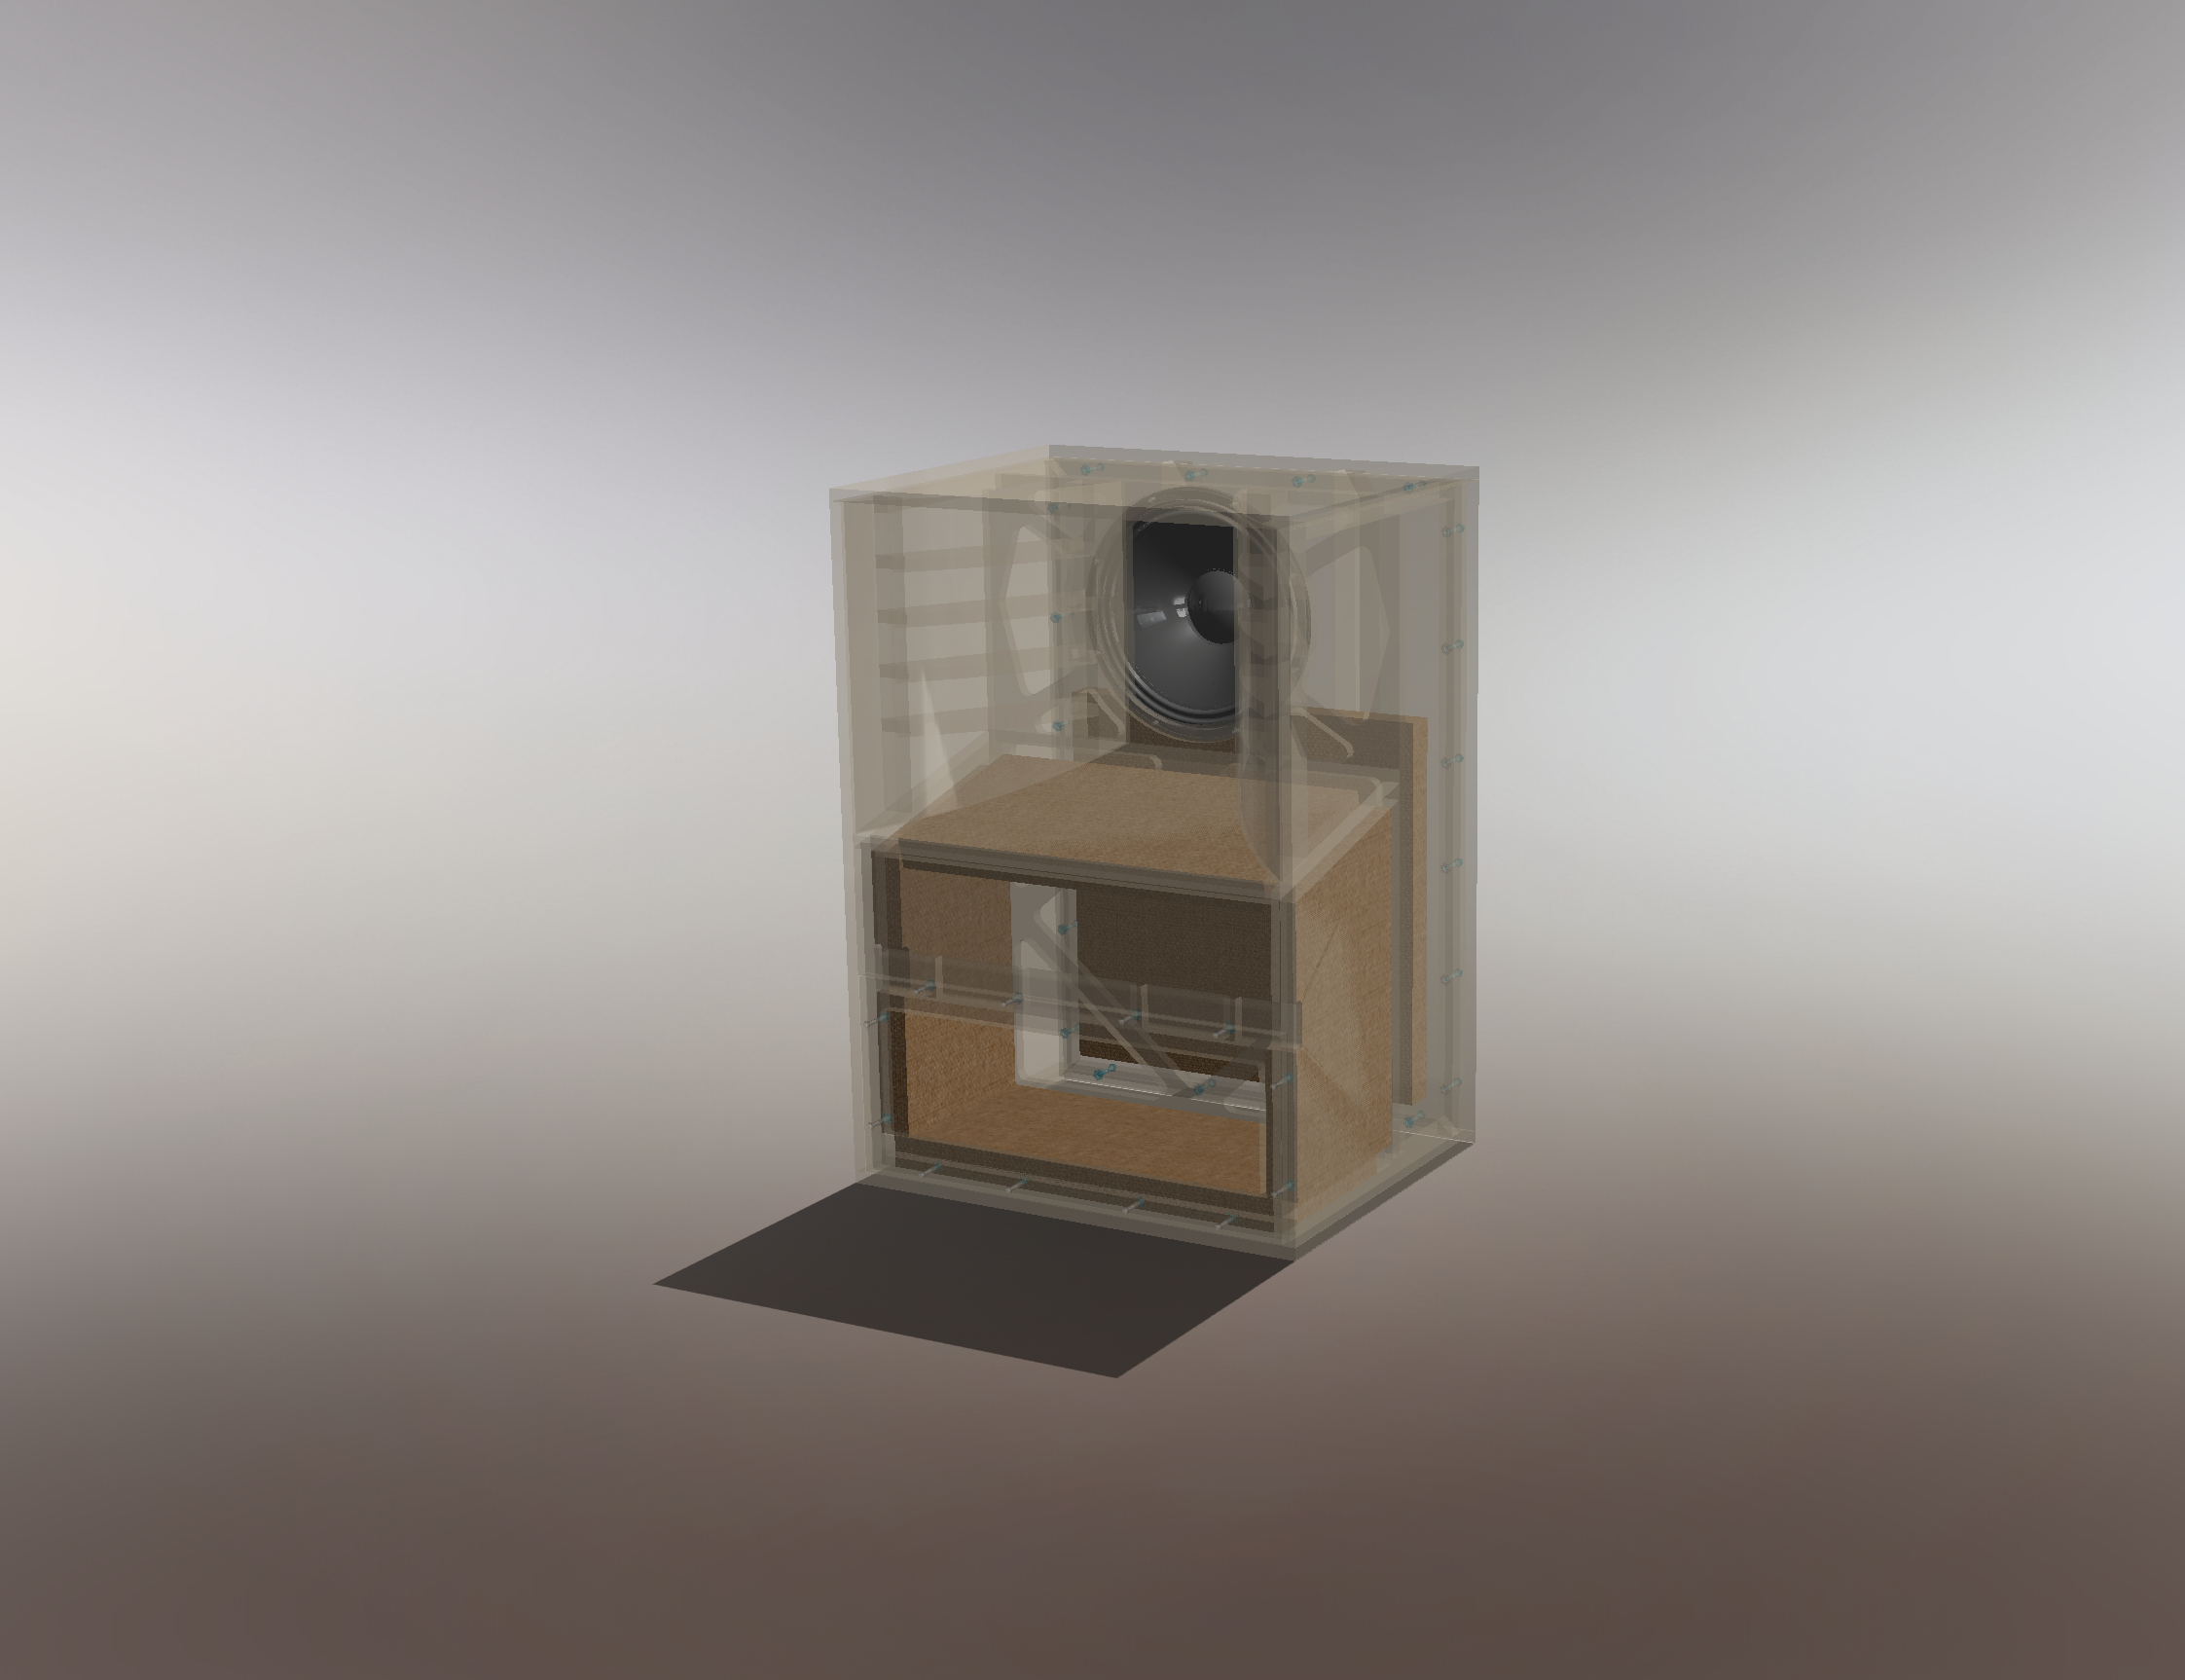
Compression Driver and Misc Assembly